
Nissan Armada 2025-2026 Service and Repair Manual: Work Procedure
If the front grille upper is removed or replaced, perform the simplified confirmation by birds-eye view screen.
CAUTION:
This procedure should only be performed if the front grille upper has been removed or replaced.
Perform camera calibration when removing or replacing each camera, removing the camera mounting parts (front bumper mall center, door mirror, etc.), or replacing the around view monitor control unit. Refer to Work Procedure.
TAKE A SCREENSHOT OF THE BIRDS-EYE VIEW SCREEN 1
Draw white lines with a width of 10 cm (3.9 in) or more as shown in the figure and place the vehicle.
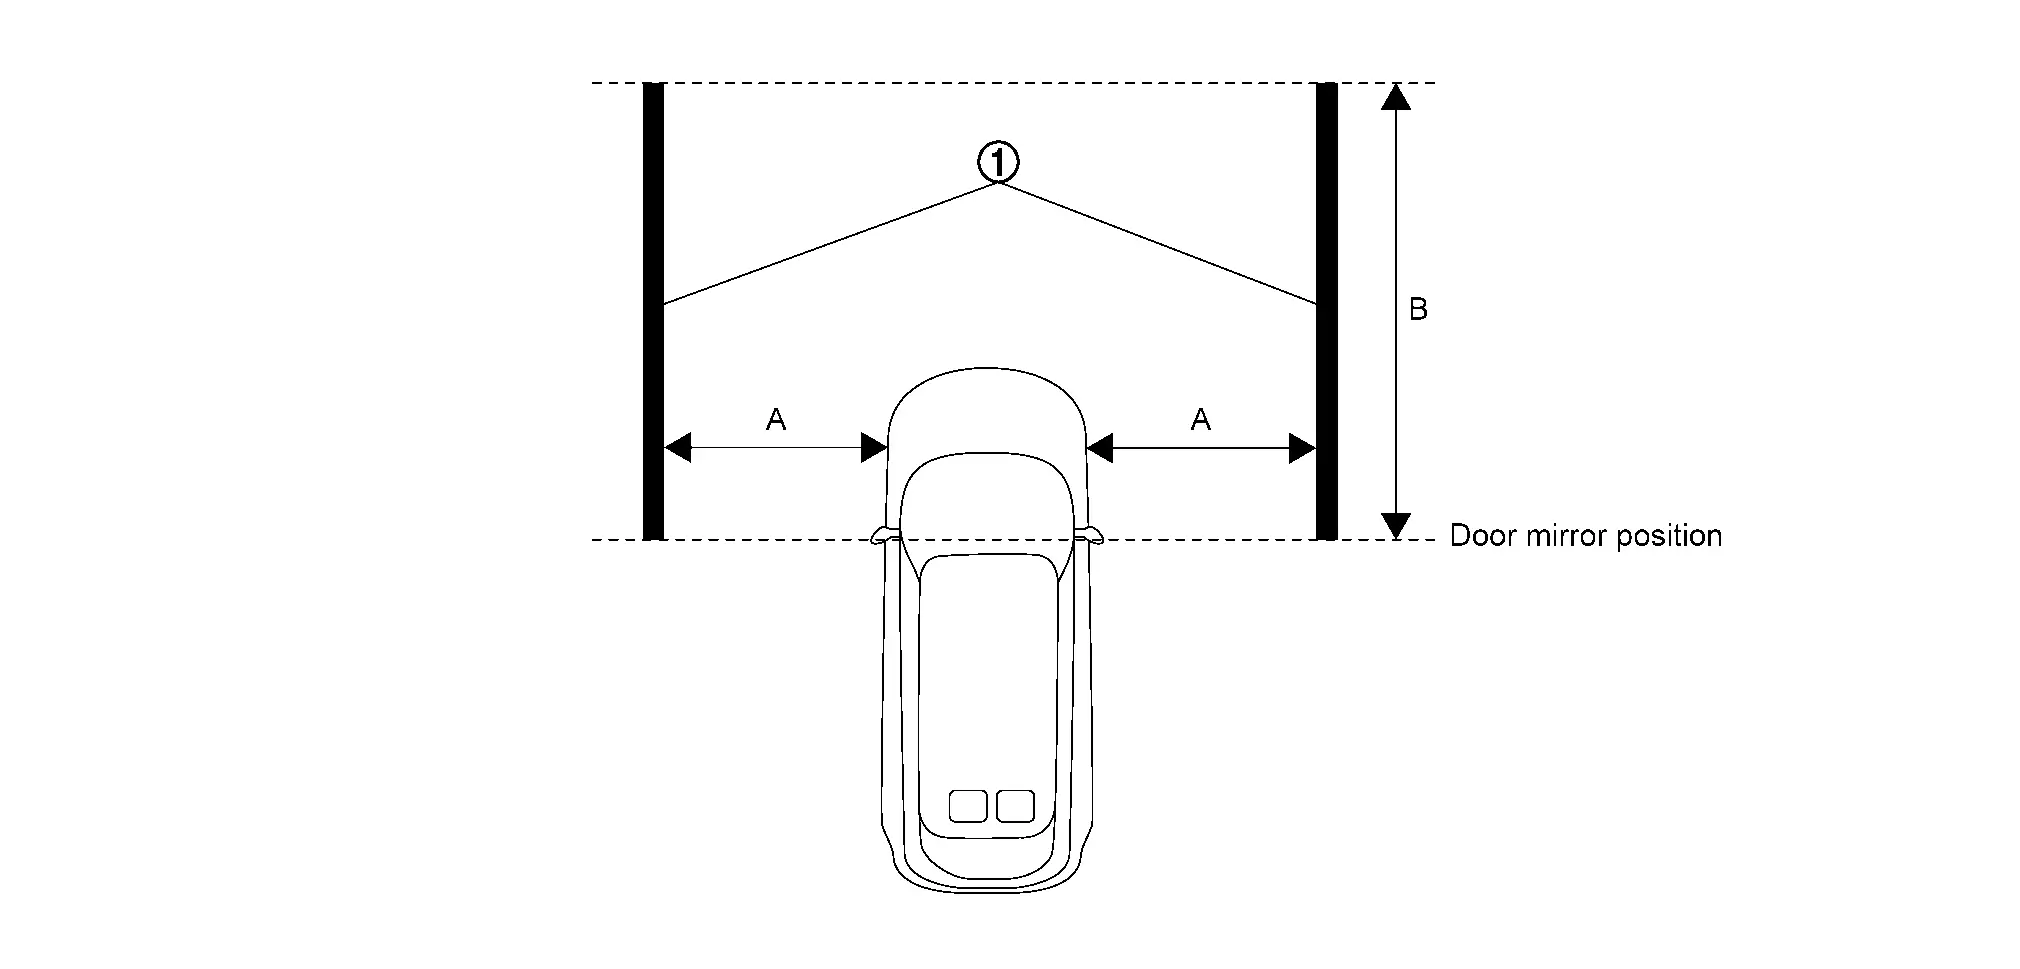

White lines
[10 cm (3.9 in) or more in width]A : 2 m (78.7 in) B : 3 m (118.1 in) Activate the around view monitor and display the birds-eye view screen.
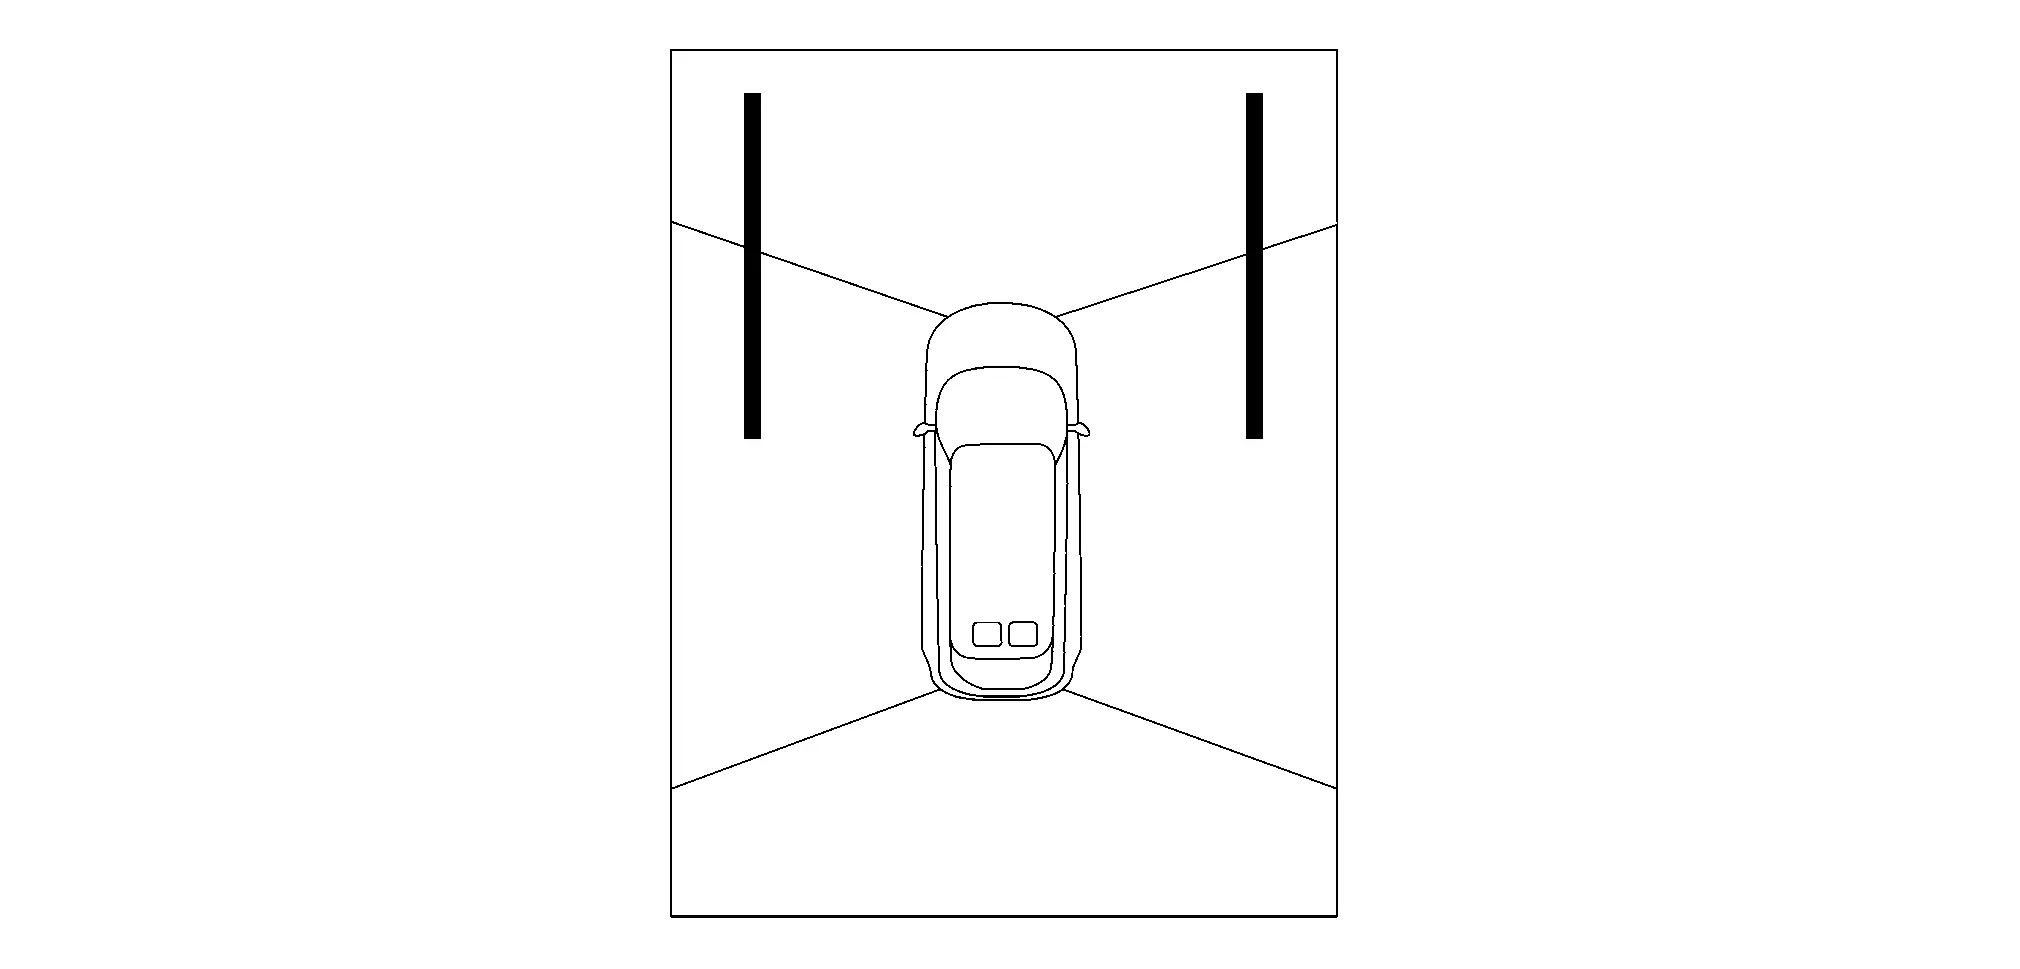
Take a screenshot of the birds-eye view screen in the state shown in the figure.
 NOTE:
NOTE:A screenshot of the birds-eye view screen can be taken by following the steps below.
Insert the USB memory into the USB port.
NOTE:Using a USB memory with an access lamp makes it easier to determine the communication status of the USB memory.
While pressing the camera switch, quickly turn the volume dial 3 clicks in the order of right→left→right (switches to system diagnostic mode).
Select “Display Diagnosis�.
Select “Screenshot to USB� and turn ON the screenshot.
Display the birds-eye view screen.
Press the camera switch.
Wait at least 10 seconds until the data is written to the USB memory.
GO TO 2.
REMOVAL OR REPLACEMENT OF FRONT GRILL UPPER
Remove or replace the front grill upper. Refer to Removal and Installation.
>>GO TO 3.
TAKE A SCREENSHOT OF THE BIRDS-EYE VIEW SCREEN 2
Take a screenshot of the birds-eye view screen again in the state of the figure.
GO TO 4.
SCREENSHOT COMPARISON OF BIRDS-EYE VIEW SCREEN
Compare the screenshots of the birds-eye view screen before and after removing or replacing the front grill upper, and check if the white lines in the figure is misaligned.
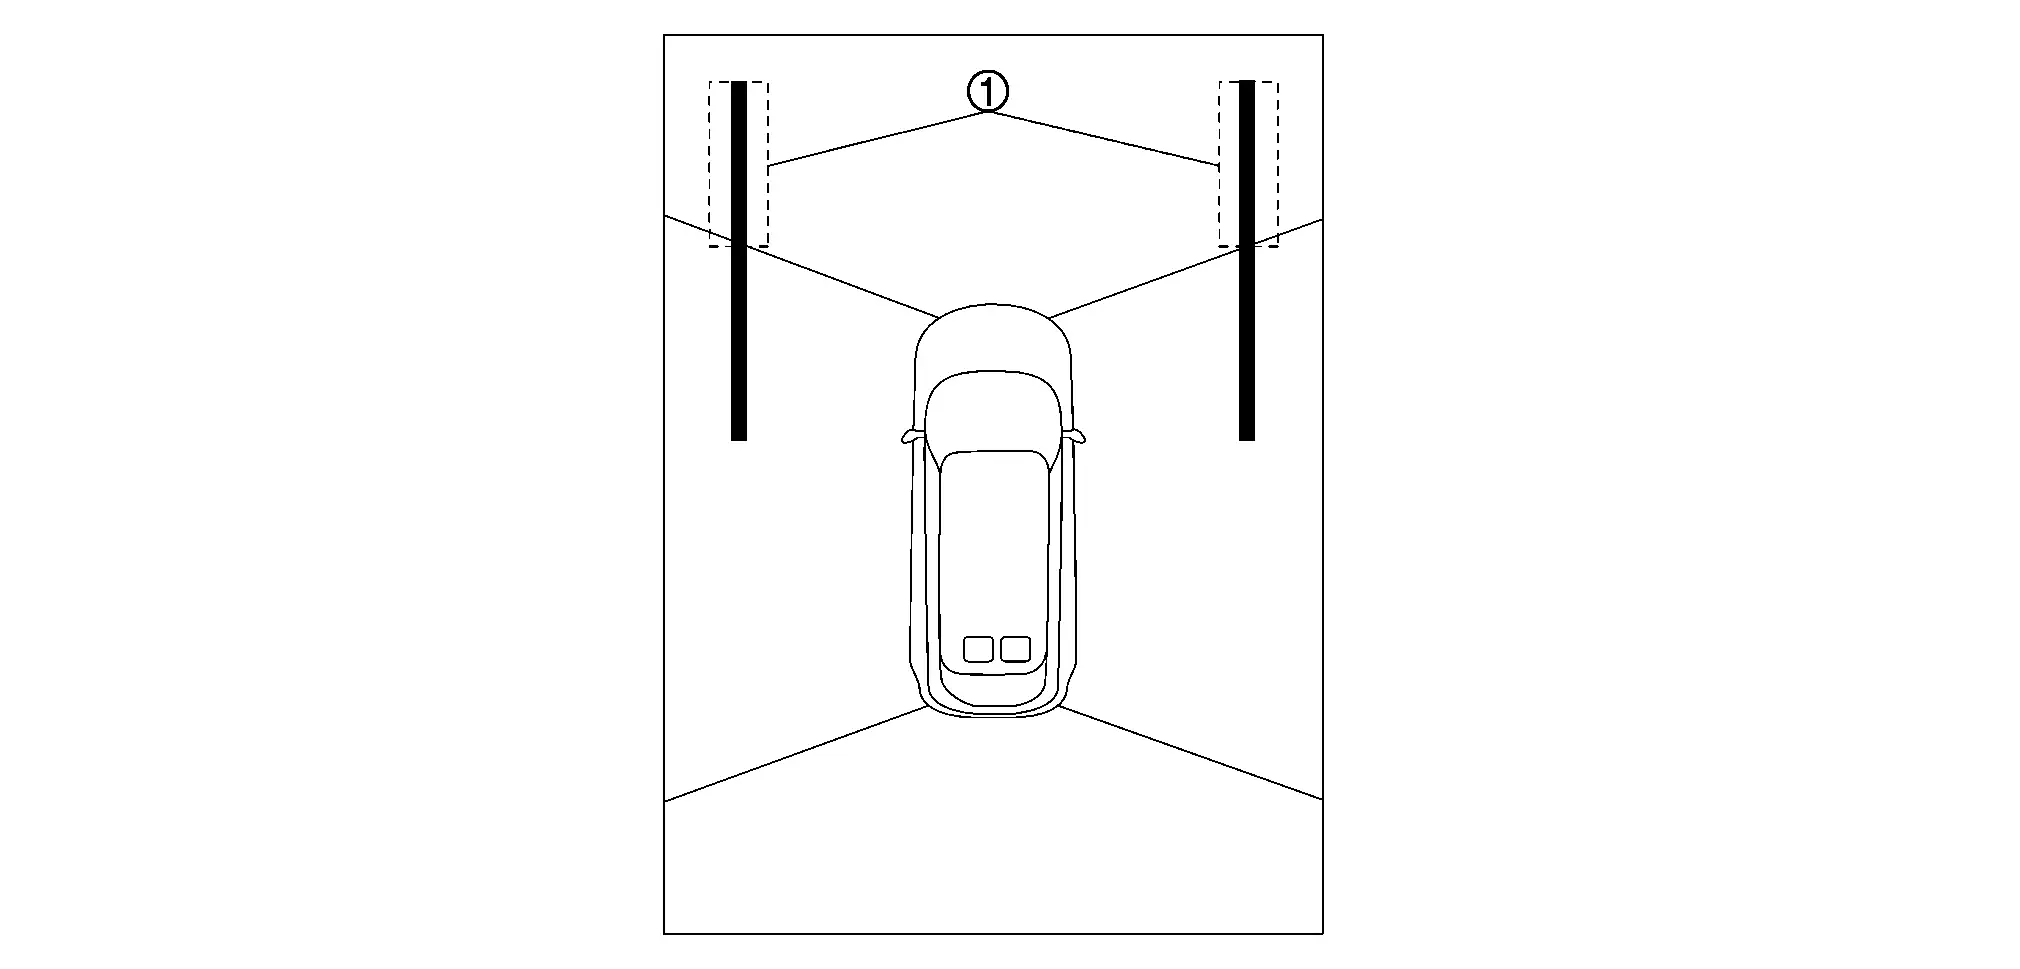
Is there a gap in the white lines?
YES>>Perform camera calibration. Refer to Work Procedure.
NO>>WORK END


Other materials:
Removal & Installation
REMOVAL
Horn High
Remove front bumper fascia assembly. Refer to Removal and Installation.
Disconnect harness connector .
Remove mounting bolt , and then remove horn high.
CAUTION:
Never disassemble horn bracket from horn.
Horn Low
Remove front grille upper. Refer to Removal and Installation.
Di ...
Exploded View
REMOVAL
Rear A/C unit assembly : Vehicle front : N·m (kg-m, in-lb)
DISASSEMBLY
Shield plate bracket Shield plate Sub harness Rear A/C unit case LH Cooler packing Drain hose Heater pipe support Rear blower motor Rear A/C unit case upper assembly Rear expansion valve Rear evaporator ...
SERVICE NOTICE AND PRECAUTIONS FOR TPMS : Precautions
Low tire pressure warning lamp turns ON when tire pressure is less than warning tire pressure value. Adjust tire pressure for all wheels to the specified value. Refer to TIRE AIR PRESSURE : Service Data.
Low tire pressure warning lamp blinks for 1 minute, then turns ON when occurring any malfunctio ...

0.0074