Exploded View
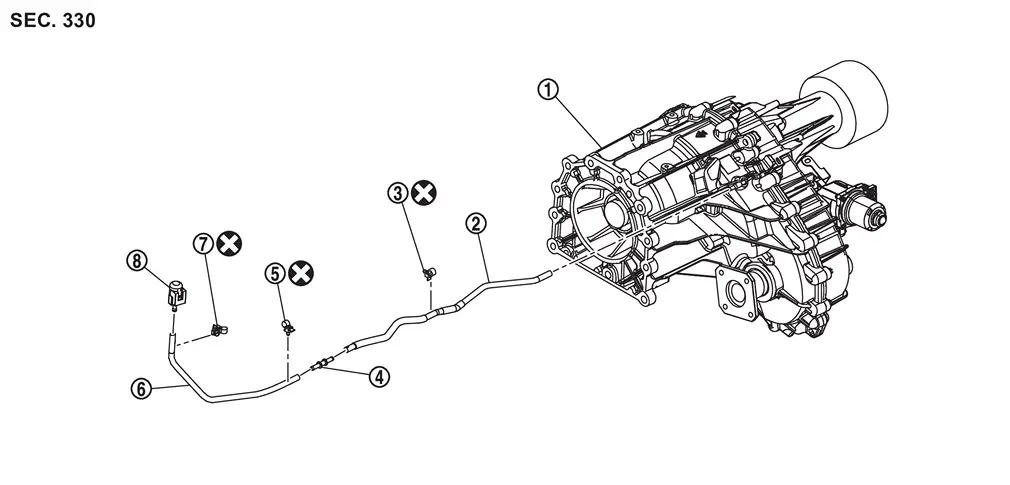
 |
Transfer assembly |  |
Air breather hose A |  |
Clip A |
 |
Hose connector |  |
Clip B |  |
Air breather hose B |
 |
Clip C |  |
Air breather | ||
 |
: Always replace after every disassembly. | ||||
Removal and Installation
WARNING:
-
Jacking up or lift up the vehicle may the vehicle height to go down which cause a personal injury and/or damage to the air suspension component parts. Refer to Precaution for when Jacking and Lifting Up the vehicle with Electronic Air Suspension System.
REMOVAL
Remove air breather hose A from transfer assembly.
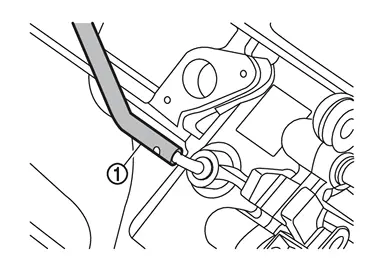
Remove clip A .
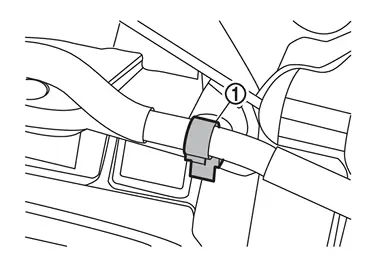
Remove clip B .
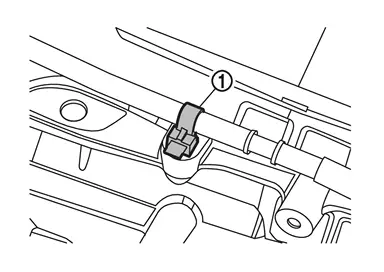
Remove A/T air breather hose. Refer to Removal and Installation.
Release clip C and remove air breather hose assembly  from bracket.
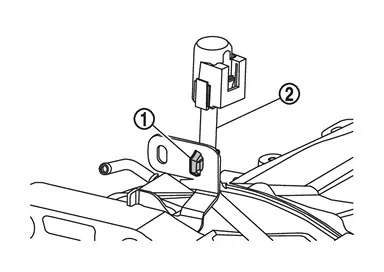
Separate each component part.
INSTALLATION
Note the following, and install in the reverse order of removal.
-
For non-reusable parts, refer to Exploded View.
-
Align rib
 of the air breather with the paint mark
 on the air breather hose, and install air breather hose so that the paint mark faced backward of the vehicle.
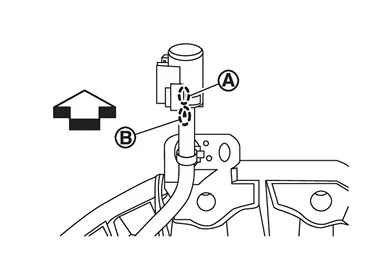
: vehicle front -
Install air breather hose A with the paint mark
facing leftward.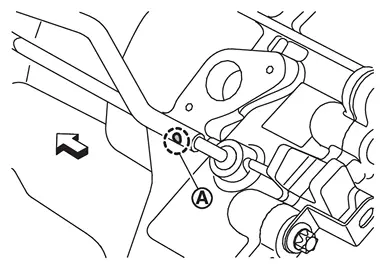
: vehicle front -
Be sure to insert air breather hose to air breather tube until hose end reaches the end of tube.
-
When inserting air breather hose A and air breather hose B to hose connector
, be sure to insert it fully until its reaches the stop.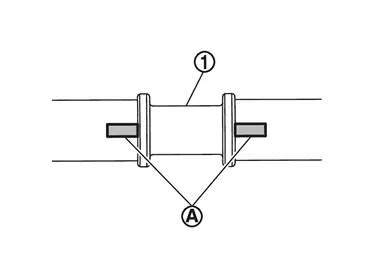
CAUTION:
Install each air breather hose with the painted mark
facing towards the top of the vehicle.
Other materials
Front Final Drive Assembly
Exploded View
Flame assembly
Front final drive assembly
Front cross member assembly
: vehicle front
: N·m (kg-m, ft-lb)
: Always replace after every disassembly.
Removal and Installation
WARNING:
Jacking up or lift up the vehicle may the vehicle height to go down which cause a pe ...
Steering Gear and Linkage
Exploded View
REMOVAL
Member
Cotter pin
Steering gear assembly
: vehicle front
: N·m (kg-m, ft-lb)
: Always replace after every disassembly.
DISASSEMBLY
Outer socket
Outer socket lock nut
Boot clamp (small diameter)
Boot
Boot clamp (large diameter)
Inner socke ...
Rear Side Spoiler
Exploded View
Rear side spoiler
Double-sided tape
[t: 2.5 mm (0.098 in)]
: Clip
: Always replace after every disassembly.
Removal and Installation
REMOVALFully open back door.
Remove rear combination lamp cover. Refer to Removal and Installation.
Remove rear side spoile ...