Exploded View
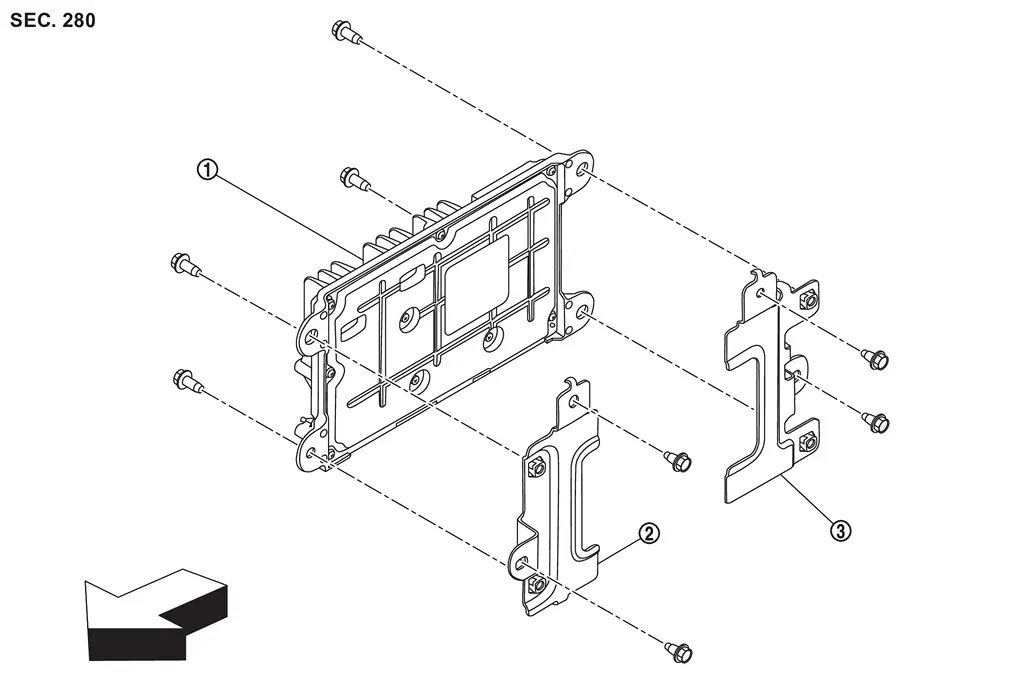
 |
Audio amp. |  |
Bracket RH |  |
Bracket LH |
| : vehicle front | |||||
Removal & Installation
CAUTION:
Before replacing audio amp, perform "ADDITIONAL SERVICE WHEN REPLACING audio AMP". Refer to Work Procedure.
REMOVAL
Remove luggage side lower finisher RH. Refer to Removal and Installation.
Remove the audio amp. mounting nut  , and then remove the audio amp. .
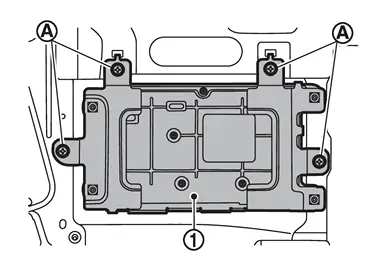
Disconnect the audio amp. harness connectors.
Remove bracket mounting bolts , and then remove brackets .
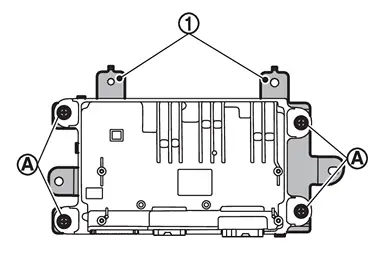
INSTALLATION
CAUTION:
Before replacing audio amp, perform "ADDITIONAL SERVICE WHEN REPLACING audio AMP". Refer to Work Procedure.
Install in the reverse order of removal.
Other materials
Sonar system limitations
WARNING
The following limitations apply to the Nissan Armada sonar system. Failure
to understand and follow these limitations may result in serious injury or even
fatal accidents.
Carefully review all limitations of the Nissan Armada sonar system. Environmental
conditions such as heavy r ...
Front Drive Shaft
Inspection
WARNING:
Jacking up or lift up the vehicle may the vehicle height to go down which cause a personal injury and/or damage to the air suspension component parts. Refer to Precaution for when Jacking and Lifting Up the vehicle with Electronic Air Suspension System.
FRONT DRIVE SHAFT IN ...
Brake Pedal
Inspection and Adjustment
INSPECTIONBrake Pedal HeightCheck the height (H1) between the floor panel and the brake pedal upper surface. H1
: Refer to Brake Pedal.
CAUTION:
Remove the front floor carpet.Stop Lamp SwitchCheck the clearance (A) among the brake pedal lever and the stop lamp switch ...