Exploded View
Without ProPILOT ASSIST 2.1
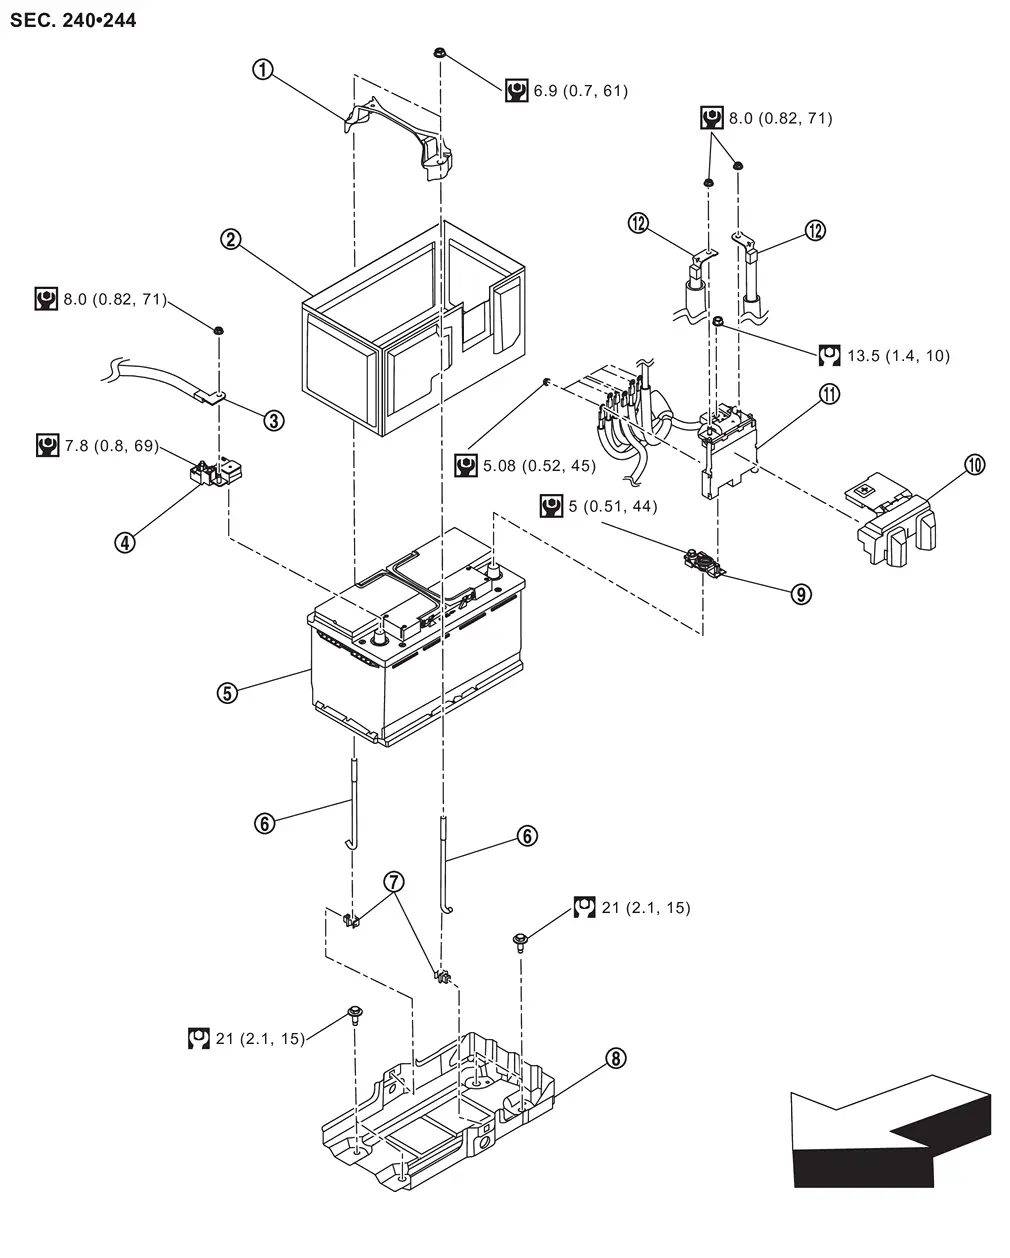
 |
Battery fix frame |  |
Battery cover |  |
Negative cable |
 |
Battery current sensor |  |
12V battery |  |
Battery fix rod |
 |
Battery fix rod clip |  |
Battery tray |  |
Battery positive terminal |
 |
Battery positive terminal cover |  |
Battery terminal with fusible link |  |
Positive cable |
 |
: N·m (kg-m, in-lb) | ||||
 |
: N·m (kg-m, ft-lb) | ||||
| : vehicle front |
With ProPILOT ASSIST 2.1
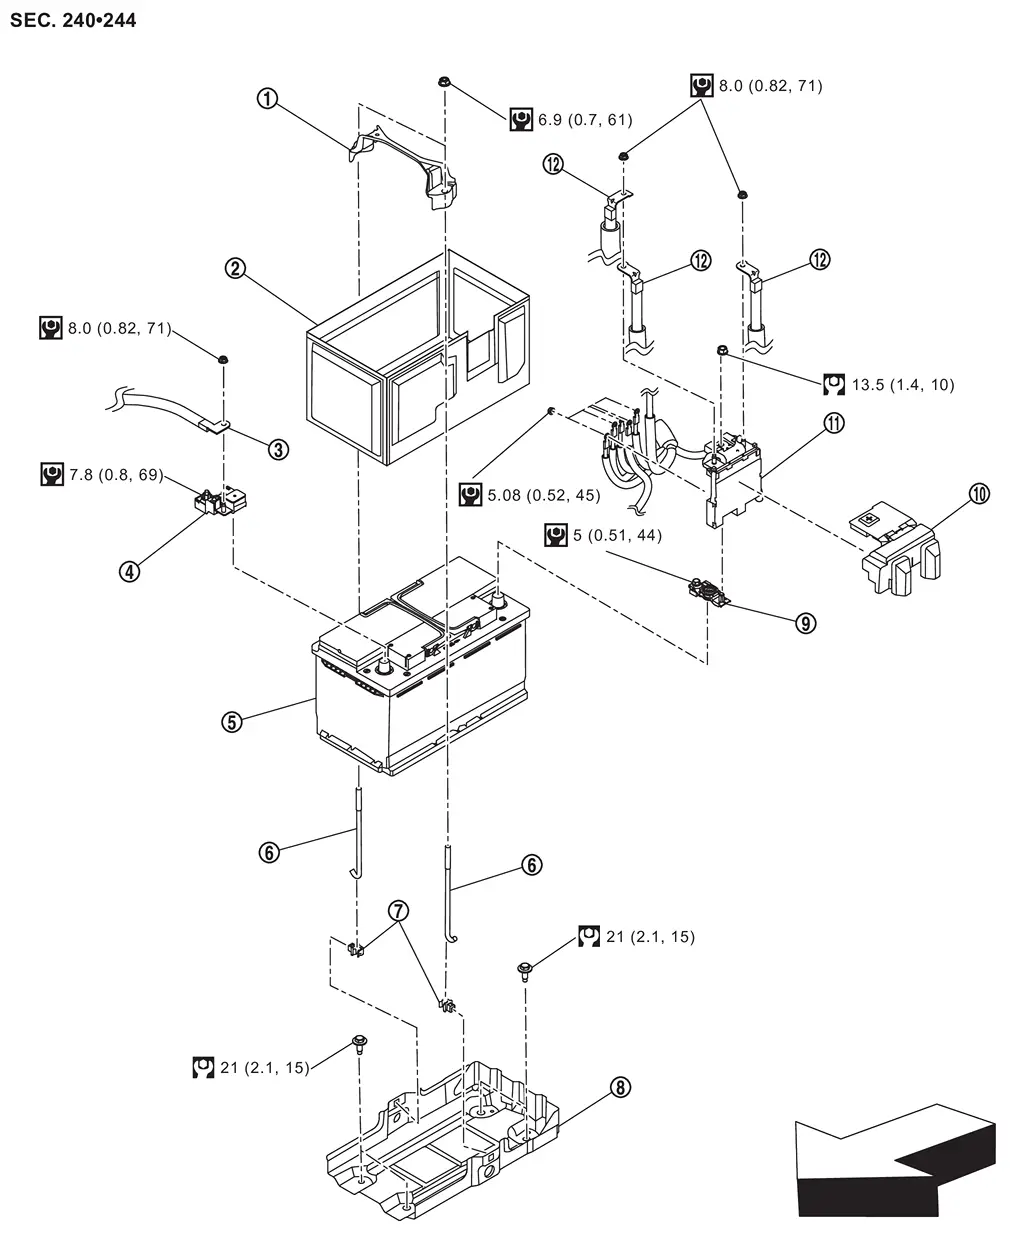
|
Battery fix frame | |
Battery cover | |
Negative cable |
|
Battery current sensor | |
12V battery | |
Battery fix rod |
|
Battery fix rod clip | |
Battery tray | |
Battery positive terminal |
|
Battery positive terminal cover | |
Battery terminal with fusible link | |
Positive cable |
|
: N·m (kg-m, in-lb) | ||||
|
: N·m (kg-m, ft-lb) | ||||
| : vehicle front |
Removal and Installation
REMOVAL
Disconnect the battery cable from the negative terminal. Refer to Exploded View.
CAUTION:
To prevent damage to the parts, disconnect the battery cable from the negative terminal first.
Remove the battery positive terminal cover.
Remove positive cable mounting nuts  , and then disconnect the positive cables
  from the battery terminal with fusible link .
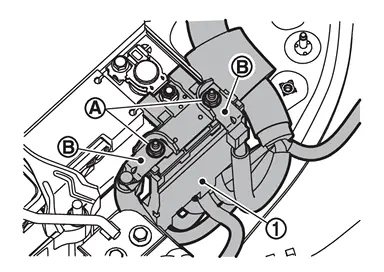
Remove battery terminal with fusible link mounting nut , and then remove the battery terminal with fusible link .
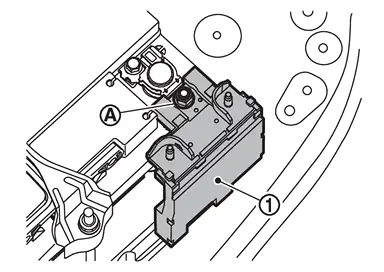
Remove cable mounting nuts , and then disconnect the cable ,  ,
,  ,
,  ,
,  and
and  from the battery terminal with fusible link .
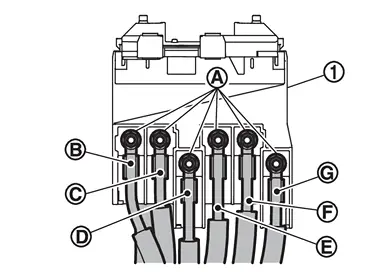
|
Red | |
Blue | |
Brown |
|
Green | |
White | |
Gray* |
| *: Without ProPILOT ASSIST 2.1 | |||||
INSTALLATION
Install in the reverse order of removal.
CAUTION:
-
To prevent damage to the parts, connect the battery cable to the positive terminal first.
-
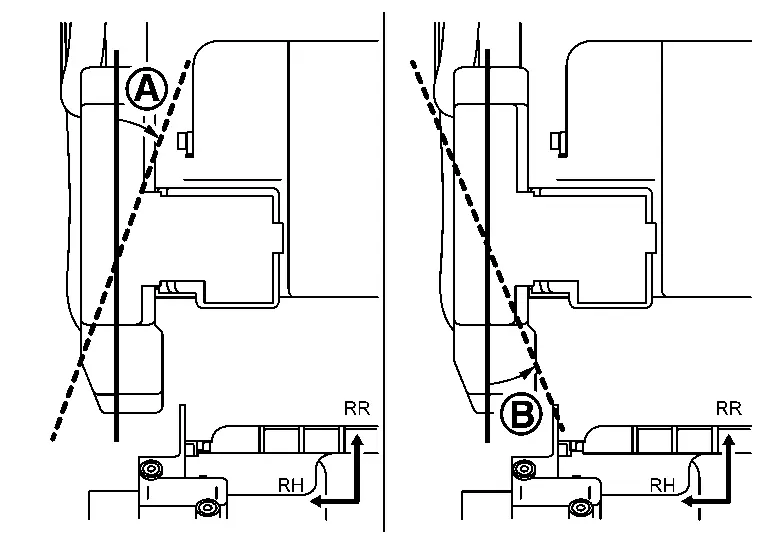
When installing battery terminal with fusible link cover, do not install it in the direction of
. Installing it in the direction of is acceptable.
Other materials
Spark plugs
Basic information
WARNING
Ensure the engine is off, the ignition is switched off, and the parking brake
is securely engaged before servicing spark plugs in your Nissan Armada.
CAUTION
Always use the correct socket when removing spark plugs from your Nissan Armada
to avoid damaging the compon ...
Lumbar Support Unit
Removal and Installation
REMOVALRemove front seatback blower motor. Refer to Removal and Installation.
Disengage fixing portions and then remove front seat lumbar support unit.
Disconnect front seat pneumatic control unit connector (4 way lumbar support) or front seat lumbar support air pump conn ...
Engine Does Not Start When Intelligent Key Is Inside of Vehicle (one Key)
Description
Engine does not start when push-button ignition switch is pressed. (One Intelligent Key has the symptom, other keys operate normally.)SYMPTOM TABLE (ONE INTELLIGENT KEY HAS THE SYMPTOM, OTHER KEYS OPERATE NORMALLY) Door lock operation (remote keyless entry) Door lock operation (request ...