Removal and Installation
CAUTION:
-
Never excessively pull body side welt.
-
Never damage the body panel.
REMOVAL
Front Body Side Welt
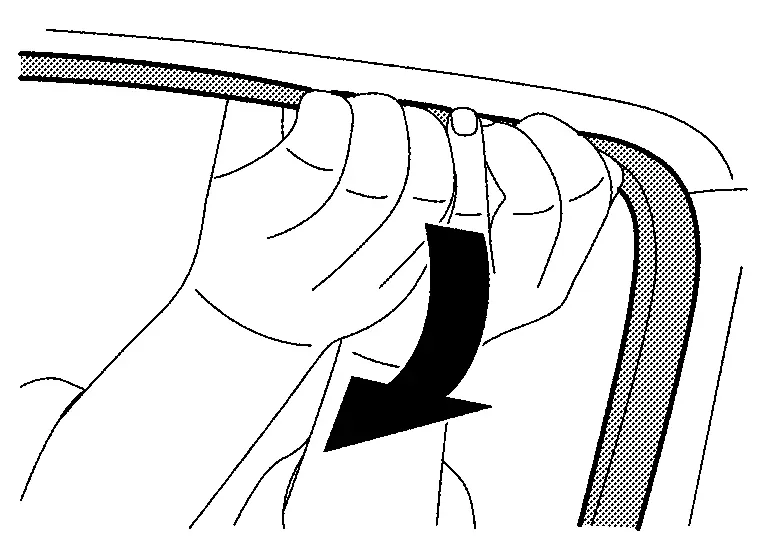
Pull the mounting part inside the vehicle to the outside of the vehicle, and then remove front body side welt.
CAUTION:
-
Remove the headlining portion of front body side welt slowly and carefully.
-
Be careful to bend or damage any part of the headlining while taking out the front body side welt.
Rear Body Side Welt
Pull the mounting part inside the vehicle to the outside of the vehicle, and then remove rear body side welt.
CAUTION:
-
Remove the headlining portion of rear body side welt slowly and carefully.
-
Be careful to bend or damage any part of the headlining while taking out the rear body side welt.
INSTALLATION
 NOTE:
NOTE:
The parts (finisher, garnish, headlining, etc.) that into contact with the body side welt is describing as trim.
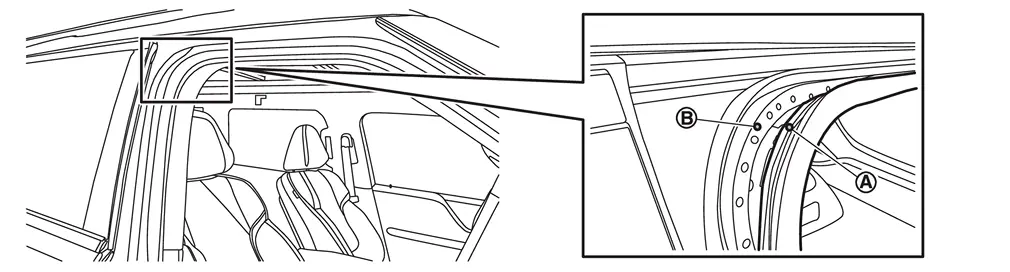
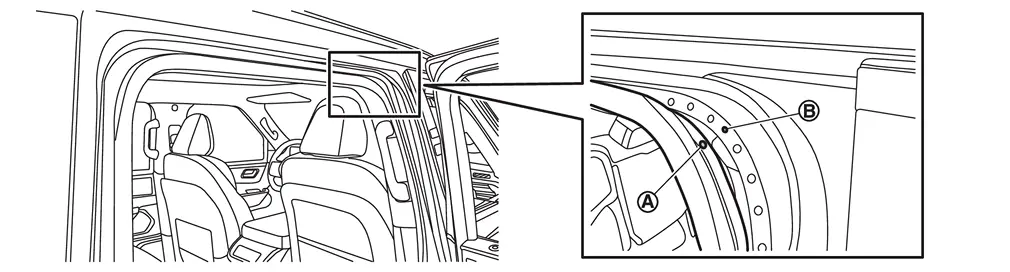
Align body side welt identification color  and vehicle position mark
  , and then install body side welt to the vehicle.
- Front body side welt
- Rear body side welt
Install body side welt.
CAUTION:
Check that body side welt fits tightly in each corner.
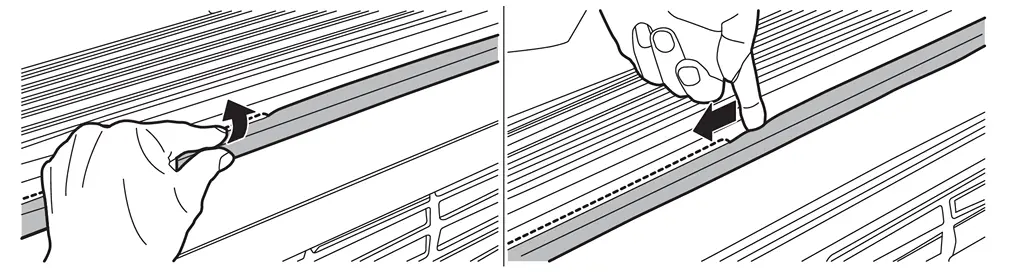
Pull out the lip of body side welt from each trim and cover it.
- When reusing the body side welt.
Use fingers to flip the lip of body side welt caught in the trim as shown in the figure, and then install it with body side welt to cover the trims.
- When the body side welt is new.
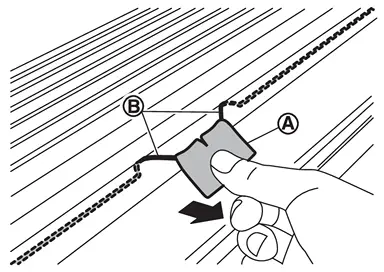
- Pull the tab sheet of body side welt toward to vehicle outside as shown in the figure, and then pull the string from lip of body side welt.
 NOTE:
NOTE:
By pulling the string, easily flip the lip of body side welt and cover the lip of body side welt onto the trims.
- Pull out the string from all around the body side welt.
NOTE:
The string separate from body side welt, but it is normal.
- Pull the tab sheet
After installation, check the condition of body side welt lip. Refer to Inspection.
Inspection
NOTE:
The parts (finisher, garnish, headlining, etc.) that into contact with the body side welt is describing as trim.
- Check that the lip of body side welt
 covers onto each trim
  .
.
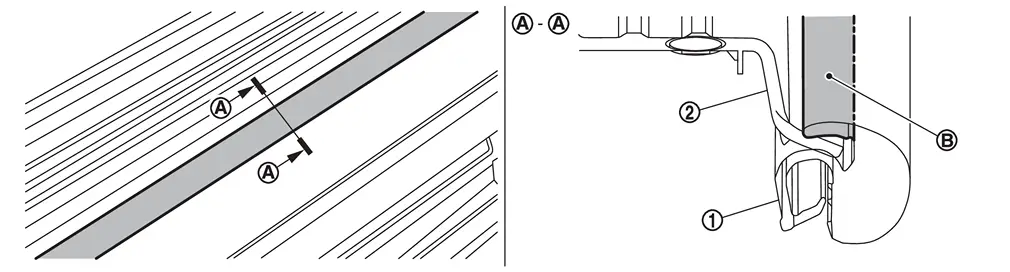
- If the lip of body side welt does not cover onto each trim, operate installation step 3. Refer to Removal and Installation.
Other materials
Calibration of G Sensor
Description
CAUTION:
Always perform the decel G sensor calibration and side G sensor calibration before driving when the following operation is performed. Refer to Work Procedure.×: Required —: Not required Procedure
Decel G sensor calibration
Side G sensor calibration
Removing/ installi ...
Center Console Tray Lamp
Exploded View
Center console tray lamp is integrated structure with front center console body assembly. For exploded view of front center console assembly, refer to Exploded View.
Replacement
CAUTION:
Disconnect the battery negative terminal or remove power circuit fuse when performing the operati ...
Telematics
Diagnosis and Repair Work Flow
Work Flow
OVERALL SEQUENCE
Reference 1··· Refer to Consult Function.
Reference 2··· Refer to DTC Index.
Reference 3··· Refer to Symptom Table.
DETAILED FLOWINTERVIEW AND SYMPTOM CONFIRMATION
Check the malfunction symptoms by performing the following ite ...