Exploded View
FRONT
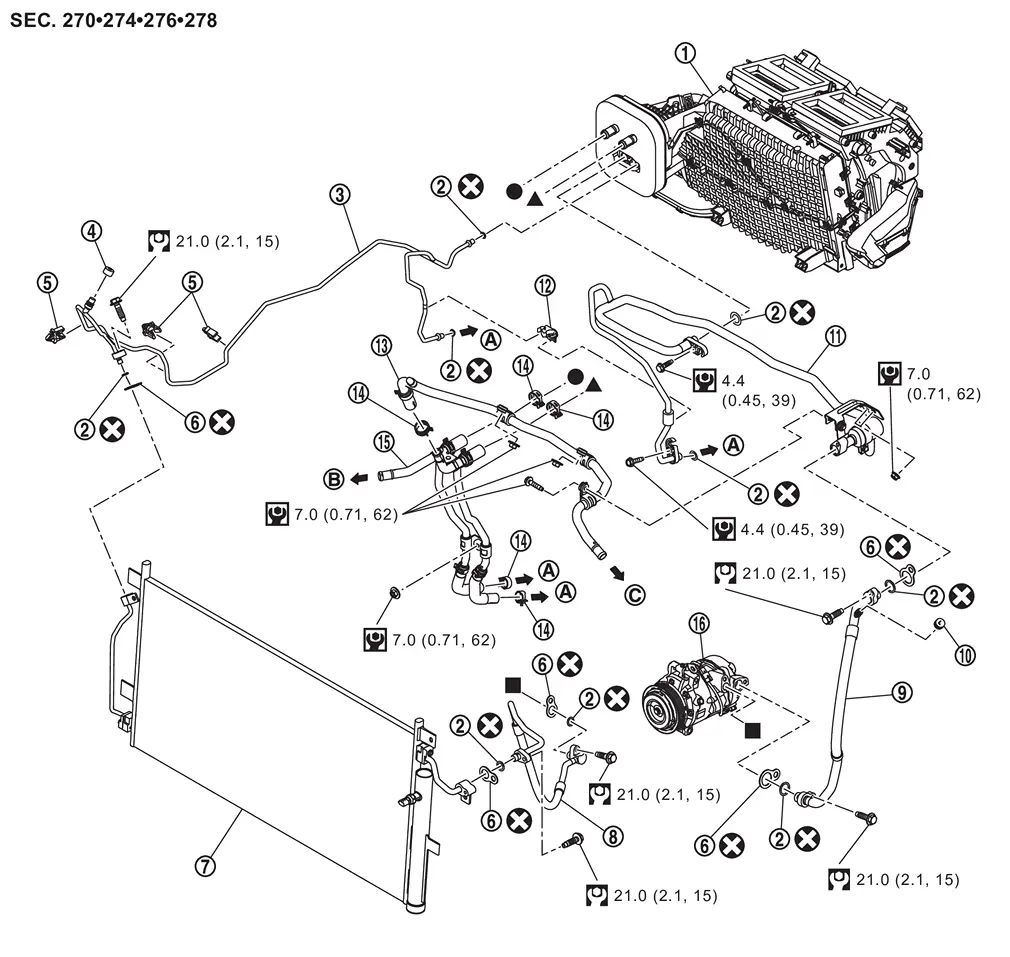
 |
Front heater & cooling unit assembly |  |
O-ring |  |
High-pressure pipe |
 |
Valve cap (high-pressure side) |  |
Tube clip 1 |  |
Washer seal |
 |
Condenser & liquid tank assembly |  |
High-pressure flexible hose |  |
Low-pressure flexible hose |
 |
Valve cap (low-pressure side) |  |
Low-pressure pipe |  |
Tube clip 2 |
 |
Front heater outlet pipe assembly |  |
Clamp |  |
Front heater pipe assembly |
 |
A/C compressor | ||||
 |
To rear cooler pipe assembly |  |
To water hose 2 Refer to Exploded View. |
 |
To water hose 6 Refer to Exploded View. |
 |
: Always replace after every disassembly. | ||||
 |
: N·m (kg-m, in-lb) | ||||
 |
: N·m (kg-m, ft-lb) | ||||
 , , , ,  : Indicates that the part is connected at points with same symbol in actual vehicle. : Indicates that the part is connected at points with same symbol in actual vehicle. |
|||||
REAR
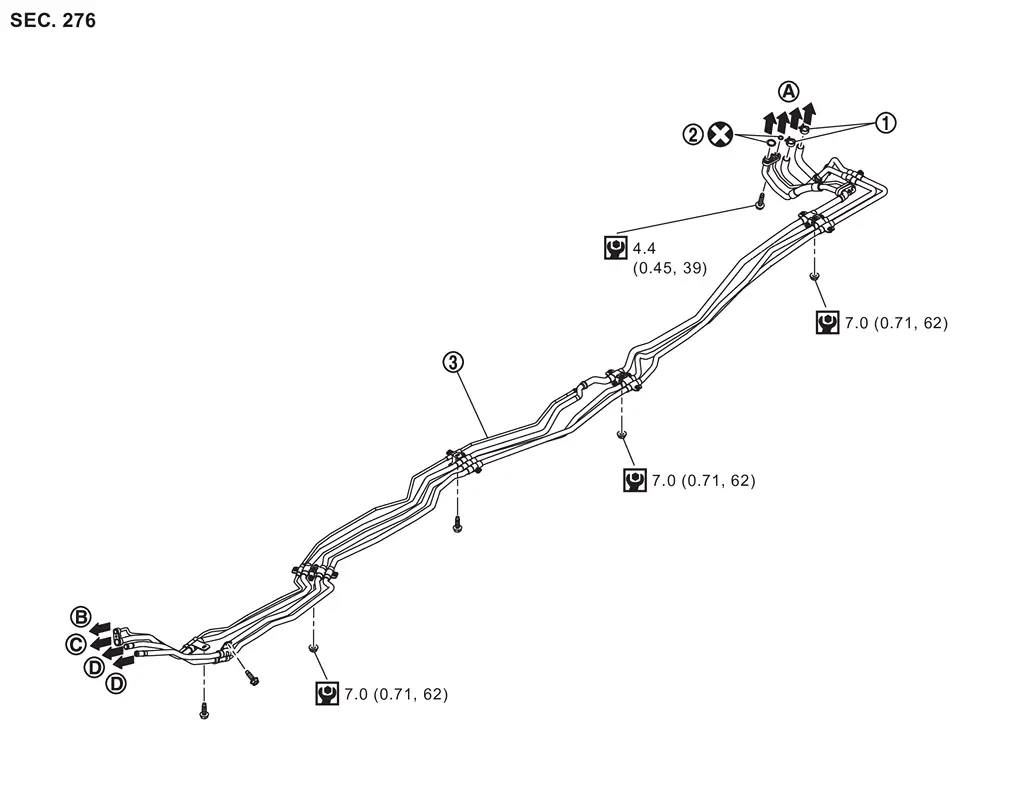
|
Clamp | |
O-ring | |
Rear cooler pipe assembly |
|
To rear A/C unit assembly Refer to Exploded View. |
|
To high-pressure pipe | |
To low-pressure pipe |
 |
To front heater pipe assembly | ||||
|
: Always replace after every disassembly. | ||||
|
: N·m (kg-m, in-lb) | ||||
- High-Pressure Flexible Hose
- High-Pressure Pipe
- Low-Pressure Flexible Hose
- Low-Pressure Pipe
- Rear Cooler Pipe Assembly
- Front Heater Pipe Assembly
- Front Heater Outlet Pipe Assembly
Other materials
Cup holders
Basic information
CAUTION
In the Nissan Armada, avoid sudden acceleration or braking when using
the cup holders to prevent spills. Hot liquids may cause burns to you or your
passengers.
Use only soft or flexible containers in the Nissan Armada cup holders.
Hard objects may become haz ...
Front Oil Seal
Exploded View
Front output shaft
Front oil seal
Front case
Snap ring
Sprockets with chain
Snap ring
Rear case
Rear companion flange
O-ring
: Always replace after every disassembly.
: N·m (kg-m, ft-lb)
: Apply transfer fluid.
: Apply Genuine Liquid Gas ...
Radiator Core Seal
Removal and Installation
REMOVALApply protective tape (A) on the part to protect it from damage.
Disengage radiator core seal fixing clips using a remover tool (A), and then remove radiator core seal .
: Clip
INSTALLATIONInstall in the reverse order of removal. ...