Removal and Installation
WARNING:
- Jacking up or lifting up the vehicle may the vehicle height to go down which cause a personal injury and/or damage to the air suspension component parts. Refer to Precaution for when Jacking and Lifting Up the vehicle with Electronic Air Suspension System (With electronic air suspension).
- When checking under the vehicle or inside wheel house, always turn OFF the electronic air suspension function with the vehicle unladen and normal height, since the suspension may accidentally move and it can lead to personal injury. Refer to Precaution for Electronic Air Suspension System (With electronic air suspension).
REMOVAL
Without 12V Sub Battery
Drain engine coolant from cooling system. Refer to ENGINE COOLANT : Draining.
Remove front heater outlet pipe assembly. Refer to Removal and Installation.
Remove front road wheel tire RH. Refer to ROAD WHEEL TIRE : Removal & Installation.
Remove fender protector RH. Refer to Removal and Installation.
Remove front heater pipe assembly mounting nut  .
.
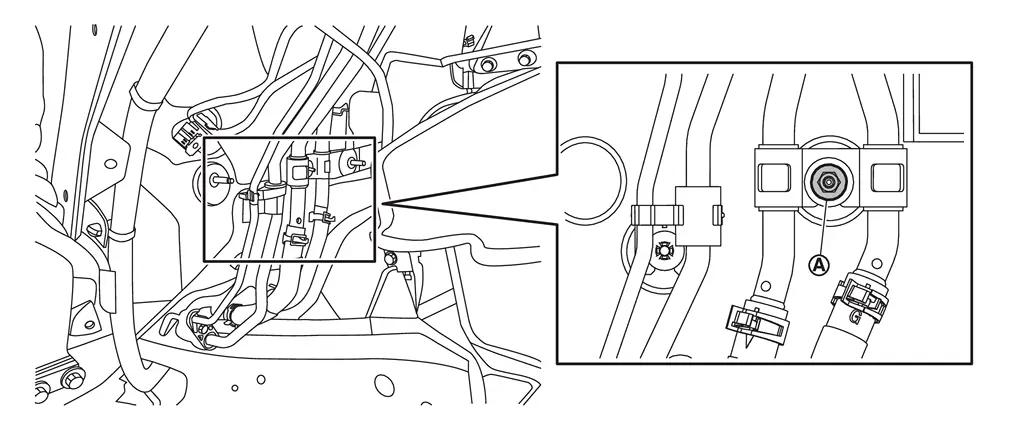
Loosen clamps  , and then disconnect front heater pipe assembly from rear cooler pipe assembly.
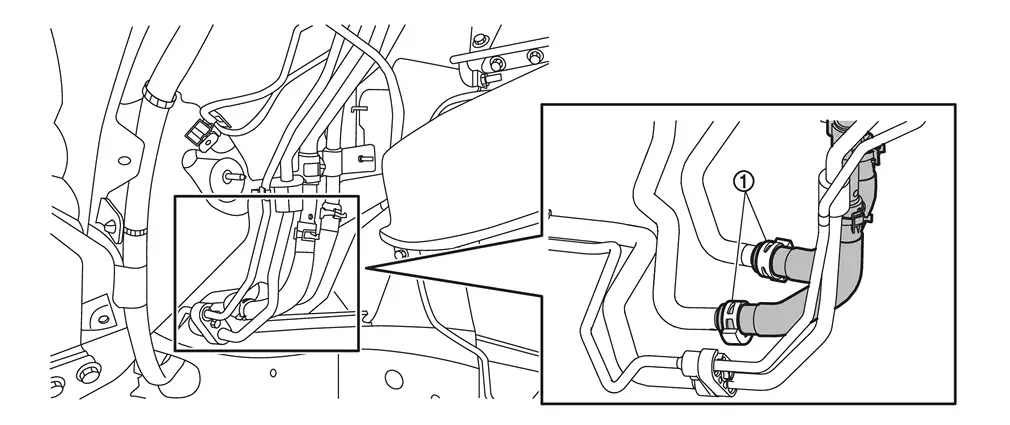
Loosen clamp , and then disconnect water hose 2 from front heater pipe assembly.
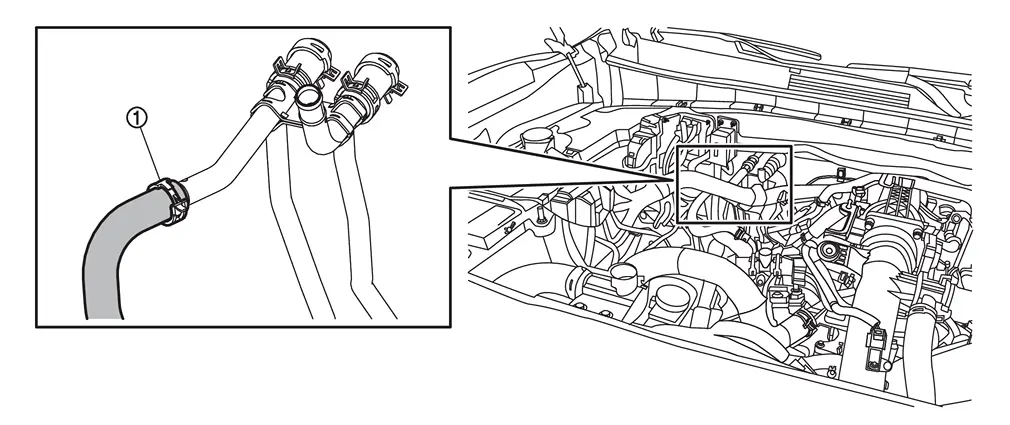
Loosen clamps , and then disconnect front heater pipe assembly from front heater core.
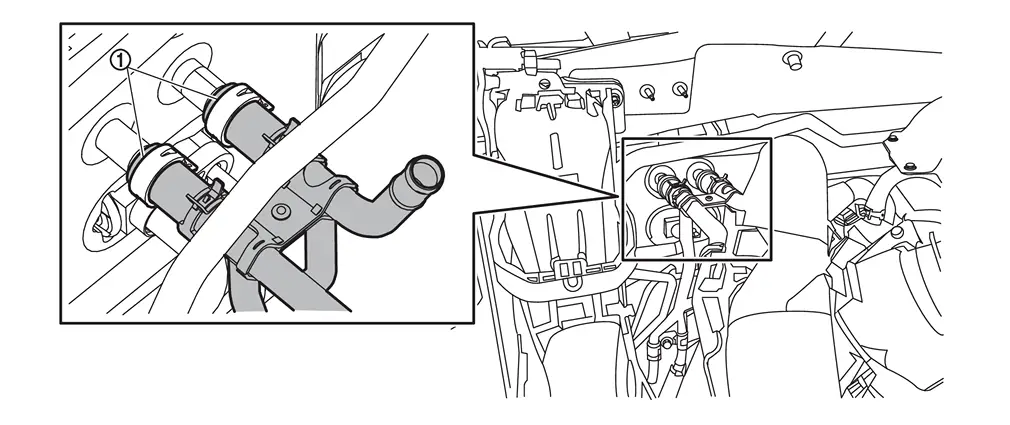
Remove front heater pipe assembly from vehicle.
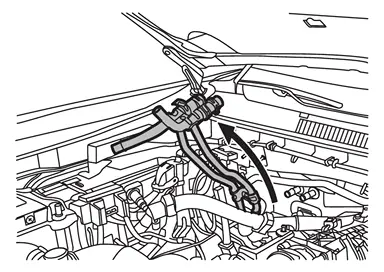
With 12V Sub Battery
Drain engine coolant from cooling system. Refer to ENGINE COOLANT : Draining.
Remove front heater outlet pipe assembly. Refer to Removal and Installation.
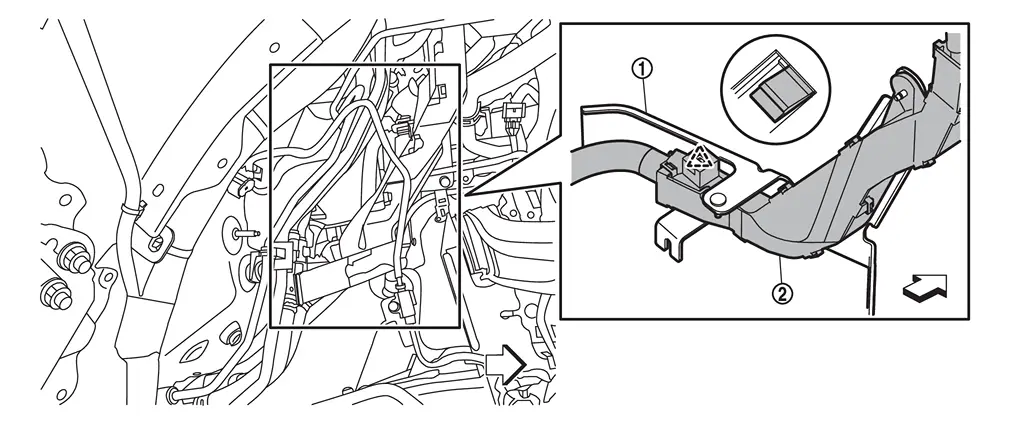
Remove mounting nuts , and then move 12V sub battery harness 1 to secure work space.
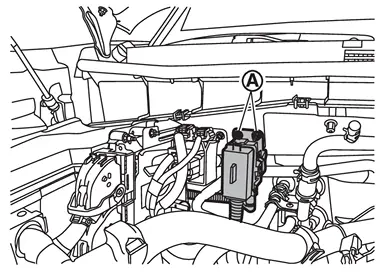
Remove front road wheel tire RH. Refer to ROAD WHEEL TIRE : Removal & Installation.
Remove fender protector RH. Refer to Removal and Installation.
Remove mounting nuts , and then remove 12V sub battery harness 1 bracket from body.
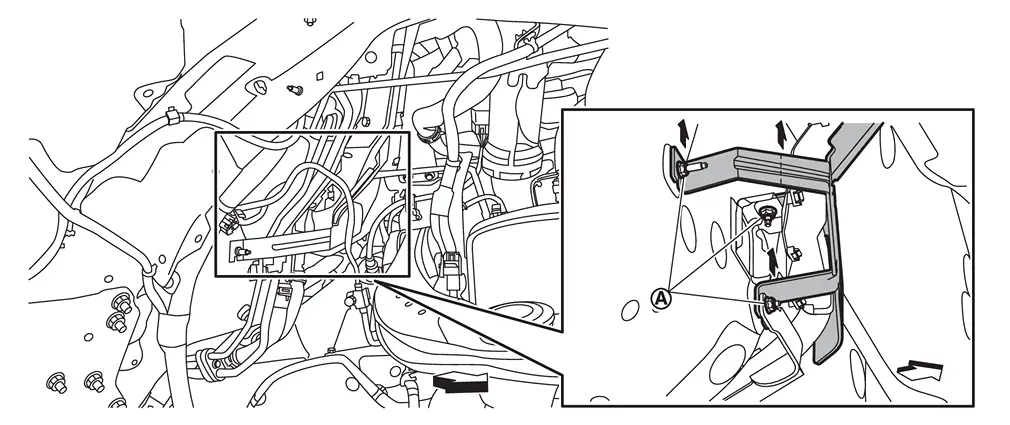
| : vehicle front |
Remove 12V sub battery harness 1 mounting nut .
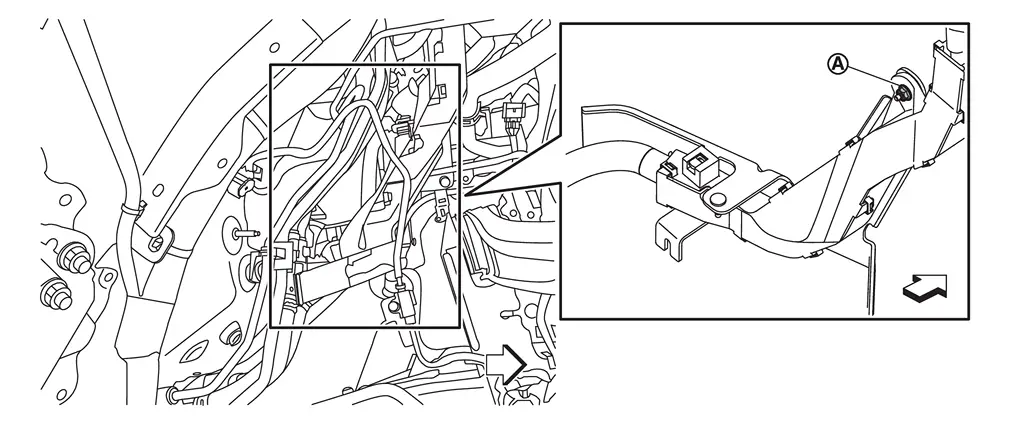
| : vehicle front |
Disengage fixing pawl, and then move 12V sub battery harness 1 bracket and 12V sub battery harness 1  to secure work space.
 |
: Pawl |
| : vehicle front |
Remove front heater pipe assembly mounting nut .
Loosen clamps , and then disconnect front heater pipe assembly from rear cooler pipe assembly.
Loosen clamp , and then disconnect water hose 2 from front heater pipe assembly.
Loosen clamps , and then disconnect front heater pipe assembly from front heater core.
Remove front heater pipe assembly from vehicle.
INSTALLATION
Note the following item, and then install in the reverse order of removal.
CAUTION:
Securely insert each hose, and install clamp at a position where it does not interfere with the pipe bulge.
 NOTE:
NOTE:
When filling radiator with engine coolant. Refer to ENGINE COOLANT : Refilling.
Other materials
Input Oil Seal
Exploded View
Transfer assembly
Input oil seal
: vehicle front
: Always replace after every disassembly.
: Apply transfer fluid.
Removal and Installation
WARNING:
Jacking up or lift up the vehicle may the vehicle height to go down which cause a personal injury and ...
Seat Cushion Blower Motor
Removal and Installation
REMOVALRemove front seat cushion trim and pad. Refer to Disassembly and Assembly.
Disengage fixing pawls and then remove front seat cushion blower motor.
: Pawl
Disengage front seat cushion blower motor harness fixing clip.
Disconnect front seat cushion blower motor con ...
Rear Wiper
Exploded View
Rear wiper motor
Rear wiper blade
Rear wiper arm
Pivot seal
: N·m (kg-m, in-lb)
Rear Wiper Arm
Removal and Installation
CAUTION:
Clean back door window glass and rear wiper refill so that back door window glass may not be damaged by dust, ...