Removal and Installation
REMOVAL
CAUTION:
-
Perform lubricant return operation before each refrigeration system disassembly. However, if a large amount of refrigerant or lubricant leak is detected, never perform lubricant return operation. Refer to Perform Lubricant Return Operation.
-
When disconnect the A/C piping related parts, cap or wrap the joint of those parts with suitable material such as vinyl tape to avoid the entry of air.
Use a refrigerant collecting equipment (for HFO-1234yf) to discharge the refrigerant. Refer to Recycle Refrigerant.
Remove air cleaner body. Refer to Removal and Installation.
Remove mounting bolt  , and then disconnect high-pressure flexible hose from condenser inlet pipe.
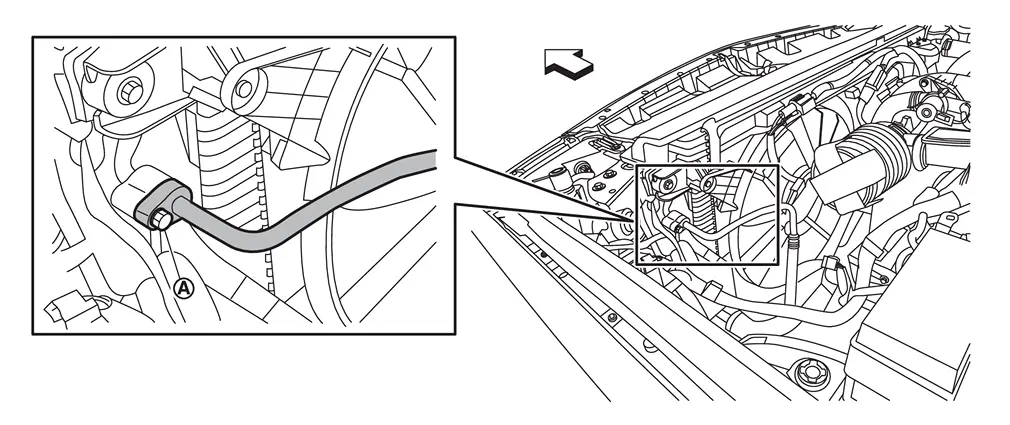
| : vehicle front |
Remove mounting bolt , and then disconnect high-pressure flexible hose from A/C compressor.
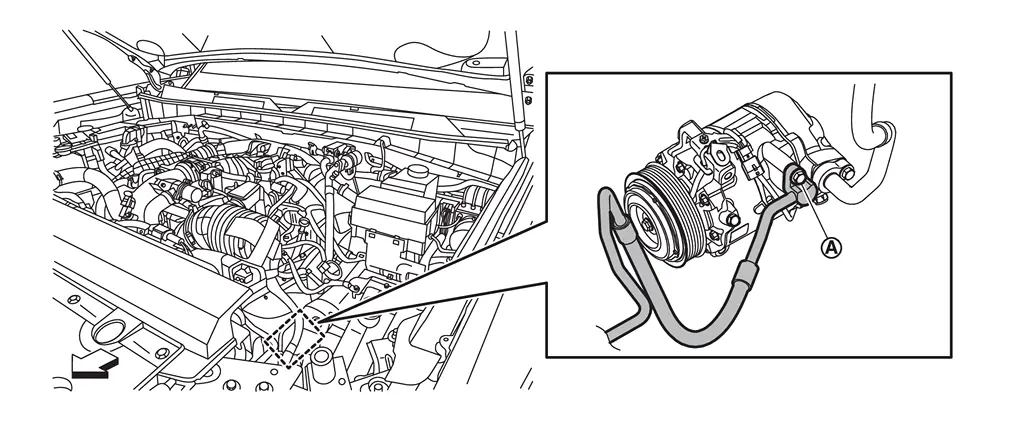
| : vehicle front |
Remove high-pressure flexible hose from vehicle.
INSTALLATION
Note the following items, and then install in the reverse order of removal.
CAUTION:
-
To prevent leakage of refrigerant, replace the O-ring and washer seal with a new one. Apply a coat of compressor oil to the O-ring prior to installation.
-
Use a refrigerant collecting equipment (for HFO-1234yf) to charge the refrigerant. Refer to Charge Refrigerant.
-
Perform a check for refrigerant leakage when charging with refrigerant. Refer to Leak Test.
Other materials
Precautions
Precautions for Removing Battery Terminal
When disconnecting the 12V battery terminal, turn off the ACC power before disconnecting the 12V battery terminal, observing “How to disconnect 12V battery terminal� described below.
NOTE:
Some ECUs operate for a certain fixed time even after ignit ...
Rear Pillar Finisher
Removal and Installation
CAUTION:
Never damage the body panel.REMOVALCAUTION:
When removing, always use a remover tool that is made of plastic to prevent damage to the parts.Remove luggage side lower finisher. Refer to Removal and Installation.
Apply protective tape (A) on rear pillar finisher to pr ...
Squeak and Rattle Trouble Diagnoses
Work Flow
CUSTOMER INTERVIEW
The customer may not be able to provide a detailed description or the location of the noise. Attempt to obtain all the facts and conditions that exist when the noise occurs (or does not occur).
If there is more than one noise in the vehicle, perform a diagnosis and re ...