
Nissan Armada 2025-2026 Service and Repair Manual: Disassembly & Assembly
DISASSEMBLY
Without Dynamic Digital Suspension and Electronic Air Suspension
CAUTION:
Never damage shock absorber piston rod when removing components from shock absorber.
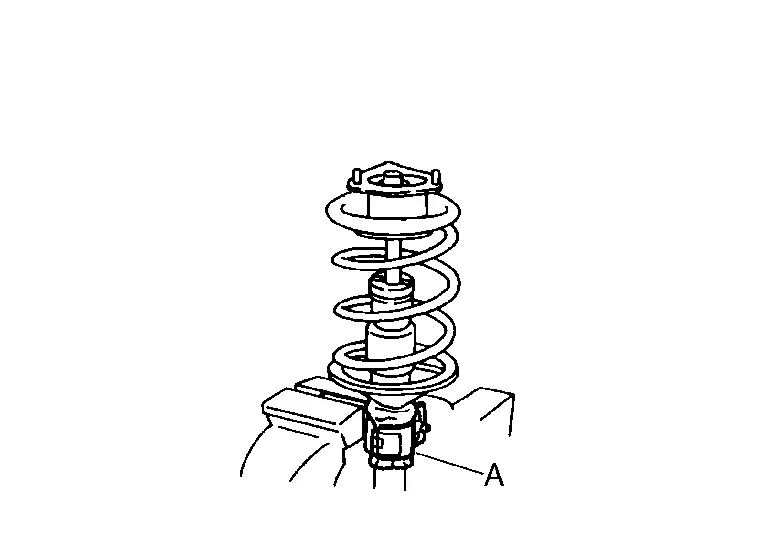
Install shock absorber attachment [SST: ST35652000 ( − )] (A) to shock absorber and secure it in a vise.
CAUTION:
When installing the shock absorber attachment to shock absorber, wrap a shop cloth around shock absorber to protect it from damage.
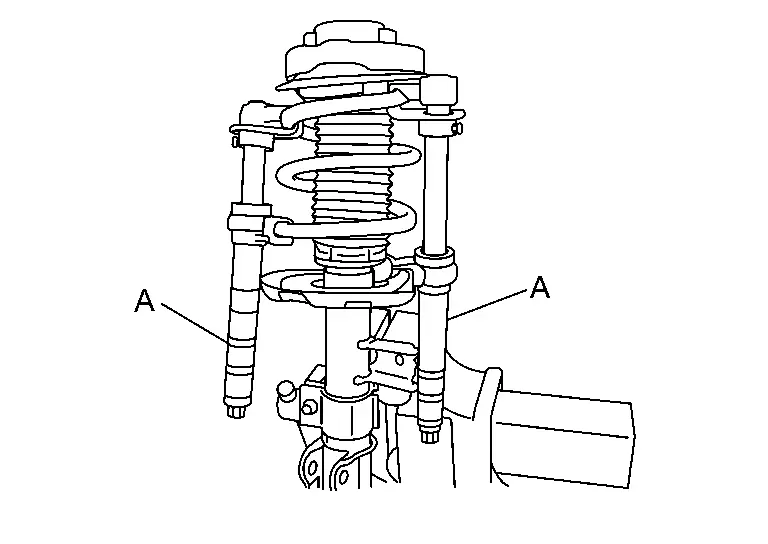
Using a spring compressor (commercial service tool) (A), compress coil spring between rubber seat and shock absorber until coil spring with a spring compressor is free.
CAUTION:
Be sure the spring compressor is securely attached to coil spring, before compressing it.
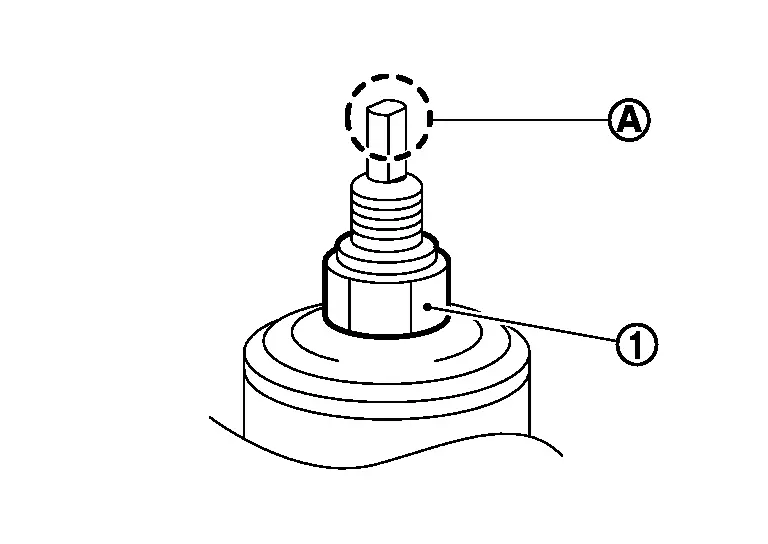
Check coil spring with a spring compressor between rubber seat and shock absorber is free. Remove piston rod lock nut  while securing the piston rod tip
  so that piston rod does not turn.
Remove mounting insulator, rubber seat, dust cover, and bound bumper from shock absorber.
After removing coil spring with spring compressor (commercial service tool), gradually release the spring compressor.
CAUTION:
Loosen while making sure coil spring attachment position does not move.
Remove the shock absorber attachment [SST: ST35652000 ( − )] from shock absorber.
Perform inspection after disassembly. Refer to Inspection.
With Dynamic Digital Suspension and Electronic Air Suspension
CAUTION:
The shock absorber assembly cannot be disassembled.
ASSEMBLY
Without Dynamic Digital Suspension and Electronic Air Suspension
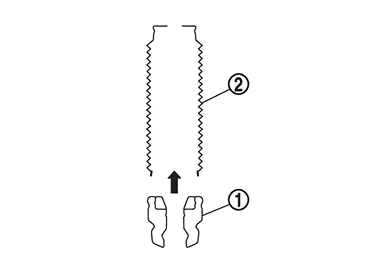
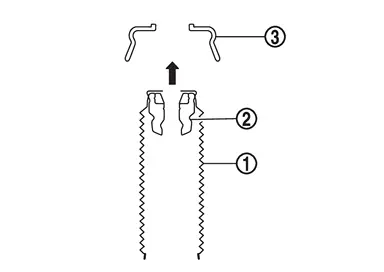
Install bound bumper  to dust cover
  .
.
Install dust cover and bound bumper to mounting insulator  .
.
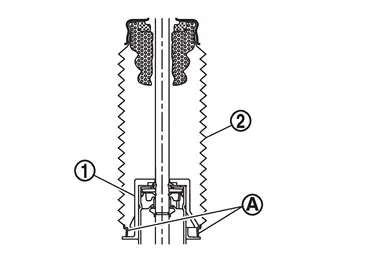
Install shock absorber to bound bumper, dust cover, and mounting insulator.
 NOTE:
NOTE:
Check that part of dust cover is attached to shock absorber .
Install shock absorber attachment [SST: ST35652000 ( − )] to shock absorber and secure it in a vise.
CAUTION:
When installing the shock absorber attachment to shock absorber, wrap a shop cloth around shock absorber to protect it from damage.
Compress coil spring using a spring compressor (commercial service tool), and install it onto shock absorber.
CAUTION:
Be sure the spring compressor is securely attached to coil spring, before compressing it.
Set coil spring so that its paint marks
are aligned with the position from the bottom end of the coil spring as shown in the figure.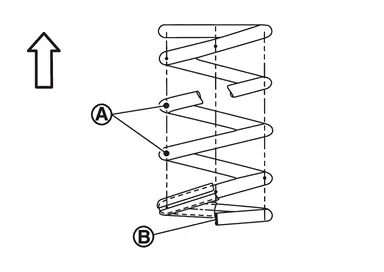

: Upper side 
: Lower end of the coil spring shall be at vehicle out side
Align and attach the protrusions of the rubber sheet to the bolts of the mounting insulator  .
.
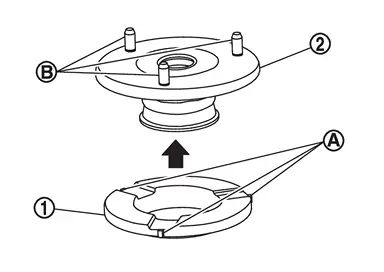
Install rubber sheet and mounting insulator to shock absorber.
Install the mounting insulator
as shown in the figure.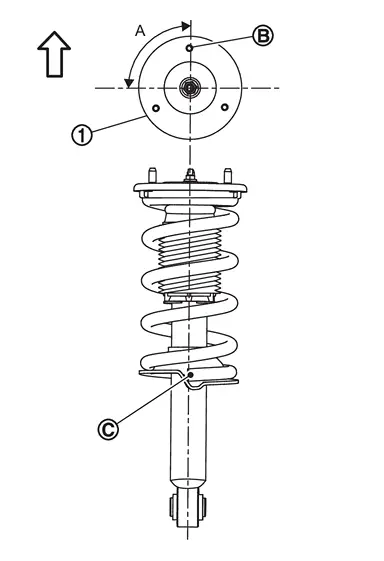
Angle (A) : 90° : mounting insulator bolt 
: lower end of the coil spring Align the lower end of the coil spring
with the position (A) of the shock absorber in the diagram.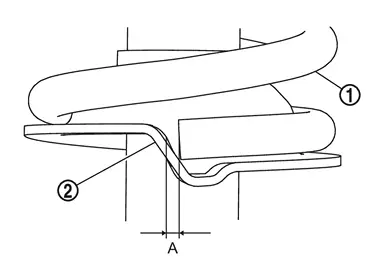
A : 5 mm or less
Secure piston rod tip so that piston rod does not turn, then tighten piston rod lock nut to the specified torque.
Gradually release a spring compressor (commercial service tool), and remove coil spring.
CAUTION:
Loosen while making sure coil spring attachment position does not move.
Remove the shock absorber attachment [SST: ST35652000 ( − )] from shock absorber.
 Removal and Installation
REMOVAL
Without Dynamic Digital Suspension and Electronic Air Suspension
Remove tires. Refer to ROAD WHEEL TIRE : Removal & Installation.
Set suitable jack under lower link.
CAUTION:
Never damage ...
 Inspection
WITHOUT DYNAMIC DIGITAL SUSPENSION AND ELECTRONIC AIR SUSPENSION
Inspection After Removal
Check shock absorber for oil leakage or other malfunctions. Replace it if necessary.
Inspection After Installa ...
Other materials:
Removal and Installation
REMOVAL
Remove front center console rear finisher assembly. Refer to Removal and Installation.
Remove fixing screws , and then remove rear A/C control assembly.
Remove fixing screws , and then remove rear A/C control from rear A/C control bracket.
INSTALLATION
Install in the reverse order of rem ...
Refilling
WARNING:
The ignition switch OFF.
Recommended fluid and capacity: Refer to Fluids and Lubricants.
CAUTION:
Carefully fill the fluid. (Fill up for approximately 3 minutes.)
Leave the vehicle for 3 minutes, and check the fluid level again.
Install filler plug on transfer and tighten to the specif ...
Exploded View
Front output shaft Front oil seal Front case Snap ring Sprockets with chain Snap ring Rear case : Always replace after every disassembly. : N·m (kg-m, ft-lb) : Apply transfer fluid. : Apply Genuine Liquid Gasket, Loctite 598 or equivalent. ...

0.0087