
Nissan Armada 2025-2026 Service and Repair Manual: Disassembly and Assembly
CAUTION:
OUTSIDE SEAT CUSHION FINISHER OUTER
Disassembly
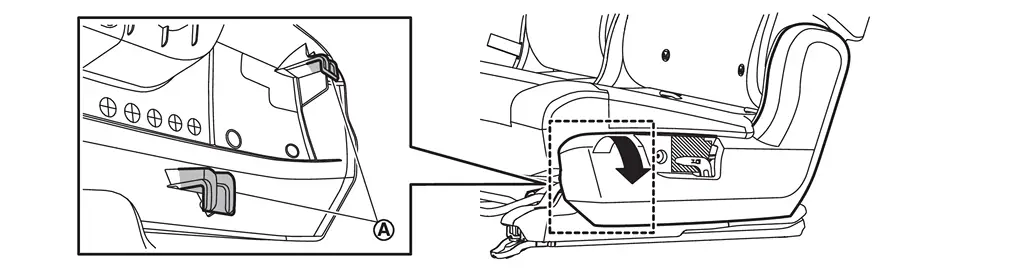
Disengage fixing pawls, and then remove reclining knob cap.
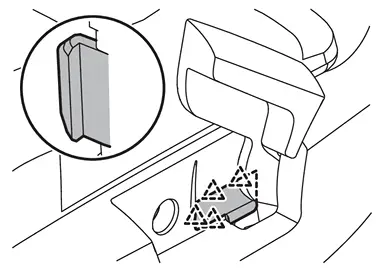
 | : Pawl |
Disengage fixing portion  using a remover tool (A) according to numerical order 1→2 indicated by arrows as shown in the figure, and then remove reclining knob.
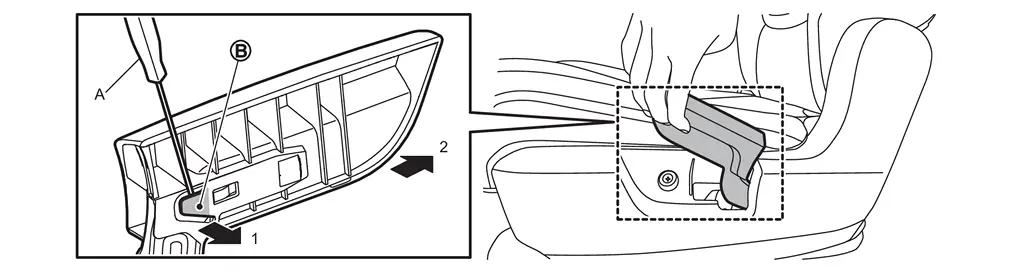
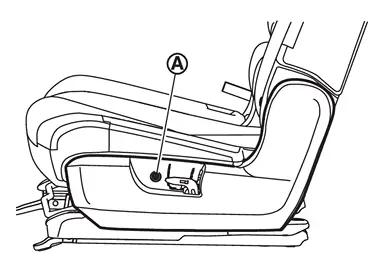
Remove outside seat cushion finisher outer.Remove outside seat cushion finisher outer fixing screw  .
.
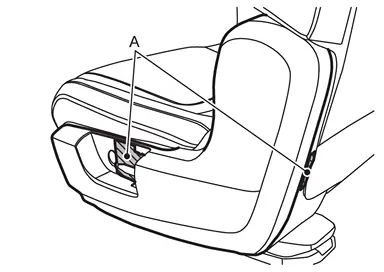
.
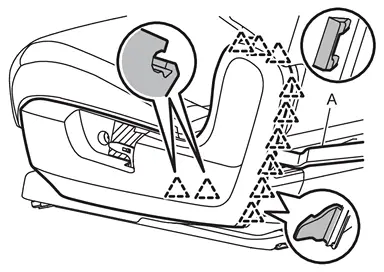
| : Pawl |
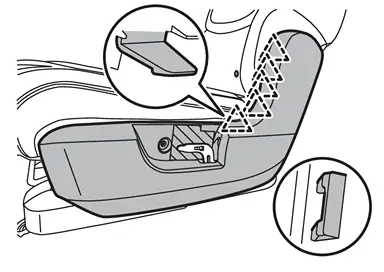
| : Pawl |
Assembly
Assemble in the reverse order of disassembly.
INSIDE SEAT CUSHION FINISHER OUTER
Disassembly
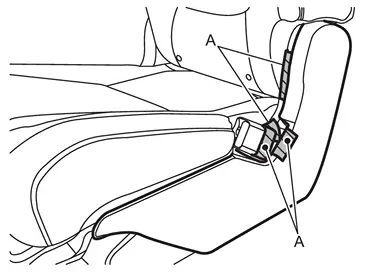
Apply protective tapes (A) to prevent damage.
LH seat
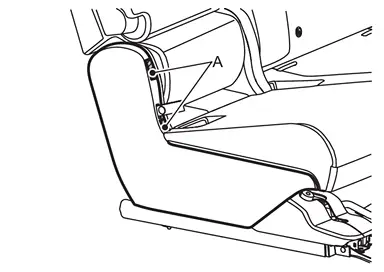
RH seat
Disengage fixing portion and clip.
LH seat
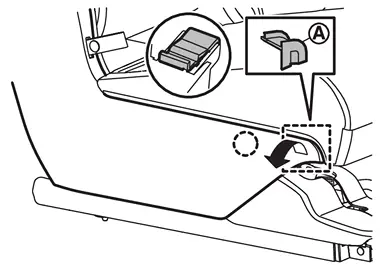

: Clip RH seat
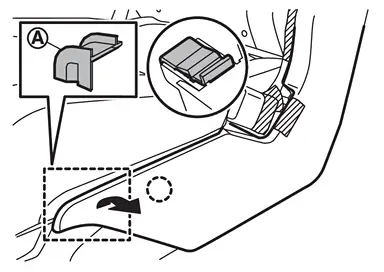
: Clip
Disengage fixing pawls and clip (LH seat) using a remover tool (A).
LH seat
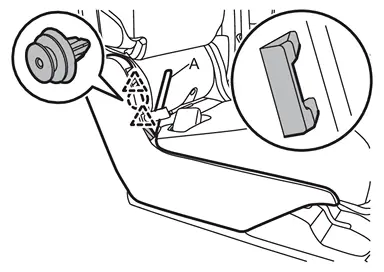
: Clip : Pawl RH seat
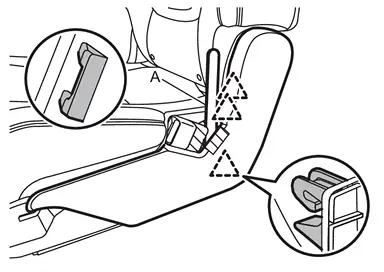
: Pawl
Disengage fixing pawls using a remover tool (A).
LH seat
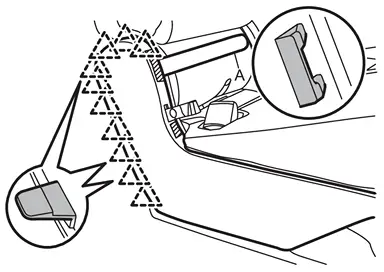
: Pawl RH seat
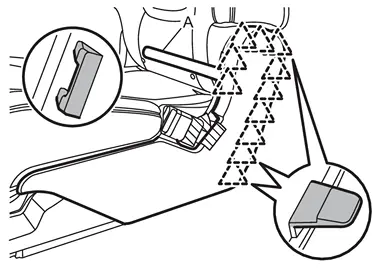
: Pawl
Disengage fixing portion and pawl(s), and then remove inside seat cushion finisher outer.
LH seat
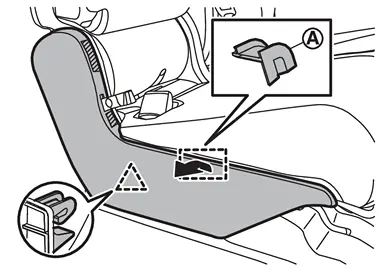
: Pawl RH seat
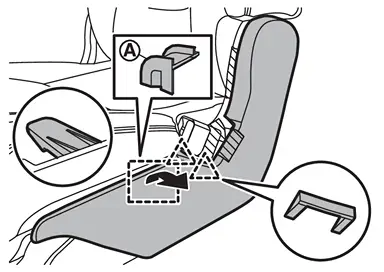
: Pawl
Assembly
Assemble in the reverse order of disassembly.
INSIDE / OUTSIDE SEAT CUSHION FINISHER INNER
Disassembly
Remove seat cushion trim and pad. Refer to Disassembly and Assembly.
Remove fixing screw , and then remove reclining strap (LH seat).
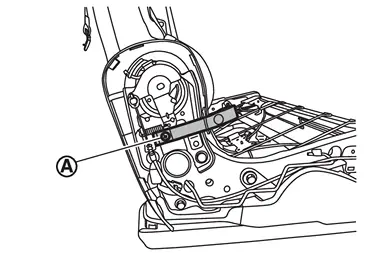
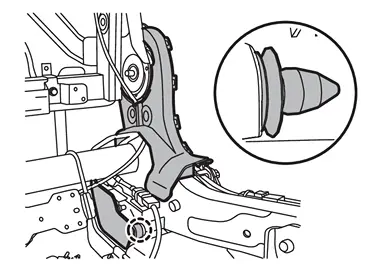
| : Clip |
Assembly
Assemble in the reverse order of disassembly.
OUTSIDE SEAT CUSHION LOWER COVER OUTER
Disassembly
Remove outside striker cover.
Disengage fixing pawls and metal clips according to numerical order 1→3 indicated by arrows as shown in the figure, and then remove outside seat cushion lower cover outer.
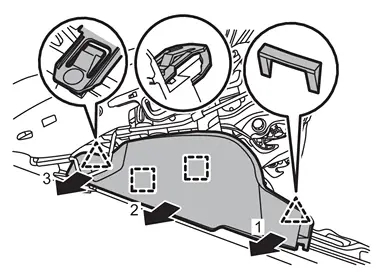
| : Pawl |
 | : Metal clip |
Assembly
Assemble in the reverse order of disassembly.
INSIDE SEAT CUSHION LOWER COVER OUTER
Disassembly
Remove inside striker cover.
Disengage fixing pawls and metal clips according to numerical order 1→3 indicated by arrows as shown in the figure, and then remove inside seat cushion lower cover outer.
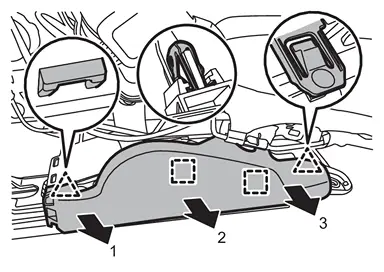
| : Pawl |
| : Metal clip |
Assembly
Assemble in the reverse order of disassembly.
OUTSIDE SEAT CUSHION LOWER COVER INNER
Disassembly
Remove outside seat cushion lower cover outer.
Disengage harness fixing clip from outside seat cushion lower cover inner.
CAUTION:
Disengage fixing metal clips, and then remove outside seat cushion lower cover inner.
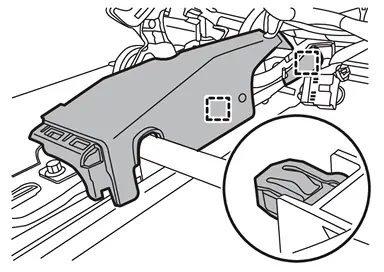
| : Metal clip |
Assembly
Assemble in the reverse order of disassembly.
INSIDE SEAT CUSHION LOWER COVER INNER
Disassembly
Remove inside seat cushion lower cover outer.
Disengage harness fixing clip from inside seat cushion lower cover inner.
CAUTION:
Disengage fixing metal clips, and then remove inside seat cushion lower cover inner.
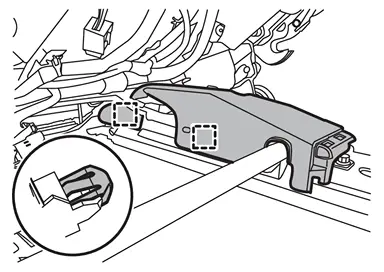
| : Metal clip |
Assembly
Assemble in the reverse order of disassembly.
INSIDE / OUTSIDE SLIDE FINISHER
Disassembly
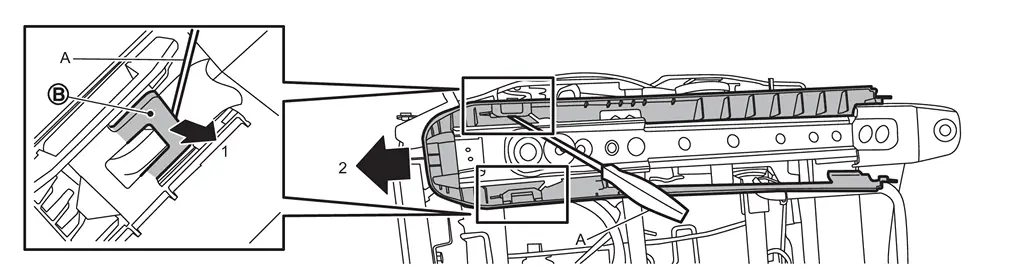
Remove fixing clips using a remover tool (A).
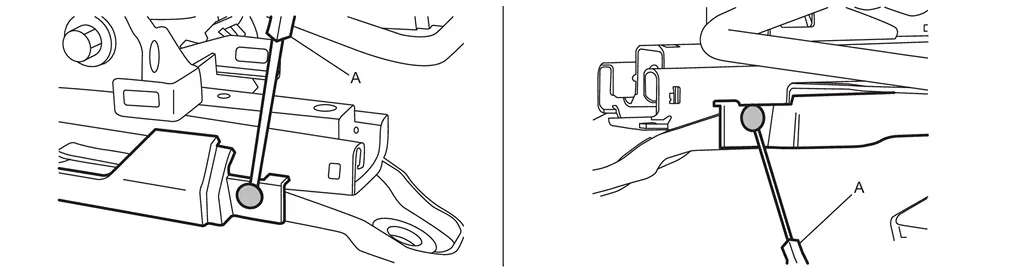
Disengage fixing portion using a remover tool (A) according to numerical order 1→2 indicated by arrows as shown in the figure, and then remove inside and outside slide finisher.
Assembly
Assemble in the reverse order of disassembly.
INSIDE / OUTSIDE STRIKER COVER
Disassembly
Disengage fixing pawls according to numerical order 1→3 indicated by arrows as shown in the figure, and then remove inside and outside striker cover.
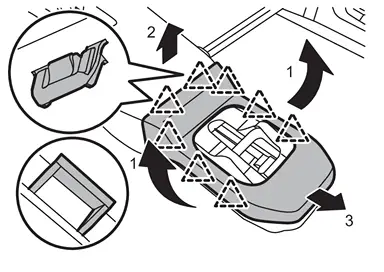
| : Pawl |
Assembly
Assemble in the reverse order of disassembly.

 Third Seat
...
Other materials:
Work Flow
OVERALL SEQUENCE
DETAILED FLOW
INTERVIEW FOR MALFUNCTION
NOTE:
>>
GO TO 2.
SELF-DIAGNOSIS WITH CONSULT
With CONSULT
Perform self-diagnosis of “Wireless charger� using CONSULT. Refer to CONSULT Function.
NOTE:
Skip to step 4 of the diagnosis procedure if “Wireless charger� is not di ...
Removal and Installation
CAUTION:
Always work with a helper.
REMOVAL
Remove moonroof unit assembly. Refer to Removal and Installation.
Remove rear moonroof glass fixing screws , and then remove rear moonroof glass.
Remove fixing clips, and then remove center reinforce frame from rear moonroof glass.
: Clip
INSTALLATI ...
Clock and outside air temperature
In the Nissan Armada, both the clock 1 and the outside air temperature 2 are
conveniently displayed at the top section of the vehicle information display, allowing
the driver to quickly access essential information while driving.
Clock
The clock in the Nissan Armada can be adjusted through ...

0.0071