Exploded View
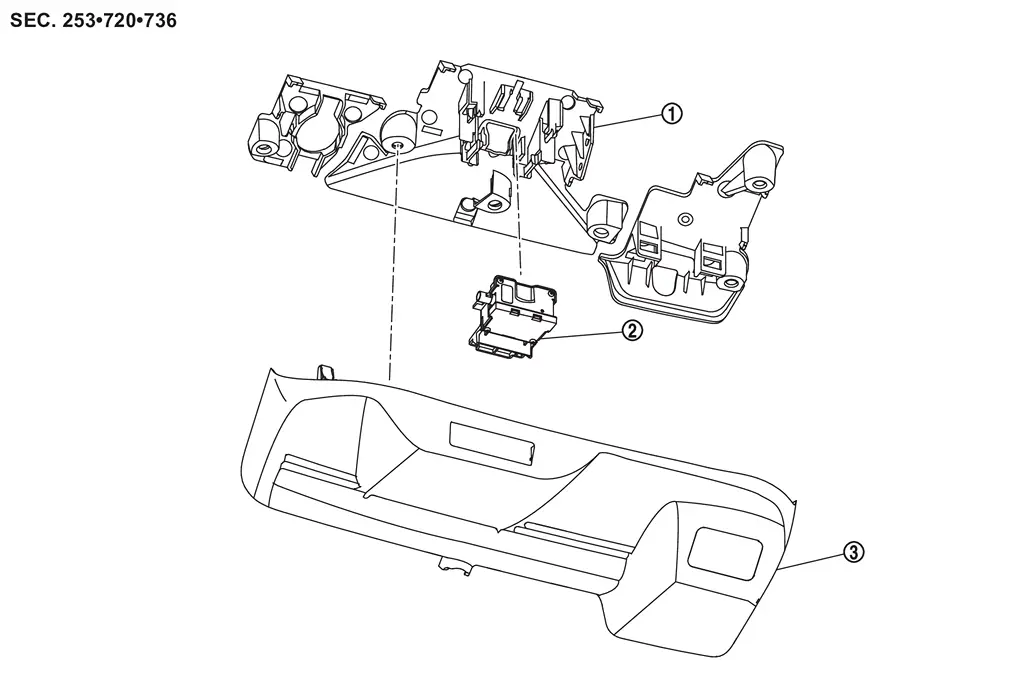
 |
Bracket |  |
Driver assistance camera |  |
Cover |
Removal and Installation
REMOVAL
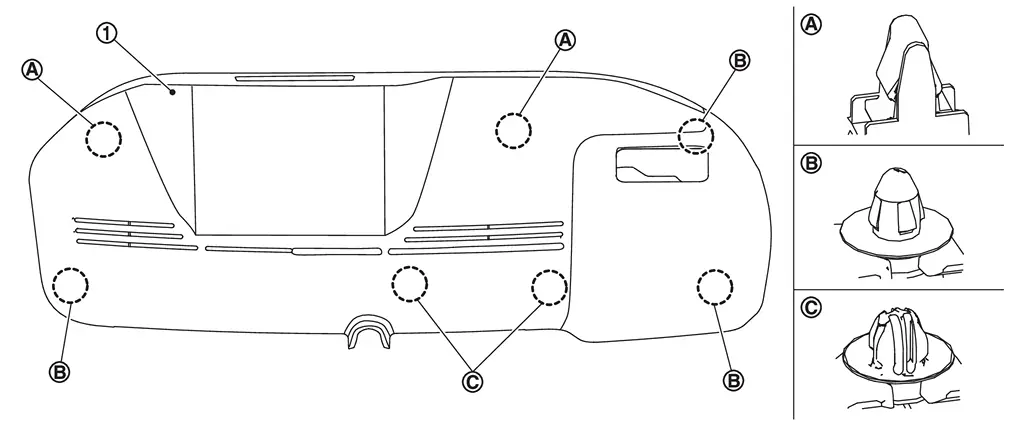
Using a suitable tool, release clips  , and remove cover .
Disconnect front camera unit harness connector.
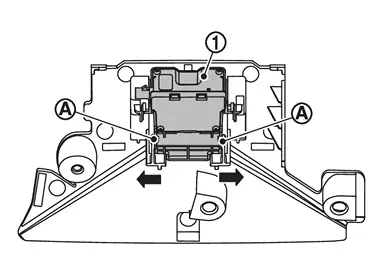
Release pawls  of bracket, and remove front camera unit from bracket.
INSTALLATION
Installation is in the reverse order of removal.
CAUTION:
-
Do not touch or shock the driver assistance camera lens area or drop the driver assistance camera.
-
Make sure that the driver assistance camera harness is not twisted after installation.
-
Align the cover clips with the bracket holes and install by hand. Do not use excessive force.
-
Perform camera aiming every time the driver assistance camera is removed and installed. Refer to Work Procedure.
Other materials
Transfer Cam Position Sensor
Exploded View
Transfer assembly
Transfer cam position sensor
: N·m (kg-m, in-lb)
Removal and Installation
WARNING:
Jacking up or lift up the vehicle may the vehicle height to go down which cause a personal injury and/or damage to the air suspe ...
Rear Suspension Tools and Preparation
Special Service Tools
The actual shapes of TechMate tools may differ from those of special service tools illustrated here.
Tool number
(TechMate No.)
Tool name Description
ST3127S000
(NI-25765-A)
Preload gauge
Measuring rotating torque of ball joint
KV401110S0
( - )
Rear shock absorber s ...
Automatic Back Door Switch
Removal and Installation
REMOVALRemove instrument pad A. Refer to Removal and Installation.
Remove switch bracket fixing screws , and then remove switch bracket .
Disengage automatic back door switch fixing pawls using a remover tool (A), and then remove automatic back door switch from the switch ...