Exploded View
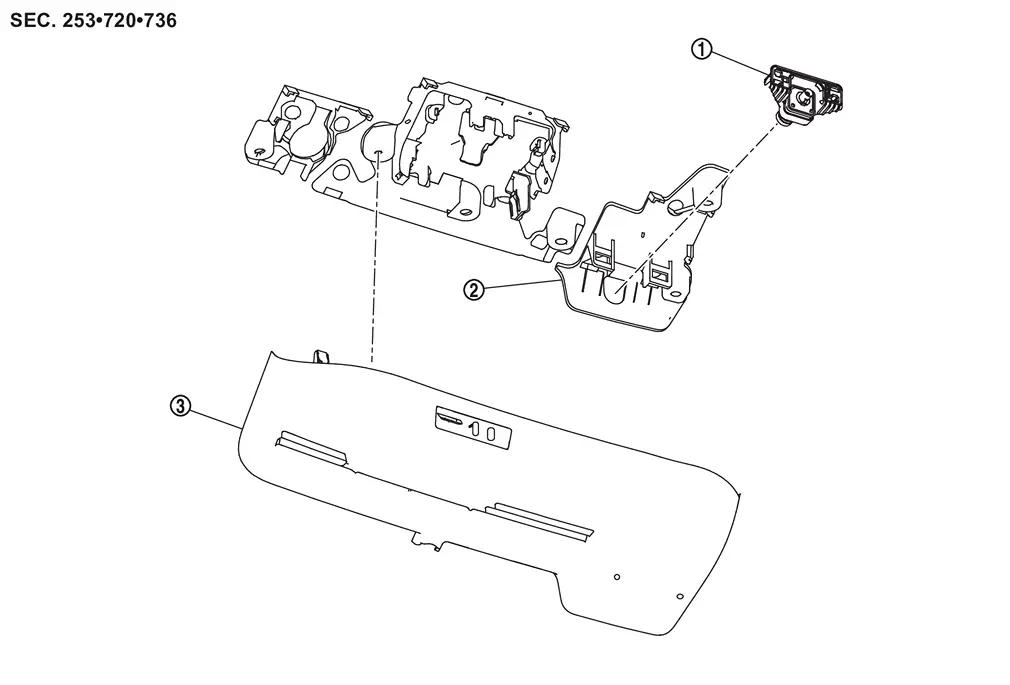
 |
Front camera (driving video recorder) |  |
Bracket |  |
Cover |
Removal and Installation
REMOVAL
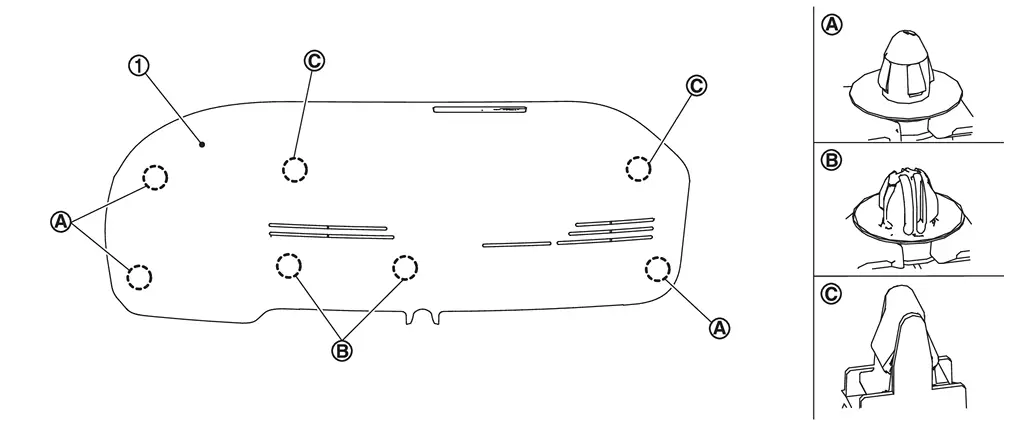
Using a suitable tool, release clips  , and remove cover .
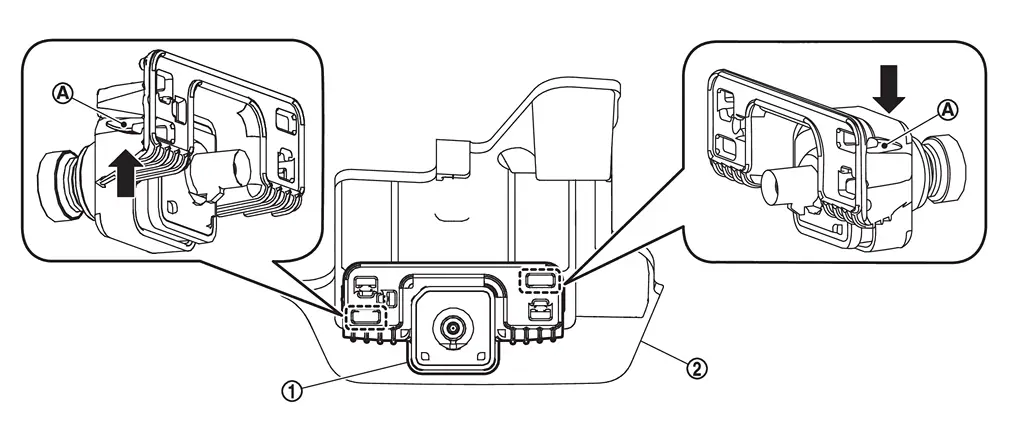
Disconnect front camera (driving video recorder) harness connector.
Push to the arrow  the stopper
  , and remove the front camera (driving video recorder) from bracket .
INSTALLATION
Note the following, and install in the reverse order of removal.
 NOTE:
NOTE:
Bracket together with windshield glass is supplied to the market as a one unit.
CAUTION:
-
Do not touch or shock the front camera (driving video recorder) lens area or drop the front camera (driving video recorder).
-
Make sure that the front camera (driving video recorder) harness is not twisted after installation.
-
Align the cover clips with the bracket holes and install by hand. Do not use excessive force.
Other materials
Automatic Transmission Fluid (ATF)
For the Nissan Armada, inspection or replacement of automatic transmission fluid
should be performed by qualified technicians. It is recommended to visit a NISSAN
dealer for proper servicing.
CAUTION
Use only Genuine NISSAN Matic P ATF when servicing the Nissan Armada
transmission system ...
Noise, Vibration and Harshness (nvh) Troubleshooting
NVH Troubleshooting Chart
Use the chart below to find the cause of the symptom. The numbers indicate the order of the inspection. If necessary, repair or replace these parts.
SUSPECTED PARTS
(Possible cause) Symptom Reference
Transfer fluid leakage Noise
TRANSFER FLUID (Level low)
1 ...
Third Seat Cushion
Disassembly and Assembly
DISASSEMBLYDisengage seat cushion trim fixing retainers .
Remove hinge cover (LH and RH).Remove fixing screw .
Disengage fixing pawl, and then remove hinge cover.
: Pawl
Remove seat cushion frame assembly mounting bolts .
Remove bushes from seat cushion frame ass ...