How To Check
-
If fuse is blown, be sure to eliminate cause of malfunction before installing new fuse.
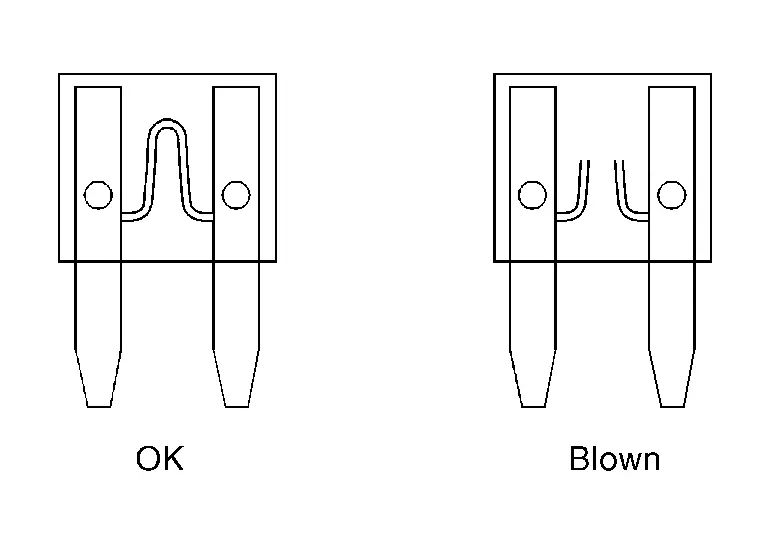
-
Use fuse of specified rating. Never use fuse of more than specified rating.
-
Do not partially install fuse; always insert it into fuse holder properly.
-
Remove fuse for “ELECTRICAL PARTS (BAT)� if vehicle is not used for a long period of time.
EXTENDED STORAGE FUSE SWITCH (IF EQUIPPED)
The following switch may be mounted on the fuse block (Junction Box) for transportation and storage.
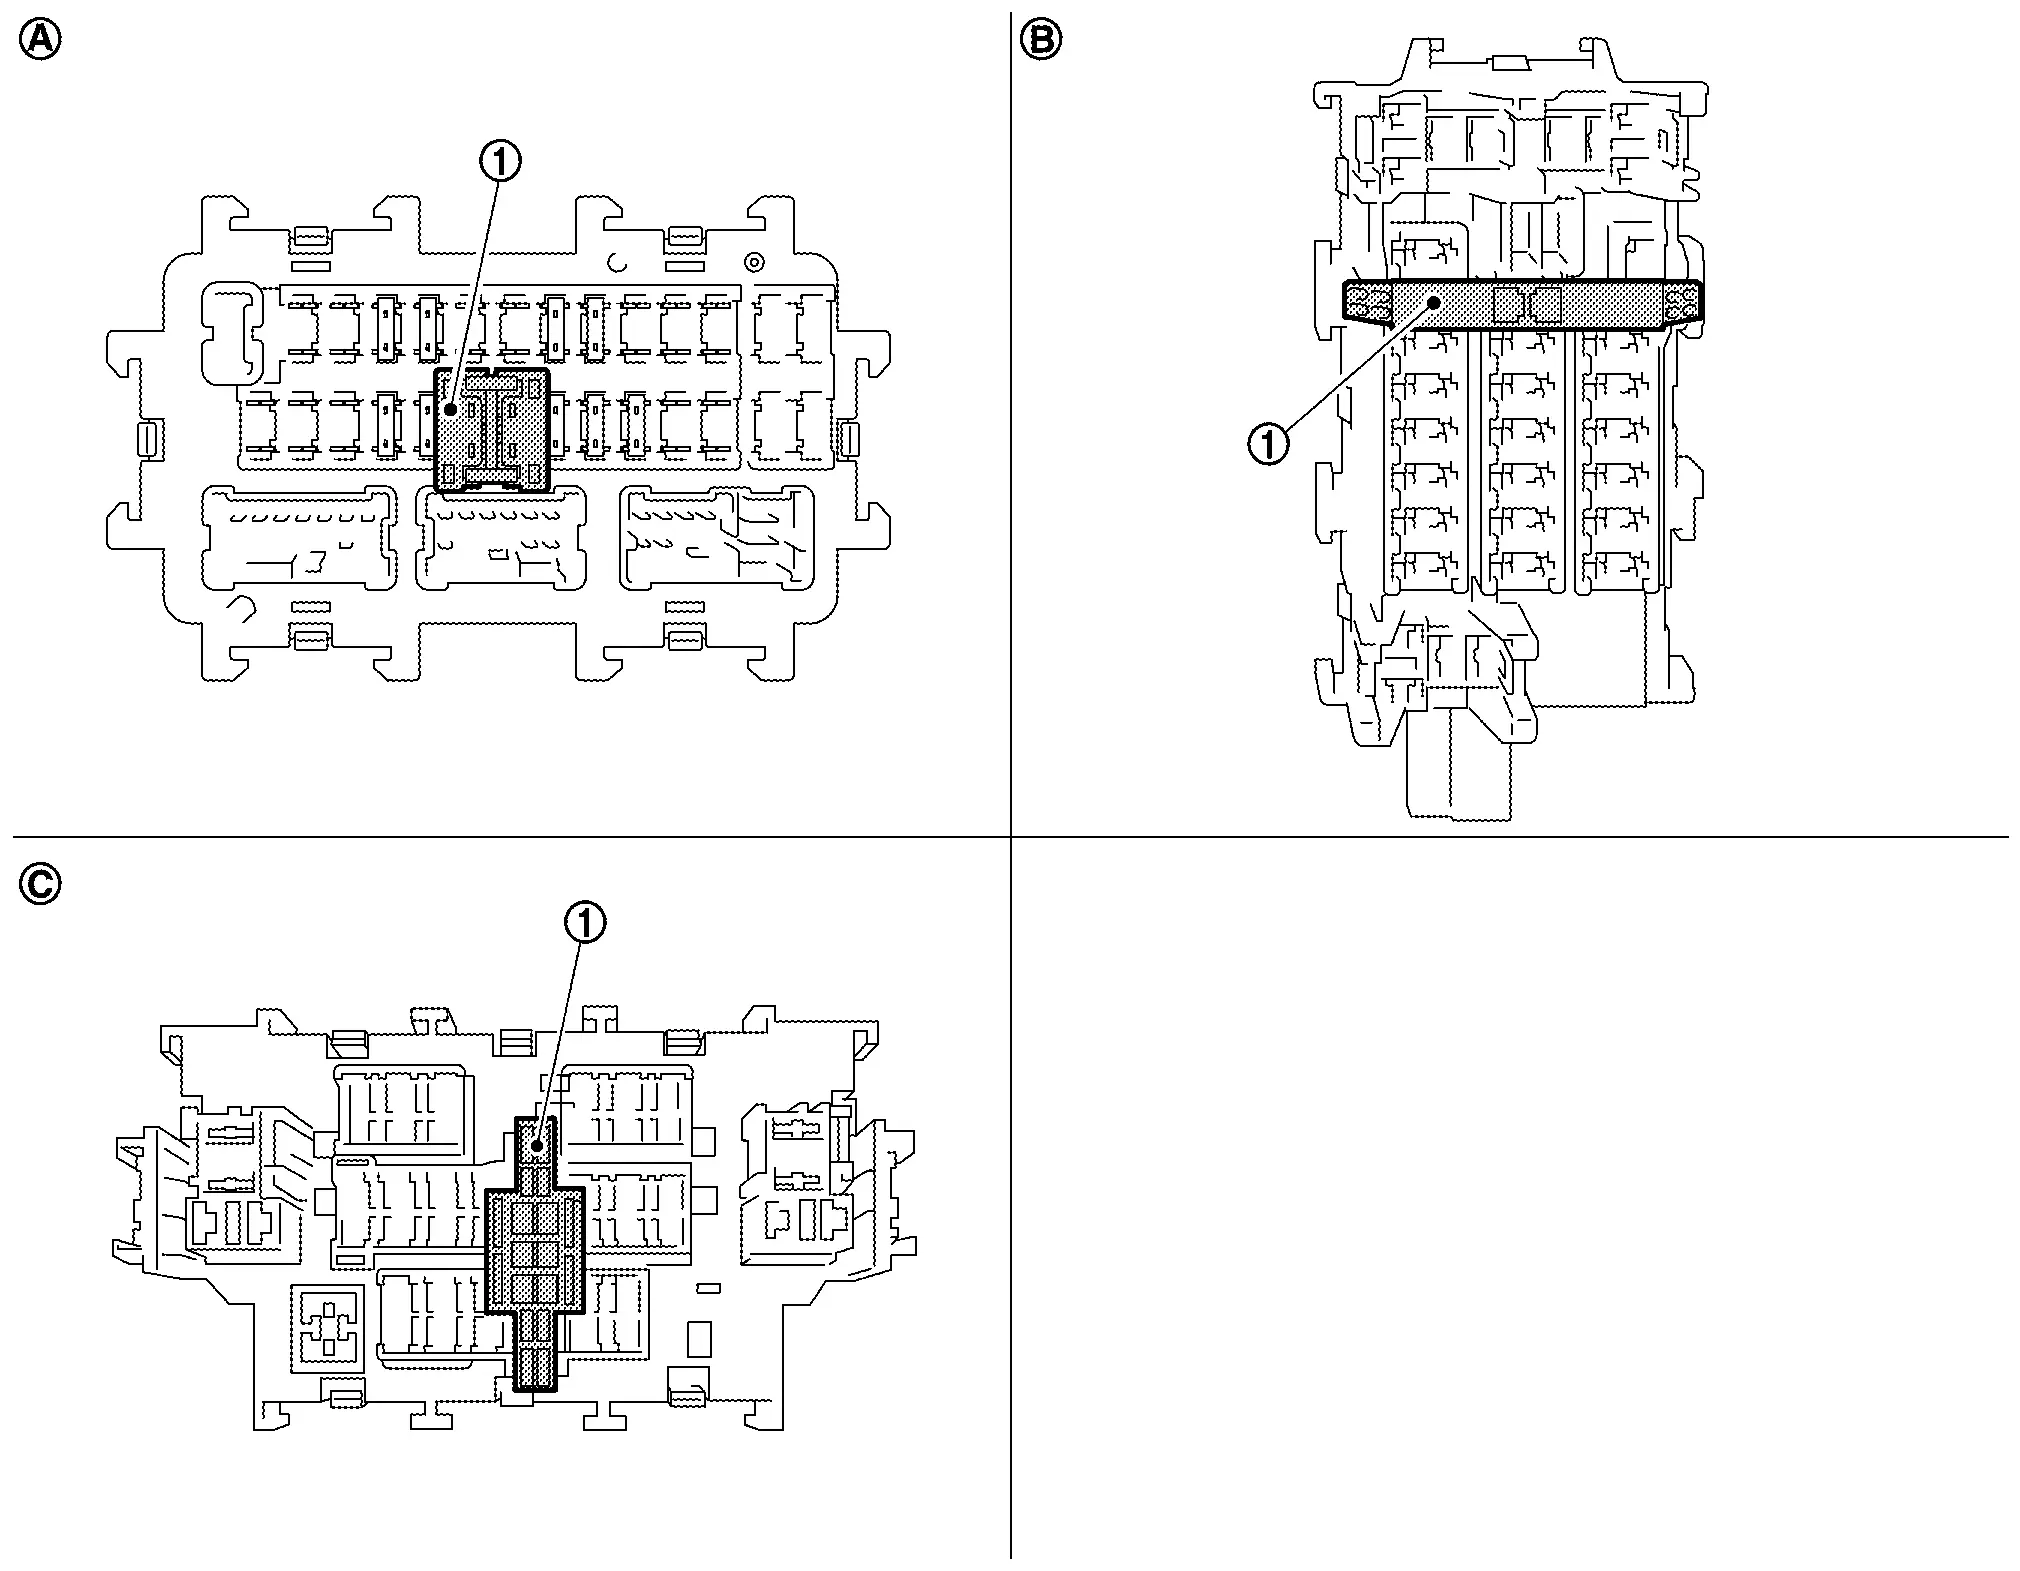
 |
Extended storage fuse switch | ||||
 |
Type A |  |
Type B |  |
Type C |
Remove the extended storage fuse switch if it causes the interference when checking fuses.
How To Extended Storage Fuse Switch ON/OFF
CAUTION:
-
Turn the ignition switch OFF when operating the extended storage fuse switch.
-
Under normal conditions, keep the extended storage fuse switch in ON state. Never operate the extended storage fuse switch except when necessary.
-
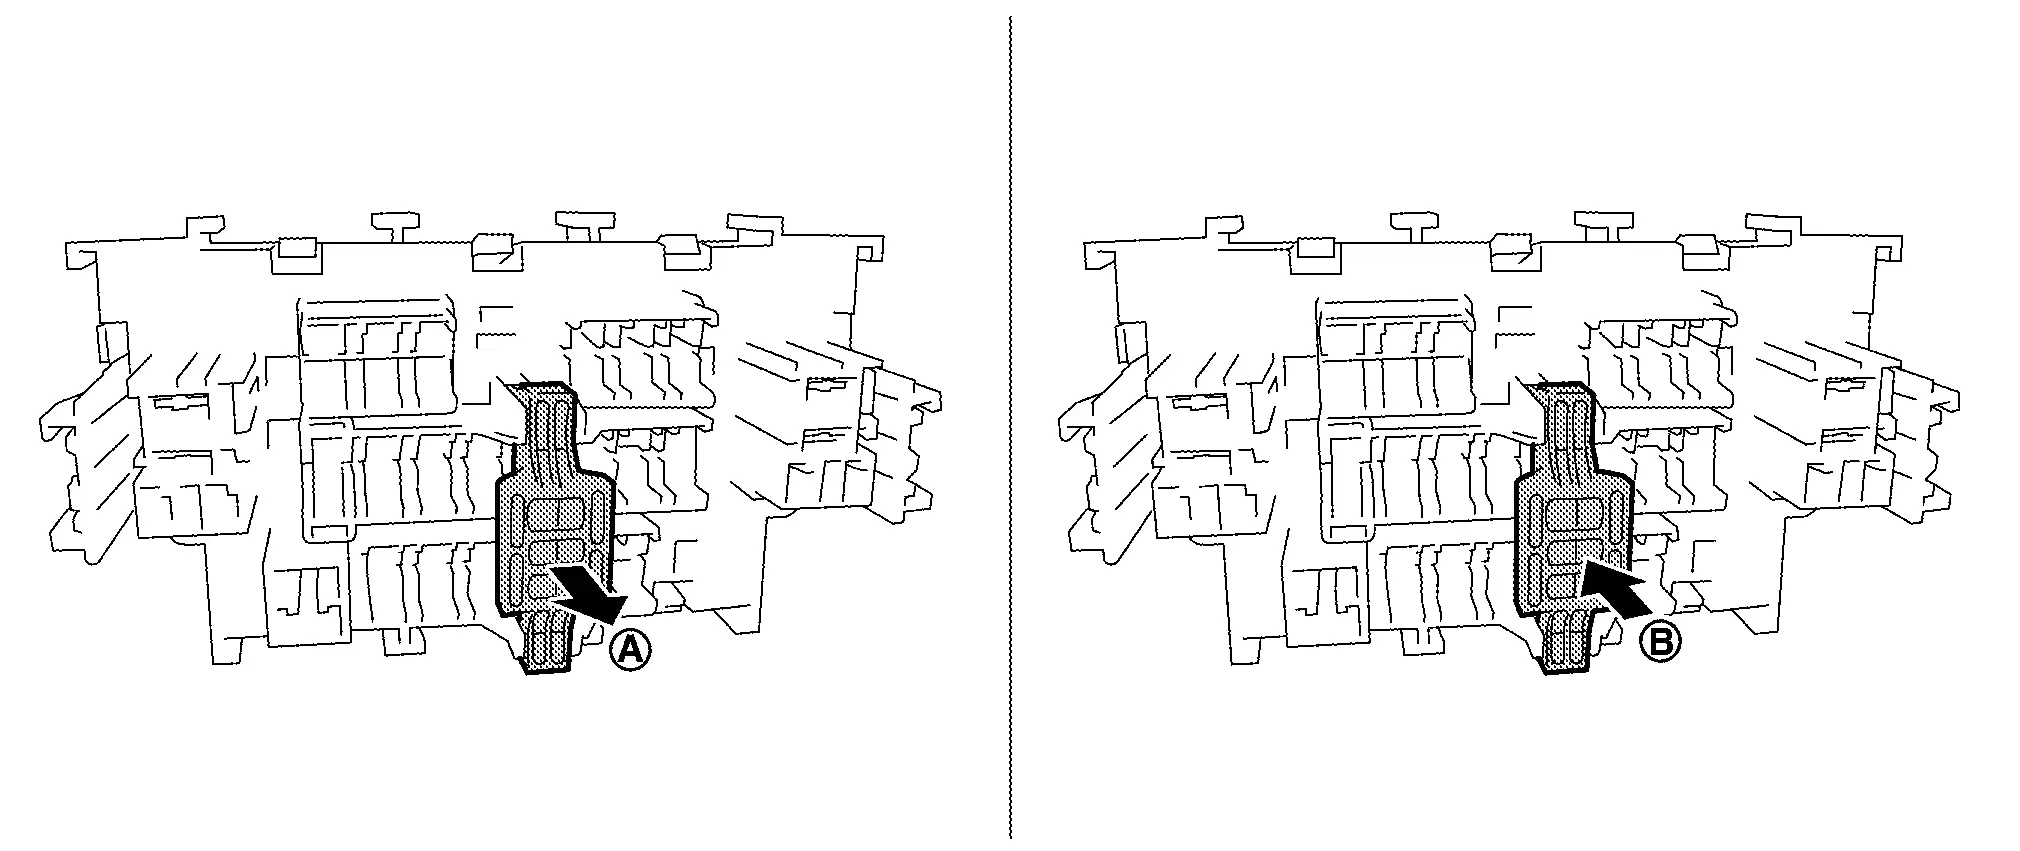
Type A
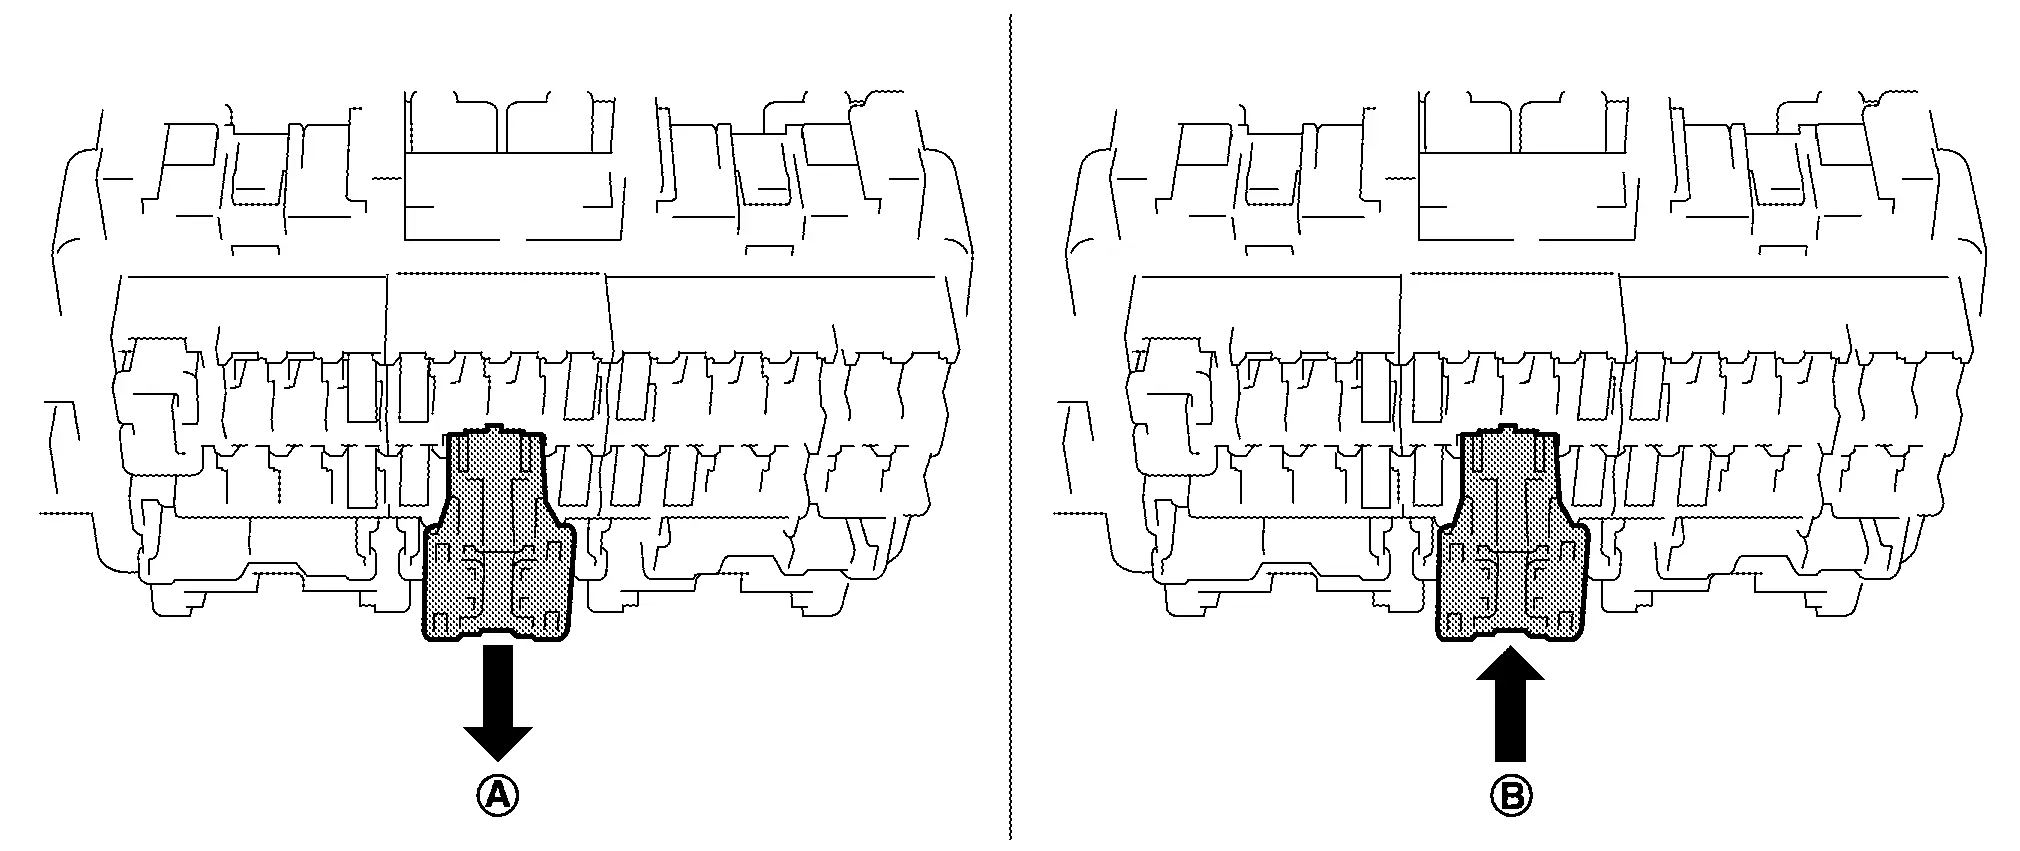
-
To turn the extended storage fuse switch OFF, pull it up in
direction as shown in the figure. -
To turn the extended storage fuse switch ON, press it in
direction as shown in the figure.
-
-
Type B
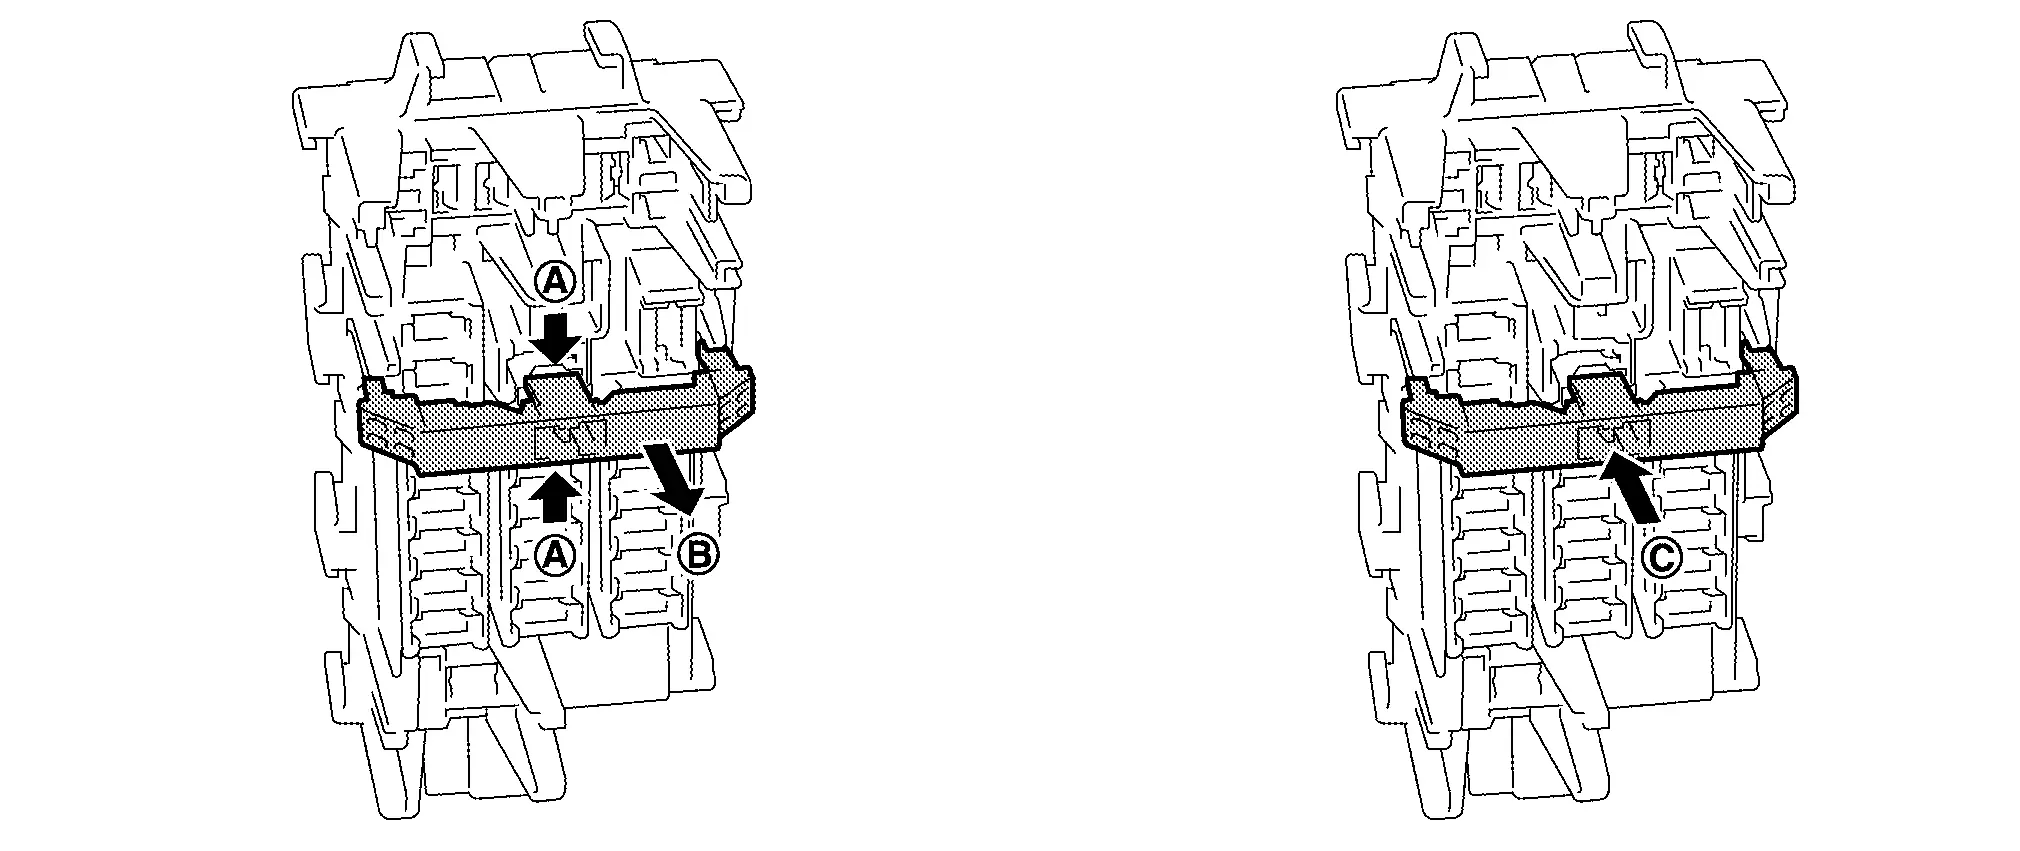
-
To turn the extended storage fuse switch OFF, hold
of the switch and pull up in direction as shown in the figure. -
To turn the extended storage fuse switch ON, press it in
direction as shown in the figure.
-
-
Type C
-
To turn the extended storage fuse switch OFF, pull it up in
direction as shown in the figure. -
To turn the extended storage fuse switch ON, press it in
direction as shown in the figure.
-
How To Remove Extended Storage Fuse Switch
Type A
-
Turn the ignition switch OFF.
-
Turn the extended storage fuse switch OFF.
-
Press pawl
and tilt to disengage the extended storage fuse switch. Press pawl and tilt to remove the extended storage fuse switch.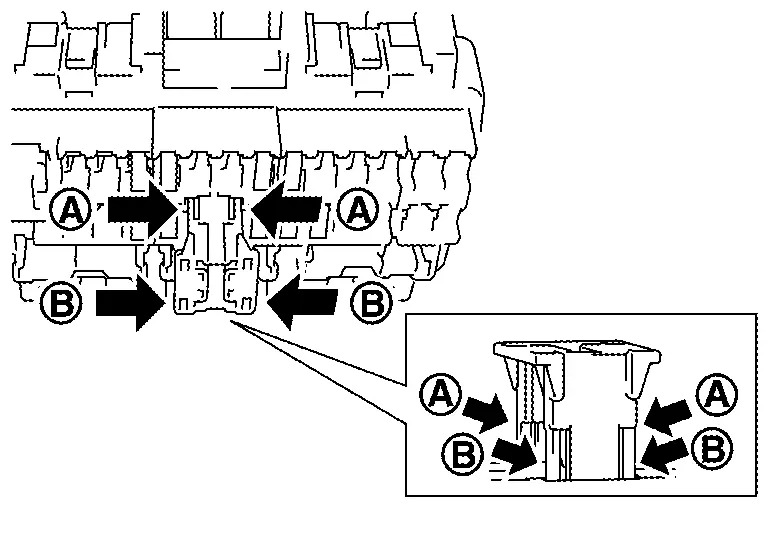
CAUTION:
Never use fuse for bus bar.
 NOTE:
NOTE:
-
Extended storage fuse switch and bus bar are removed together. Remove bus bar from extended storage fuse switch, if necessary.
-
Install removed bus bar to fuse block.
-
Extended storage fuse switch is for transportation and storage. Reinstallation is not required after the removal.
-
Type B
-
Turn the ignition switch OFF.
-
Turn the extended storage fuse switch OFF.
-
Hold
and pull up the extended storage fuse switch hard in direction.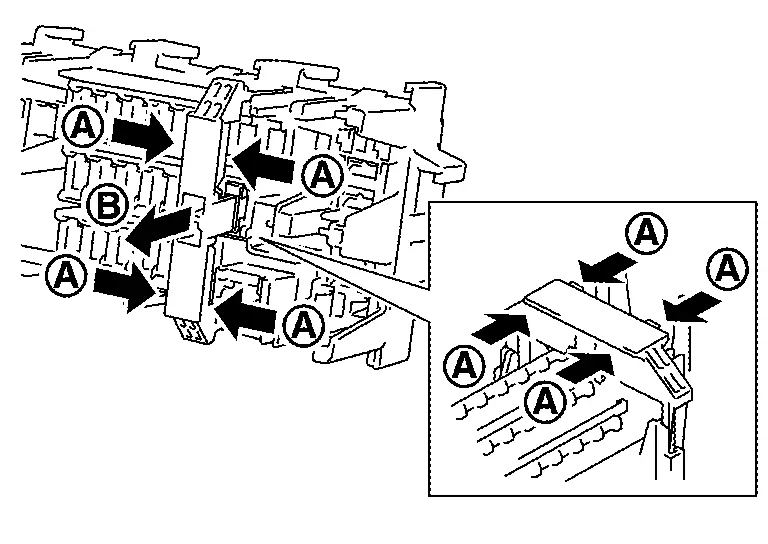
CAUTION:
Never use fuse for bus bar.
NOTE:
-
Extended storage fuse switch and bus bar may be removed together. Remove bus bar from extended storage fuse switch, if necessary.
-
Install removed bus bar to fuse block.
-
Extended storage fuse switch is for transportation and storage. Reinstallation is not required after the removal.
-
Type C
-
Turn the ignition switch OFF.
-
Turn the extended storage fuse switch OFF.
-
Hold
and pull up the extended storage fuse switch hard in direction.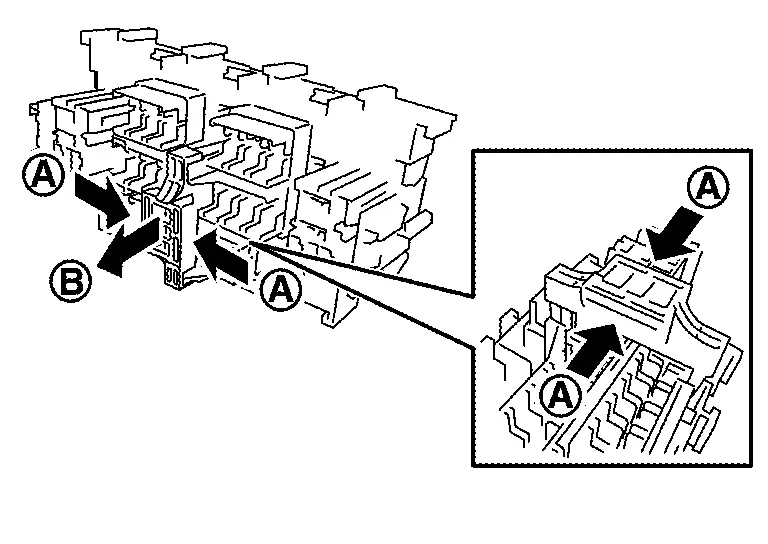
CAUTION:
Never use fuse for bus bar.
NOTE:
-
Extended storage fuse switch and bus bar are removed together. Remove bus bar from extended storage fuse switch, if necessary.
-
Install removed bus bar to fuse block.
-
Extended storage fuse switch is for transportation and storage. Reinstallation is not required after the removal.
-
Other materials
Cooler Pipe and Hose
Exploded View
FRONT
Front heater & cooling unit assembly
O-ring
High-pressure pipe
Valve cap (high-pressure side)
Tube clip 1
Washer seal
Condenser & liquid tank assembly
High-pressure flexible hose
Low-pressure flexible hose
Valve cap (low-pressure side)
L ...
Center Console Tray Lamp
Exploded View
Center console tray lamp is integrated structure with front center console body assembly. For exploded view of front center console assembly, refer to Exploded View.
Replacement
CAUTION:
Disconnect the battery negative terminal or remove power circuit fuse when performing the operati ...
Display Unit
Removal and Installation
REMOVALDisconnect the battery cable from the negative terminal.
Remove display unit display unit finisher RH and LH. Refer to Removal and Installation.
Remove display unit cover. Refer to Removal and Installation.
Remove the mounting screws of the display unit .
Pull the ...