Exploded View
Without Moonroof Models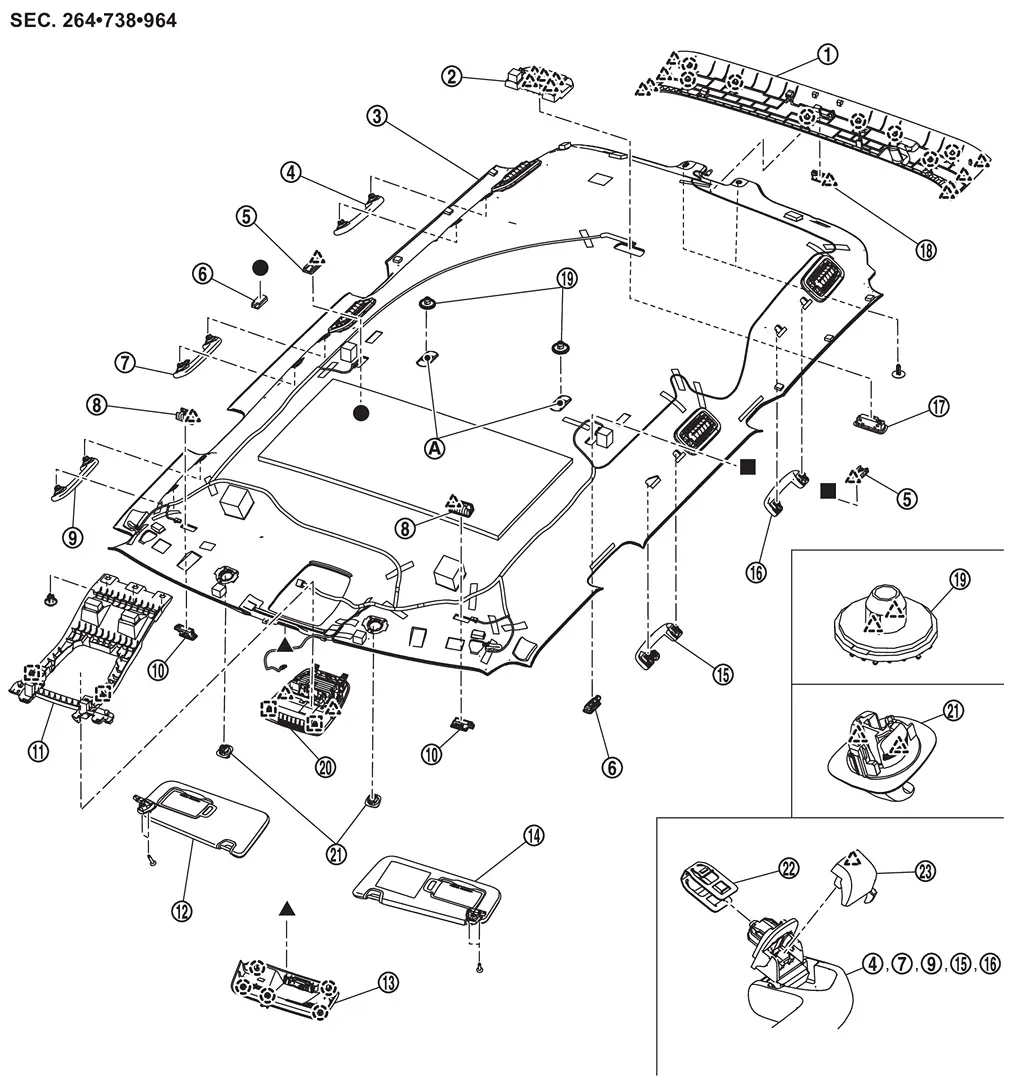
 |
Roof rear garnish |  |
Room lamp bracket |  |
Headlining assembly |
 |
Third assist grip RH |  |
Personal lamp bracket |  |
Personal lamp |
 |
Second assist grip RH |  |
Vanity mirror lamp bracket |  |
Front assist grip RH |
 |
Vanity mirror lamp |  |
Map lamp bracket |  |
Sun visor assembly RH |
 |
Cover |  |
Sun visor assembly LH |  |
Second assist grip LH |
 |
Third assist grip LH |  |
Room lamp |  |
Luggage room lamp |
 |
Trim fastener |  |
Map lamp assembly |  |
Sun visor holder |
 |
Metal clip |  |
Assist grip cap | ||
 |
Dual-lock fastener | ||||
 |
: Clip | ||||
 |
: Pawl | ||||
 |
: Metal clip | ||||
 , , , ,  : Indicates that the part is connected at points with same symbol in actual vehicle. : Indicates that the part is connected at points with same symbol in actual vehicle. |
|||||
With Moonroof Models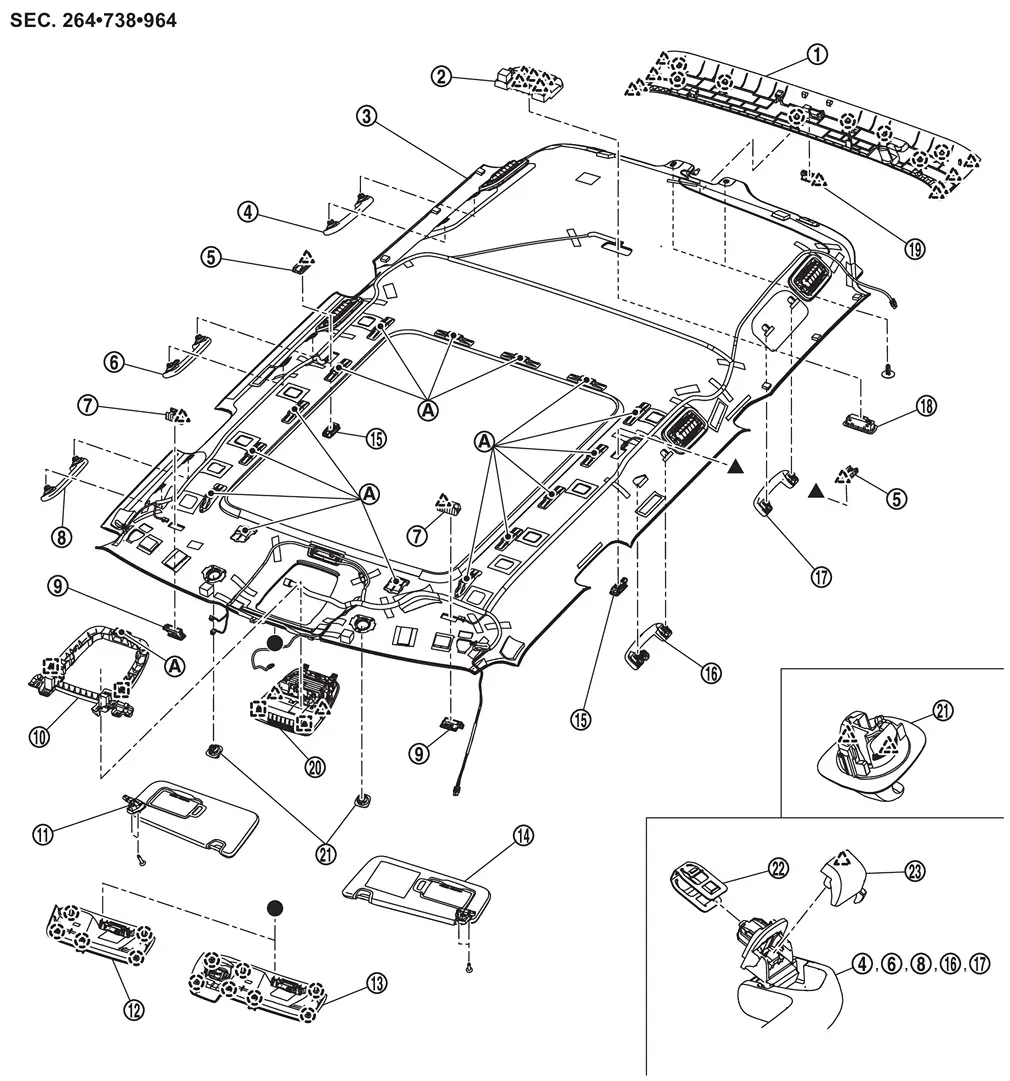
|
Roof rear garnish | |
Room lamp bracket | |
Headlining assembly |
|
Third assist grip RH | |
Personal lamp bracket | |
Second assist grip RH |
|
Vanity mirror lamp bracket | |
Front assist grip RH | |
Vanity mirror lamp |
|
Map lamp bracket | |
Sun visor assembly RH | |
Cover (without driving video recorder system) |
|
Cover (with driving video recorder system) | |
Sun visor assembly LH | |
Personal lamp |
|
Second assist grip LH | |
Third assist grip LH | |
Room lamp |
|
Luggage room lamp | |
Map lamp assembly | |
Sun visor holder |
|
Metal clip | |
Assist grip cap | ||
|
Dual-lock fastener | ||||
|
: Clip | ||||
|
: Pawl | ||||
|
: Metal clip | ||||
| , : Indicates that the part is connected at points with same symbol in actual vehicle. |
|||||
Headlining
Removal and Installation
CAUTION:
- Never damage the roof panel.
- Two workers are required for removal or installation in order to prevent damage.
- Never bend headlining assembly when removing or installing.
REMOVAL
CAUTION:
When removing, always use a remover tool that is made of plastic to prevent damage to the parts.
Remove front pillar garnish (LH and RH). Refer to Removal and Installation.
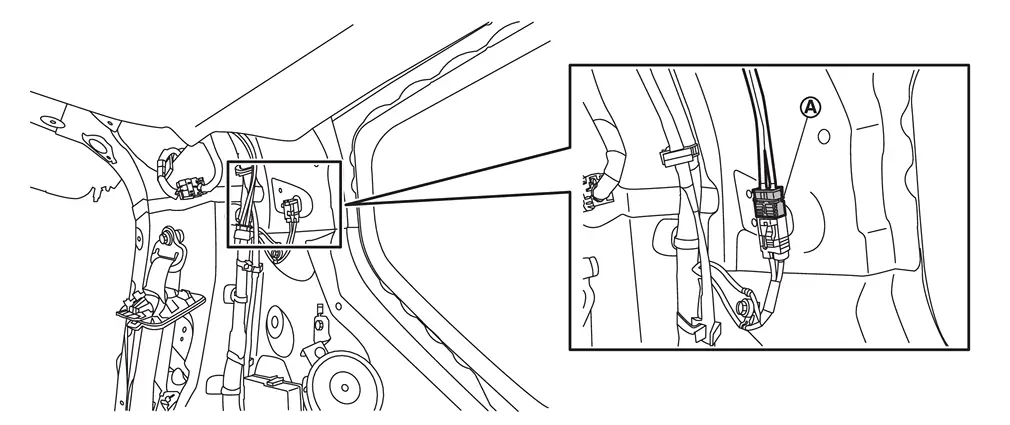
Remove following parts of front pillar LH (if equipped).Disconnect harness connector .
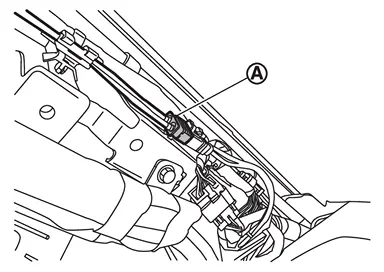
.
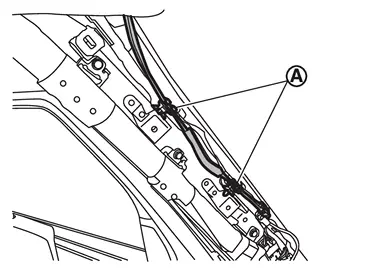
Remove center pillar upper garnish (LH and RH). Refer to Removal and Installation.
Remove luggage side upper finisher (LH and RH). Refer to Removal and Installation.
Remove harness at the rear of headlining assembly (if equipped).Disconnect harness connector .
.
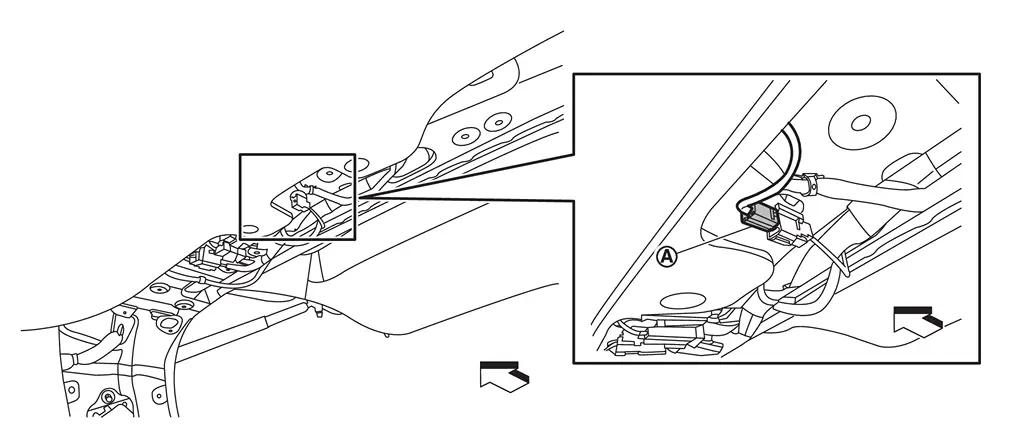
| : vehicle front |
Remove map lamp assembly. Refer to Removal and Installation.
Remove cover of front camera. Refer to Removal and Installation.
Disconnect harness connectors of headlining assembly.Disconnect harness connector from inside mirror. Remove harness from harness clip .
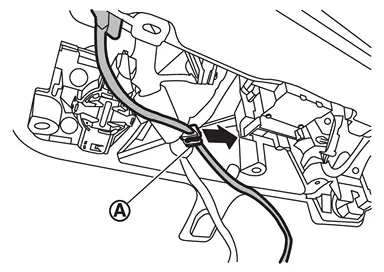
of headlining assembly.
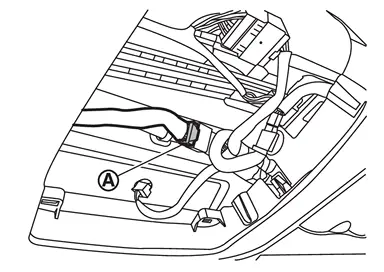
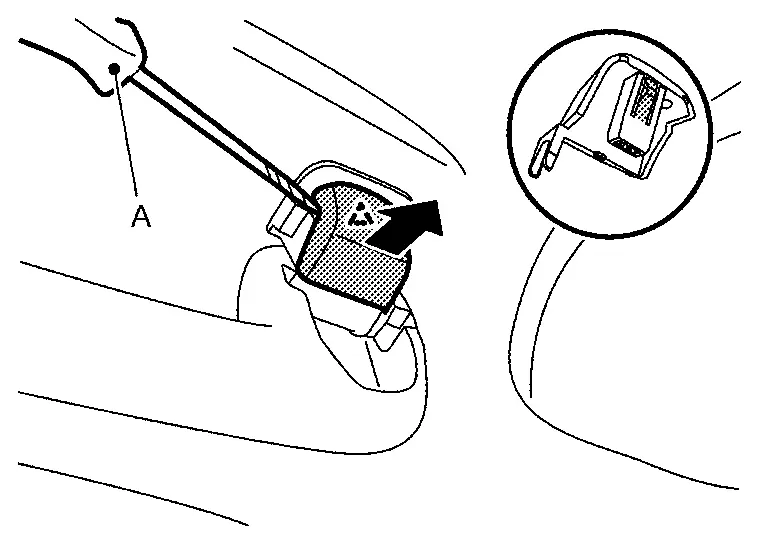
Remove all assist grips.Disengage assist grip cap fixing pawl using a remover tool (A), and then remove assist grip cap.
|
: Pawl |
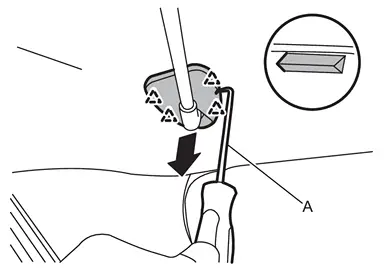
Remove sun visor assembly (LH and RH).Disengage sun visor cover fixing pawls using a remover tool (A), and then remove sun visor cover.
|
: Pawl |
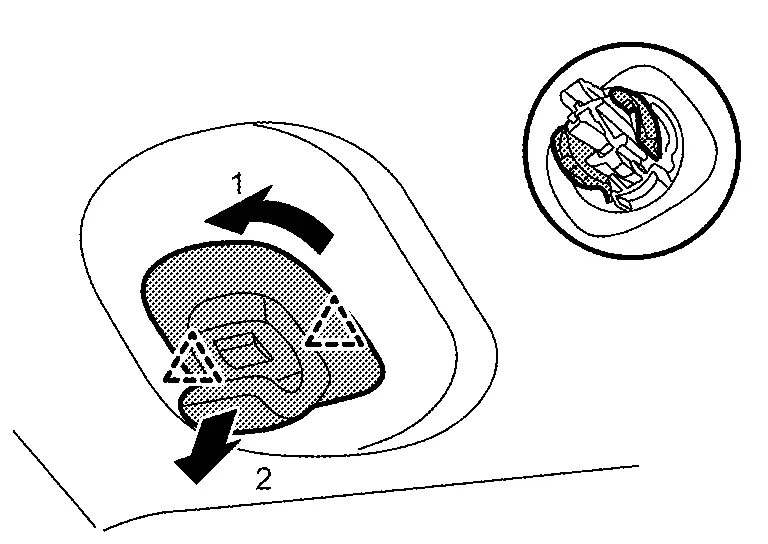
Disengage sun visor holder fixing pawls according to numerical order 1→2 indicated by arrows as shown in the figure, and then remove sun visor holder (LH and RH).
|
: Pawl |
Remove fixing clips at the rear end of headlining assembly.
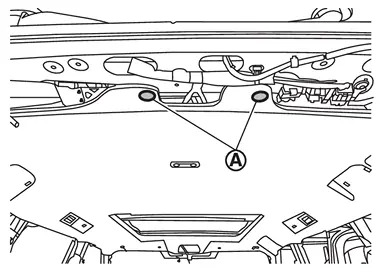
Detach dual-lock fasteners between headlining assembly and roof panel.
-
Without moonroof models
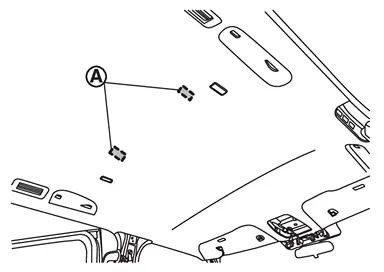
-
With moonroof models
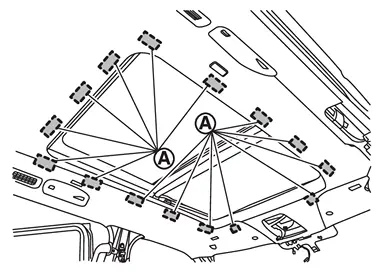
CAUTION:
To prevent damage to headlining assembly, never pull on the headlining base material when remove the dual-lock fasteners.
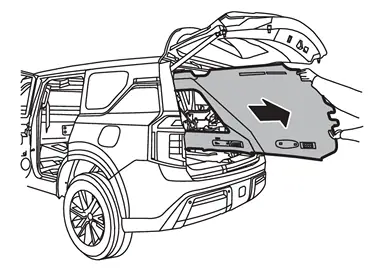
Remove headlining assembly according to direction indicated by arrow as shown in the figure.
CAUTION:
Apply protective tape to the portion where contact may occur during work.
Disengage trim fastener fixing pawls using a remover tool (A), and then remove trim fasteners (with moonroof models).
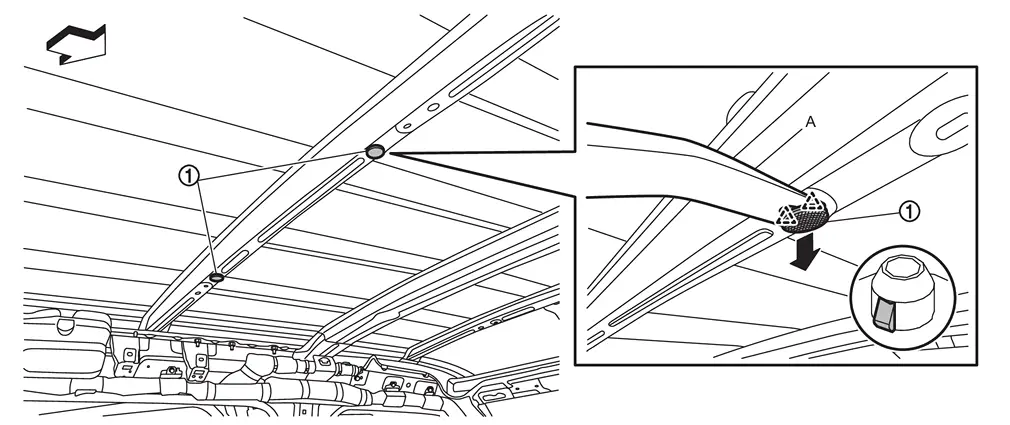
|
: Pawl |
| : vehicle front |
INSTALLATION
Note the following items, and then install in the reverse order of removal.
CAUTION:
-
When installing headlining, start by installing both sun visor holders and headlining fixing clips in order to keep the headlining in position.
-
Visually check clips for deformation and damage during installation. Replace with new ones if necessary.
-
Be careful that the surface is not wrinkled when installing.
-
When installing assist grip, install metal clip
to assist grip cap , and then install to the body panel.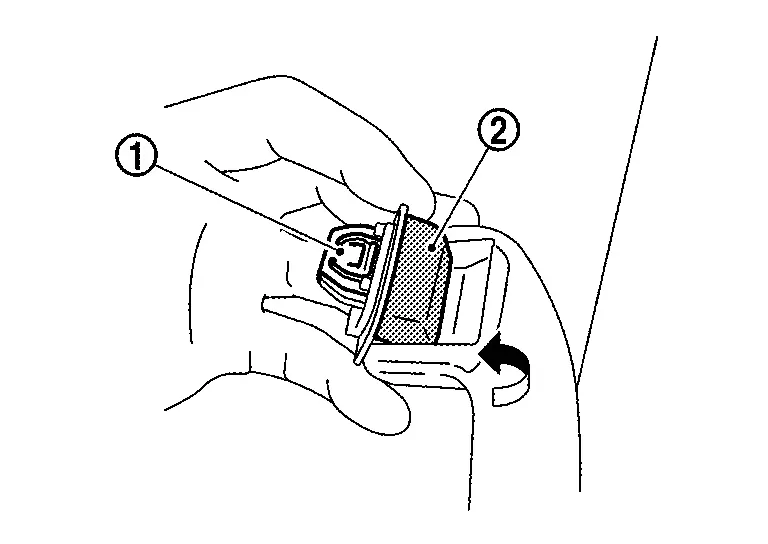
-
After installation, check that the lip of body side welt covers. Refer to Inspection.
-
After installing the sun visor assembly, make sure that the caution label is in the orientation shown when the sun visor assembly is retracted. (For the caution label of driver's seat, when it is equipped.)
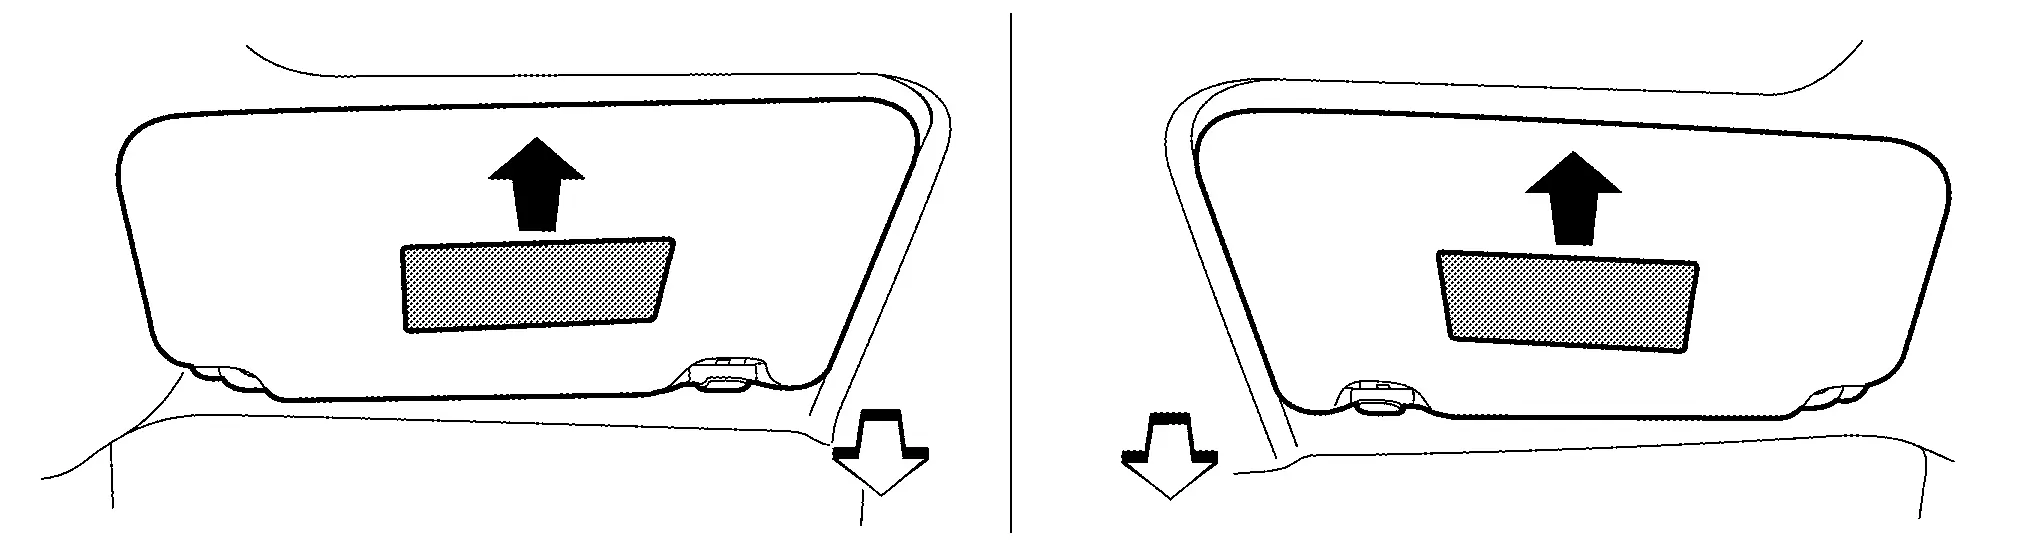

: Caution label upward : vehicle front
Roof Rear Garnish
Removal and Installation
CAUTION:
Never damage the roof panel.
REMOVAL
CAUTION:
When removing, always use a remover tool that is made of plastic to prevent damage to the parts.
Fully open back door.
Release roof rear garnish portion of back door weather-strip. Refer to Removal and Installation.
Release connector tongue of third seat belt retractor from roof rear garnish.
Remove luggage room lamp. Refer to Removal and Installation.
Apply protective tapes (A) on back pillar garnish to protect it from damage.
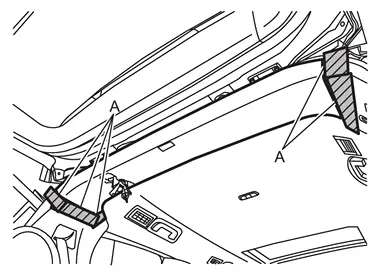
Disengage roof rear garnish fixing clips and pawls using a remover tool (A), and then remove roof rear garnish.
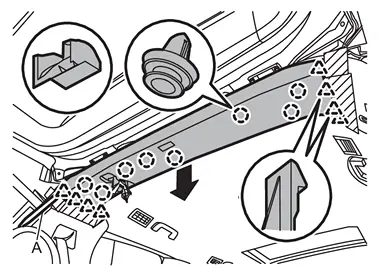
|
: Clip |
|
: Pawl |
INSTALLATION
Note the following items, and then install in the reverse order of removal.
CAUTION:
-
Visually check clips for deformation and damage during installation. Replace with new ones if necessary.
-
Check in advance that clips are accurately aligned with the portions on body panel, and then install by pressing in.
Other materials
Does Not Restart After the Stop/start System Is Activated
Diagnosis Procedure
CHECK SYMPTOM
Check the symptoms.
A stop/start indicator lamp turned on, and did an engine perform a stall at the time of restart from a stop/start system?
YES>>
GO TO 2.
NO>>
Refer to Symptom Table.
CHECK STOP/START PROHIBIT CAUSE
With CONSULT
Select “Stop/Star ...
Active Grille Shutter
Exploded View
With Flap
Active grille shutter
: Clip
Without Flap
Active grille shutter
: Clip
Removal and Installation
REMOVALRemove front combination lamp. Refer to Remova ...
Audio Amp.
Exploded View
Audio amp.
Bracket RH
Bracket LH
: vehicle front
Removal & Installation
CAUTION:
Before replacing audio amp, perform "ADDITIONAL SERVICE WHEN REPLACING audio AMP". Refer to Work Procedure.REMOVALRemove luggage side lower finisher RH. Refer to Removal and Installation ...