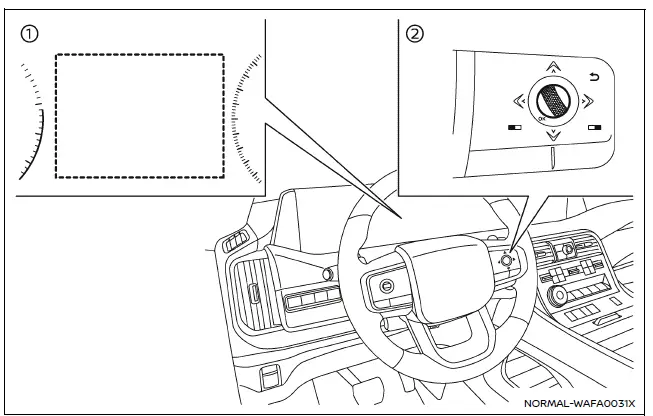
- Vehicle information display
- Steering-wheel-mounted control (right side)
The Nissan Armada sonar system is automatically activated when the ignition is in the ON position and the transmission is placed in D (Drive) or R (Reverse), ensuring immediate assistance during low-speed maneuvers.
To customize the sonar system settings in the Nissan Armada, follow these steps carefully:
1. Press the
 button until "Settings" appears in the vehicle information display, then press the
scroll dial. Use the scroll dial to navigate to "Driver Assistance" and confirm
your selection.
button until "Settings" appears in the vehicle information display, then press the
scroll dial. Use the scroll dial to navigate to "Driver Assistance" and confirm
your selection.
2. Select "Parking Assist" and press the scroll dial to access sonar-related settings.
3. Navigate through the menu using the scroll dial to configure the following Nissan Armada features:
- Rear Cross Traffic Alert
- Enables or disables the Rear Cross Traffic Alert system for safer reversing.
- Moving Object (if so equipped)
- Turns ON/OFF the Moving Object Detection (MOD) system for enhanced awareness.
- Front Sonar
- Activates or deactivates the front sonar sensors in the Nissan Armada.
- Rear Sonar
- Activates or deactivates the rear sonar sensors.
- Sonar Distance
- Adjusts detection sensitivity to "Long," "Medium," or "Short" depending on driving preferences.
- Auto Show Sonar
- Displays the sonar view automatically in the Nissan Armada information display when sensors detect nearby objects.
- Sonar Volume
- Adjusts the alert tone volume to "High," "Medium," or "Low" for optimal audibility.
Other materials
Rear Door Finisher
Exploded View
Rear door panel
Inside seal
Rear door sash inner cover
Pull handle cap
Inside handle cap
Rear door finisher
Pull handle bracket
Grommet
: Clip
: Pawl
: N·m (kg-m, in-lb)
Rear Door Finisher
Removal and Installation
CAUTION:
Never da ...
Instrument Panel Assembly
Exploded View
INSTRUMENT PANEL ASSEMBLY
Front speaker grille*1
Display unit cover
Display unit
Instrument panel assembly
Instrument mask LH
Instrument finisher A
Display unit finisher LH
Instrument pad A
Steering column cover upper
Steering column cover lower
Instrum ...
Perform the Steering Column Position Learning
Description
Perform the steering column position learning when the following conditions are performed. For details, refer to Work Procedure.
Replacing steering column control module.
Steering column does not operate normally.
Work Procedure
CHOOSE METHOD
There are two ways of learning method.
Which ...