Removal and Installation
REMOVAL
CAUTION:
When removing, always use a remover tool that is made of plastic to prevent damage to the parts.
Luggage Floor Rear Board
Remove luggage floor box. Refer to Removal and Installation.
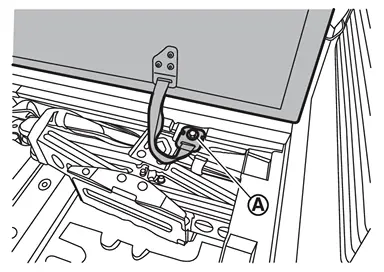
Remove belt bracket mounting bolt  of luggage floor rear board, and then remove luggage floor rear board.
Luggage Floor Board RH
Fold down the third seat RH forward.
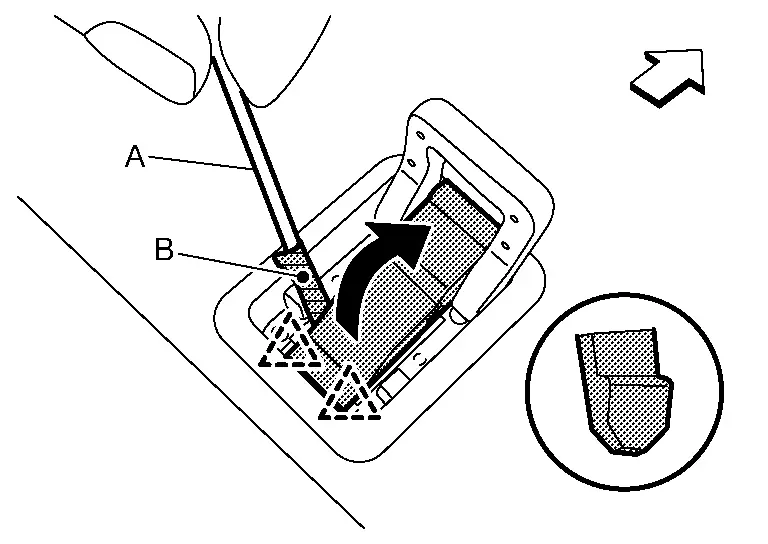
Remove rope hook.Disengage rope hook cover fixing pawls using a remover tool (A), and then open rope hook cover.
CAUTION:
Use a remover tool wrapped in protective tape (B) to prevent damage the parts.
 |
: Pawl |
| : vehicle front |
, and then remove rope hook.
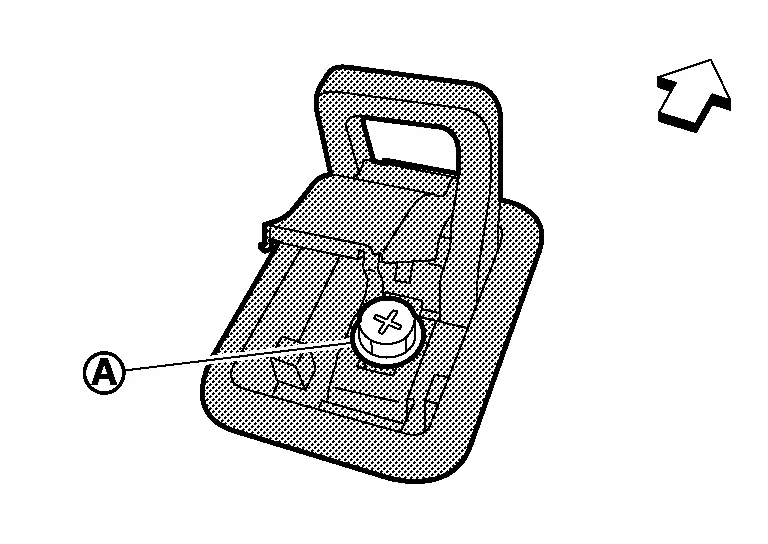
| : vehicle front |
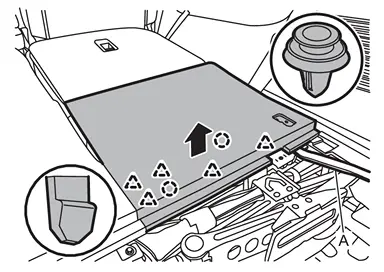
Disengage luggage floor board RH fixing pawls and clips using a remover tool (A), and then remove luggage floor board RH.
 |
: Clip |
|
: Pawl |
Luggage Floor Board LH
Remove luggage floor board RH.
Fold down the third seat LH forward.
Remove rope hook.Disengage rope hook cover fixing pawls using a remover tool (A), and then open rope hook cover.
CAUTION:
Use a remover tool wrapped in protective tape (B) to prevent damage the parts.
|
: Pawl |
| : vehicle front |
, and then remove rope hook.
| : vehicle front |
Disengage luggage floor board LH fixing pawls and clips using a remover tool (A), and then remove luggage floor board LH.
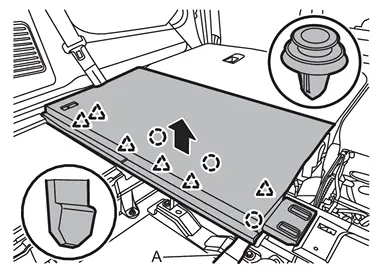
|
: Clip |
|
: Pawl |
Luggage Floor Bracket
Remove luggage floor board (LH and RH).
Remove luggage floor bracket mounting bolts .
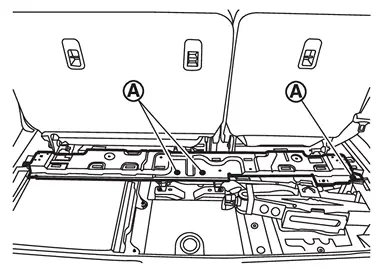
Remove rear outer side mounting nuts of third seat. Refer to Removal and Installation.
Remove luggage floor bracket.
INSTALLATION
Note the following items, and then install in the reverse order of removal.
CAUTION:
-
Visually check clips for deformation and damage during installation. Replace with new ones if necessary.
-
When installing luggage floor board, check that clips and pawls are securely fitted in luggage floor bracket holes and press them in.
Other materials
Brake System Tools and Preparation
Commercial Service Tool
Tool name
Description
Flare nut torque wrench
a: 10 mm (0.39 in), 11 mm (0.43 in), 12 mm (0.47 in)
Installing brake piping
Brake caliper wrench
Return the piston (Front brake caliper)
Brake caliper wrench
Return the piston (Rear brake caliper)
Lu ...
Intake Sensor
Exploded View
Refer to Exploded View.
Removal and Installation
REMOVALRemove front evaporator. Refer to Removal and Installation.
Disconnect sub harness connector from intake sensor harness connector.
Remove intake sensor harness connector from front case upper.
Remove intake sensor from front ...
Rear Door Glass
Exploded View
Rear door glass run
Rear door panel
Hole seal 1
Hole seal 2
Rear door glass
Rear door lower sash upper
Rear door lower sash lower
Rear door inner frame rear
Rear door inner frame front
Rear door regulator assembly
Rear door power window motor
Rear ...