Removal and Installation
CAUTION:
Never damage the body panel.
REMOVAL
CAUTION:
When removing, always use a remover tool that is made of plastic to prevent damage to the parts.
Remove luggage floor box. Refer to Removal and Installation.
Release luggage rear plate portion of back door weather-strip. Refer to Removal and Installation.
Remove luggage rear plate mask.Apply protective tape (A) on luggage rear plate to protect it from damage.
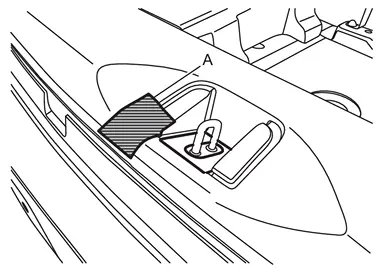
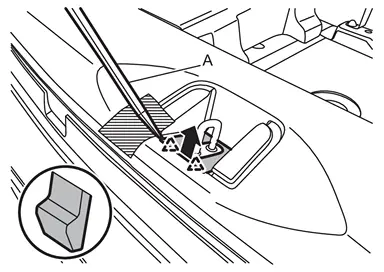
 |
: Pawl |
Apply protective tapes (A) on body panel to protect it from damage.
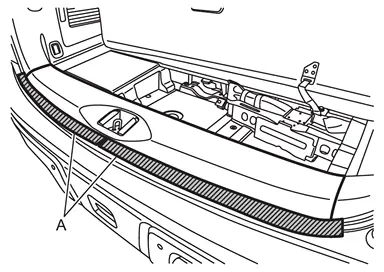
Disengage luggage rear plate fixing clips and pawls using a remover tool (A), and then remove luggage rear plate.
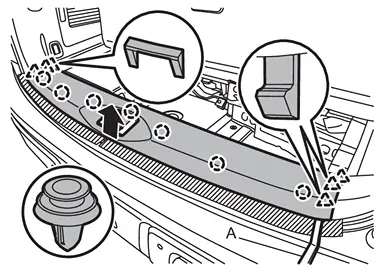
 |
: Clip |
|
: Pawl |
INSTALLATION
Note the following items, and then install in the reverse order of removal.
CAUTION:
-
Visually check clips for deformation and damage during installation. Replace with new ones if necessary.
-
Check in advance that clips and pawls are accurately aligned with the portions on body panel, and then install by pressing in.
Other materials
Rear Propeller Shaft
Inspection
WARNING:
Jacking up or lift up the vehicle may the vehicle height to go down which cause a personal injury and/or damage to the air suspension component parts. Refer to Precaution for when Jacking and Lifting Up the vehicle with Electronic Air Suspension System.
LOOSENESS OF CONNECT ...
Hood Hinge
Removal and Installation
REMOVALRemove hood assembly. Refer to Removal and Installation.
Remove front fender assembly. Refer to Removal and Installation.
Remove hood hinge mounting bolts, and then remove hood hinge.INSTALLATIONNote the following items, and then install in the reverse order of remova ...
Diagnosis and Repair Work Flow
Work Flow
OVERALL SEQUENCEDETAILED FLOWINTERVIEW FOR MALFUNCTION
It is also important to clarify the customer concerns before starting the inspection. Interview the customer about the concerns carefully and understand the symptoms fully.
NOTE:
The customers are not professionals. Never assume that ...