Exploded View
Without Moonroof Models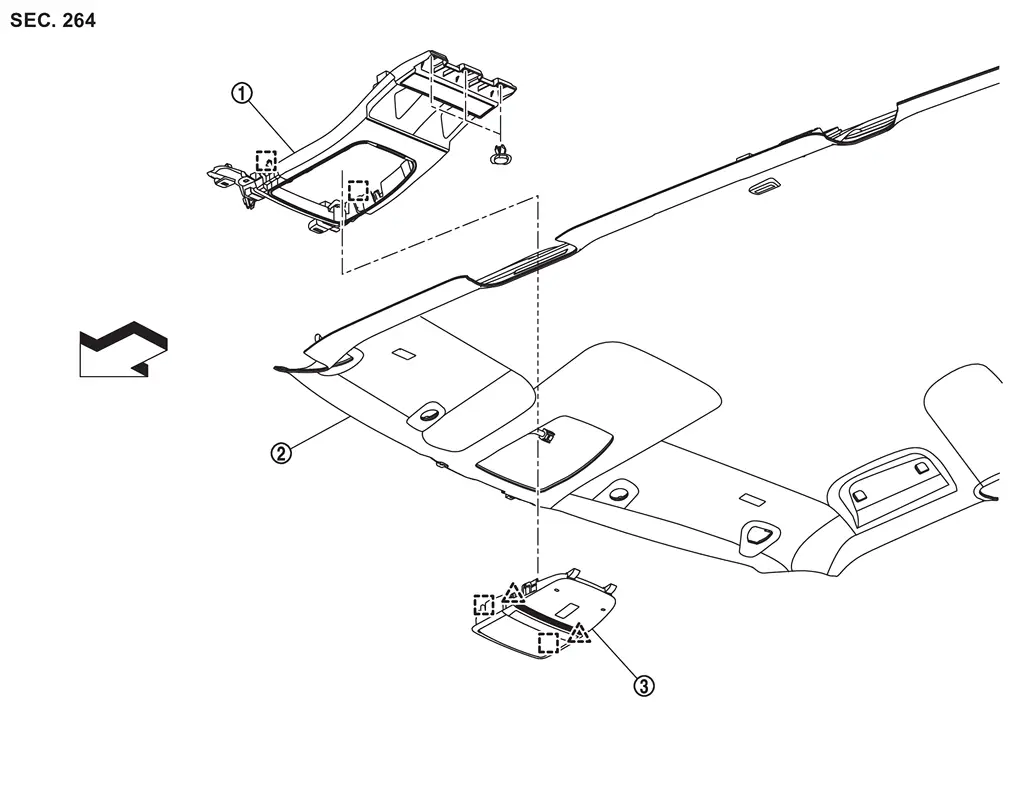
 |
Map lamp bracket |  |
Headlining assembly |  |
Map lamp assembly |
 |
: Pawl | ||||
 |
: Metal clip | ||||
| : vehicle front | |||||
With Moonroof Models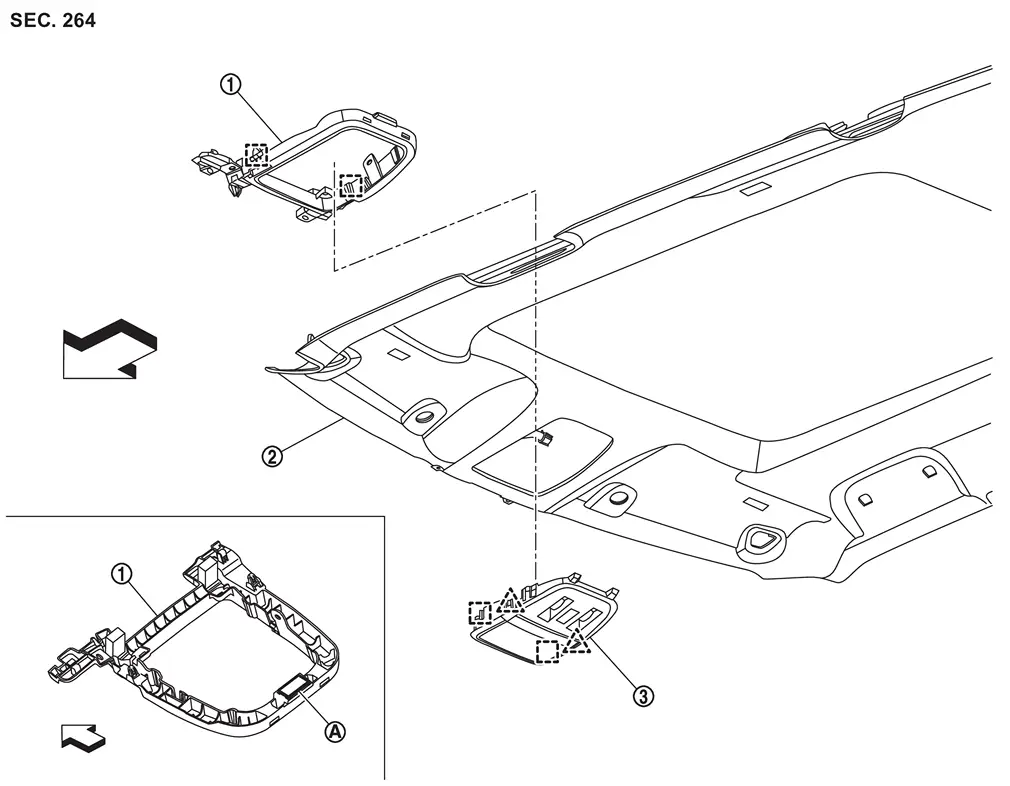
|
Map lamp bracket | |
Headlining assembly | |
Map lamp assembly |
 |
Dual-lock fastener | ||||
|
: Pawl | ||||
|
: Metal clip | ||||
| : vehicle front | |||||
Map Lamp
Removal and Installation
CAUTION:
Disconnect the battery negative terminal or remove power circuit fuse when performing the operation for preventing electric leakage. Refer to Precautions for Removing Battery Terminal.
REMOVAL
CAUTION:
When removing, always use a remover tool that is made of plastic to prevent damage to the parts.
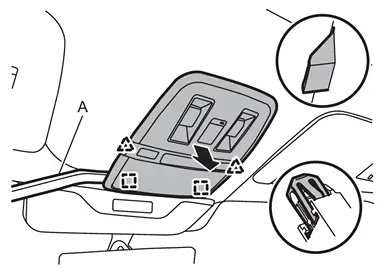
Disengage map lamp assembly fixing metal clips and pawls using a remover tool (A), and then pull out map lamp assembly from headlining assembly.
|
: Pawl |
|
: Metal clip |
Disconnect harness connectors, and then remove map lamp assembly.
INSTALLATION
Install in the reverse order of removal.
Replacement
CAUTION:
-
Disconnect the battery negative terminal or remove power circuit fuse when performing the operation for preventing electric leakage. Refer to Precautions for Removing Battery Terminal.
-
Replacement of a single part is not possible due to the integrated structure with map lamp assembly. When replacement, replace map lamp assembly as a single part. Refer to Removal and Installation.
Map Lamp Bracket
Removal and Installation
REMOVAL
Remove headlining assembly. Refer to Removal and Installation.
Disengage body harness fixing clips , and then remove body harness from map lamp bracket.
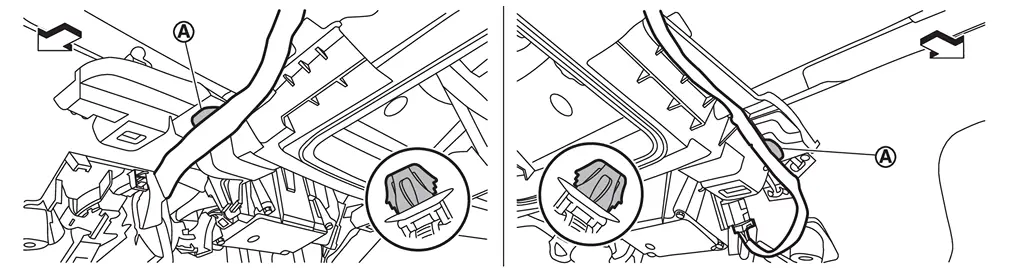
| : vehicle front |
Remove map lamp bracket.
- Without moonroof models
- Remove map lamp bracket fixing clips .
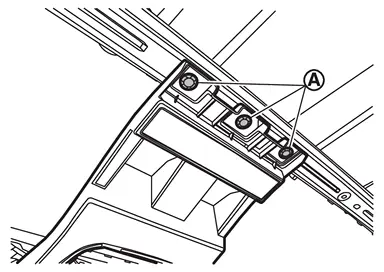
- Disengage fixing metal clips, and then remove map lamp bracket.
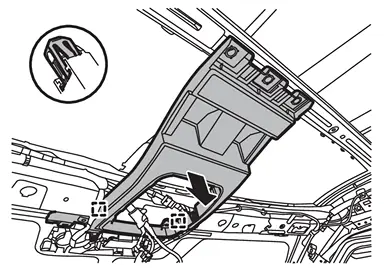
: Metal clip
- Remove map lamp bracket fixing clips
- With moonroof models
Disengage fixing metal clips and dual-lock fastener
according to numerical order 1→2 indicated by arrows as shown in the figure, and then remove map lamp bracket.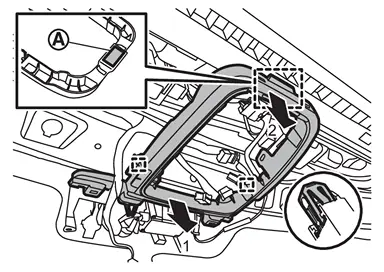
: Metal clip
INSTALLATION
Install in the reverse order of removal.
Other materials
Rear Door Alert
In the Nissan Armada, the Rear Door Alert system is designed as a helpful reminder
feature that alerts the driver when there may be an item or passenger left in the
rear seats. Always check the rear seating area before exiting the Nissan Armada
to ensure safety.
The Rear Door Alert system in ...
Rear Propeller Shaft
Inspection
WARNING:
Jacking up or lift up the vehicle may the vehicle height to go down which cause a personal injury and/or damage to the air suspension component parts. Refer to Precaution for when Jacking and Lifting Up the vehicle with Electronic Air Suspension System.
LOOSENESS OF CONNECT ...
Back Door Lock
Exploded View
Back door touch sensor*1
Back door lock & closure assembly
Back door panel
Back door stay lower bracket
Spindle unit*1
Spindle unit bracket upper*1
Bracket cover*2
Hands free control unit*2
Hands free sensor bracket*2
Hands free sensor upper*2
Hands free ...