Disassembly and Assembly
CAUTION:
When disassemble, always use a remover tool that is made of plastic to prevent damage.
OUTSIDE SEAT CUSHION FINISHER OUTER
Disassembly
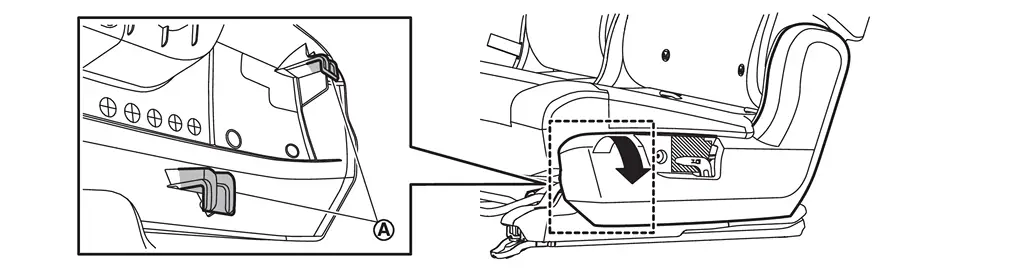
Disengage fixing pawls, and then remove reclining knob cap.
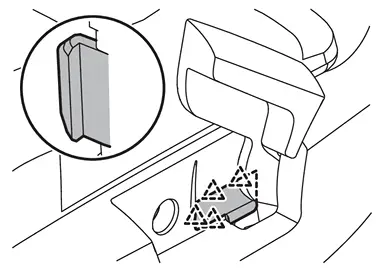
 |
: Pawl |
Disengage fixing portion  using a remover tool (A) according to numerical order 1→2 indicated by arrows as shown in the figure, and then remove reclining knob.
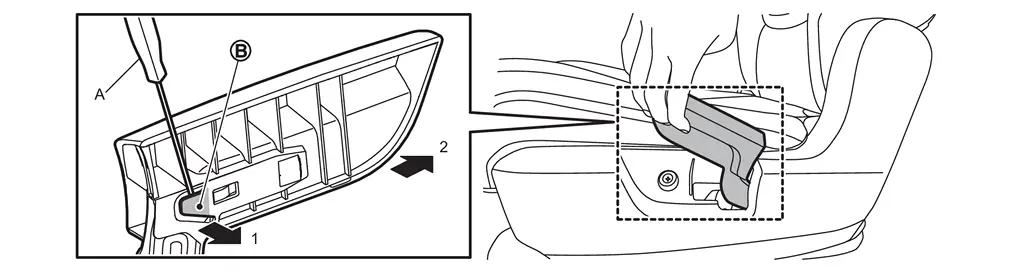
Remove outside seat cushion finisher outer.Remove outside seat cushion finisher outer fixing screw  .
.
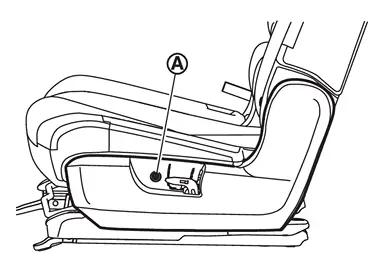
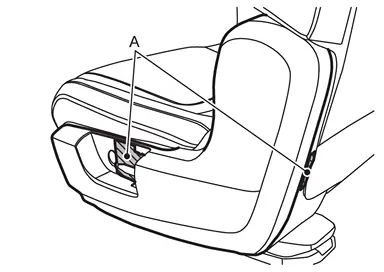
.
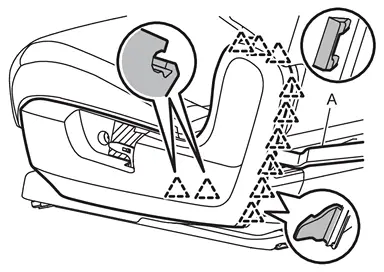
|
: Pawl |
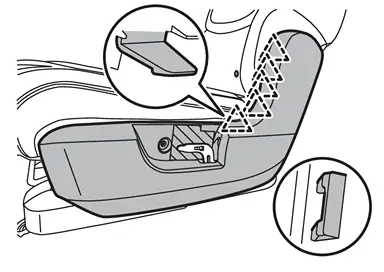
|
: Pawl |
Assembly
Assemble in the reverse order of disassembly.
INSIDE SEAT CUSHION FINISHER OUTER
Disassembly
Apply protective tapes (A) to prevent damage.
-
LH seat
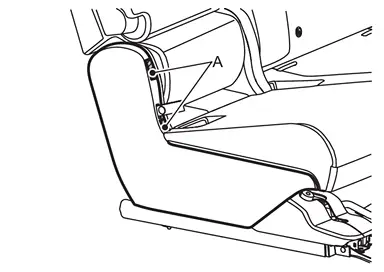
-
RH seat
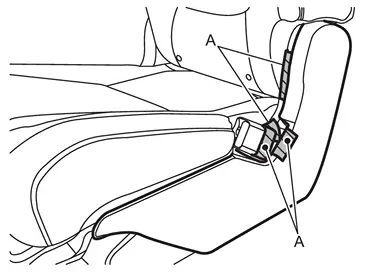
Disengage fixing portion and clip.
-
LH seat
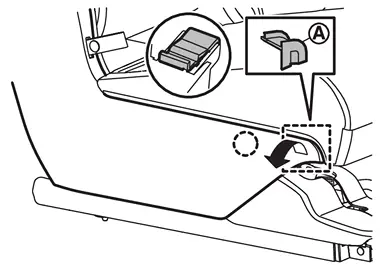

: Clip -
RH seat
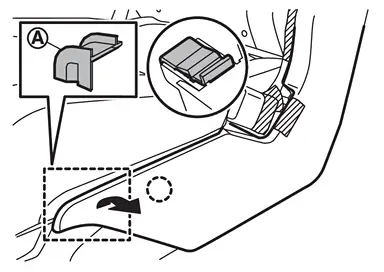
: Clip
Disengage fixing pawls and clip (LH seat) using a remover tool (A).
-
LH seat
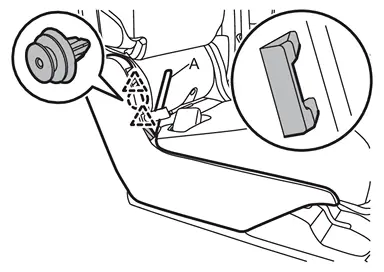
: Clip : Pawl -
RH seat
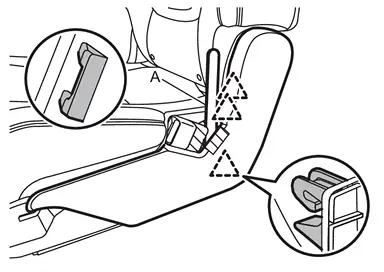
: Pawl
Disengage fixing pawls using a remover tool (A).
-
LH seat
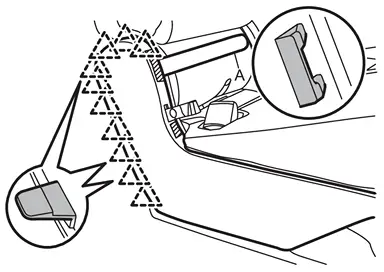
: Pawl -
RH seat
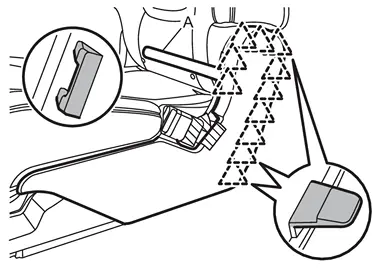
: Pawl
Disengage fixing portion and pawl(s), and then remove inside seat cushion finisher outer.
-
LH seat
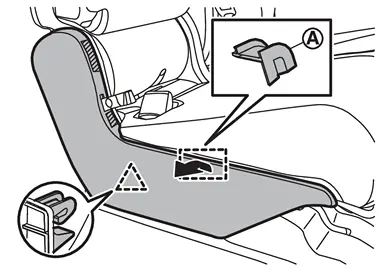
: Pawl -
RH seat
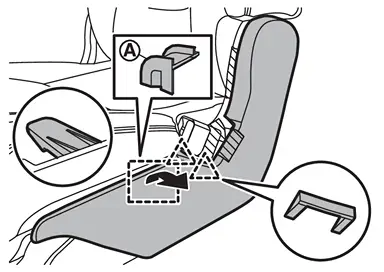
: Pawl
Assembly
Assemble in the reverse order of disassembly.
INSIDE / OUTSIDE SEAT CUSHION FINISHER INNER
Disassembly
Remove seat cushion trim and pad. Refer to Disassembly and Assembly.
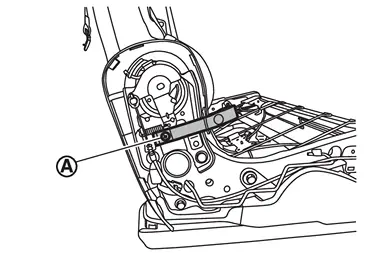
Remove fixing screw , and then remove reclining strap (LH seat).
Disengage fixing clip, and then remove inside and outside seat cushion finisher inner.
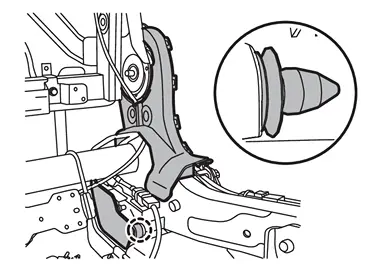
|
: Clip |
Assembly
Assemble in the reverse order of disassembly.
OUTSIDE SEAT CUSHION LOWER COVER OUTER
Disassembly
Remove outside striker cover.
Disengage fixing pawls and metal clips according to numerical order 1→3 indicated by arrows as shown in the figure, and then remove outside seat cushion lower cover outer.
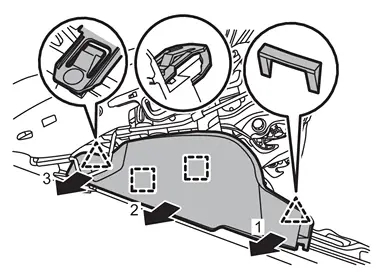
|
: Pawl |
 |
: Metal clip |
Assembly
Assemble in the reverse order of disassembly.
INSIDE SEAT CUSHION LOWER COVER OUTER
Disassembly
Remove inside striker cover.
Disengage fixing pawls and metal clips according to numerical order 1→3 indicated by arrows as shown in the figure, and then remove inside seat cushion lower cover outer.
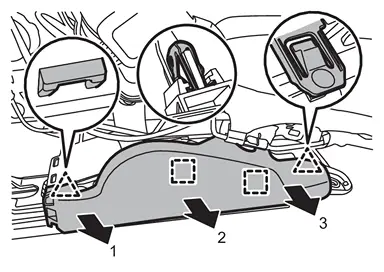
|
: Pawl |
|
: Metal clip |
Assembly
Assemble in the reverse order of disassembly.
OUTSIDE SEAT CUSHION LOWER COVER INNER
Disassembly
Remove outside seat cushion lower cover outer.
Disengage harness fixing clip from outside seat cushion lower cover inner.
CAUTION:
Before performing removal operation, check the installation position of harness fixing clip.
Disengage fixing metal clips, and then remove outside seat cushion lower cover inner.
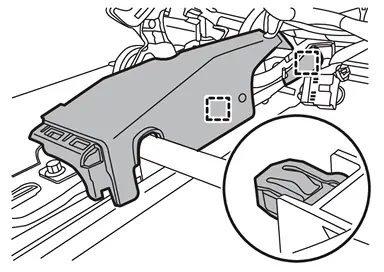
|
: Metal clip |
Assembly
Assemble in the reverse order of disassembly.
INSIDE SEAT CUSHION LOWER COVER INNER
Disassembly
Remove inside seat cushion lower cover outer.
Disengage harness fixing clip from inside seat cushion lower cover inner.
CAUTION:
Before performing removal operation, check the installation position of harness fixing clip.
Disengage fixing metal clips, and then remove inside seat cushion lower cover inner.
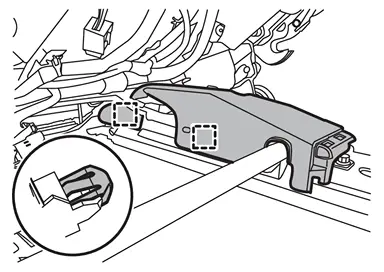
|
: Metal clip |
Assembly
Assemble in the reverse order of disassembly.
INSIDE / OUTSIDE SLIDE FINISHER
Disassembly
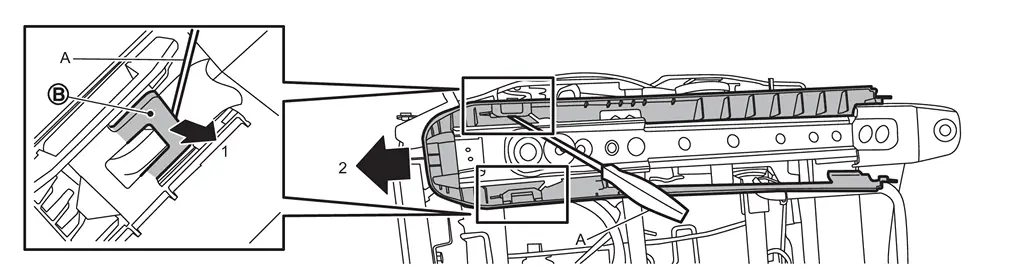
Remove fixing clips using a remover tool (A).
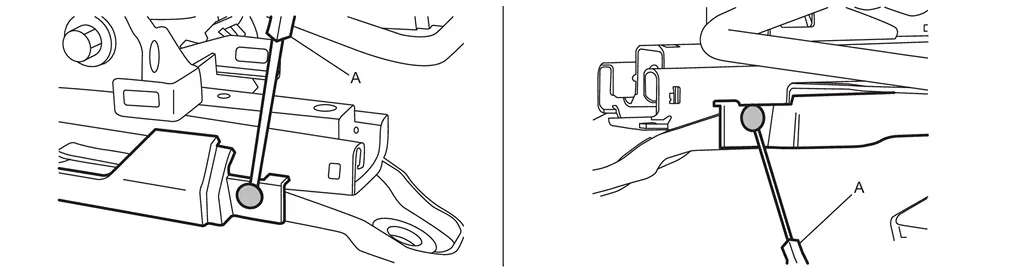
Disengage fixing portion using a remover tool (A) according to numerical order 1→2 indicated by arrows as shown in the figure, and then remove inside and outside slide finisher.
Assembly
Assemble in the reverse order of disassembly.
INSIDE / OUTSIDE STRIKER COVER
Disassembly
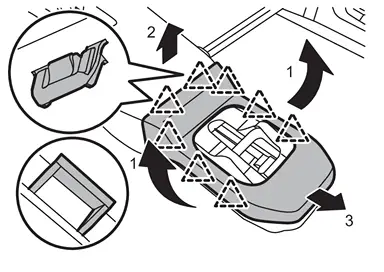
Disengage fixing pawls according to numerical order 1→3 indicated by arrows as shown in the figure, and then remove inside and outside striker cover.
|
: Pawl |
Assembly
Assemble in the reverse order of disassembly.
Other materials
Heater & Air Conditioning System Tools and Preparation
Commercial Service Tools
HFO-1234yf (R-1234yf) Service Tool and Equipment
Never mix HFO-1234yf (R-1234yf) refrigerant and/or its specified lubricant with CFC-12 (R-12) or HFC-134a (R-134a) refrigerant and/or its lubricant.
Separate and non-interchangeable service equipment must be used for handli ...
Repairing Material
Foam Repair
During factory body assembly, foam insulators are installed in certain body panels and locations around the vehicle. Use the following procedure(s) to replace any factory-installed foam insulators.URETHANE FOAM APPLICATIONSUse commercially available Urethane foam for sealant (foam materi ...
Around View Monitor Control Unit
Removal and Installation
REMOVALRemove front seat LH. Refer to Removal and Installation.
Remove front kicking plate inner LH and rear kicking plate inner LH. Refer to Removal and Installation.
Remove dash side finisher LH. Refer to Removal and Installation.
Remove center pillar lower garnish LH. Ref ...