Exploded View
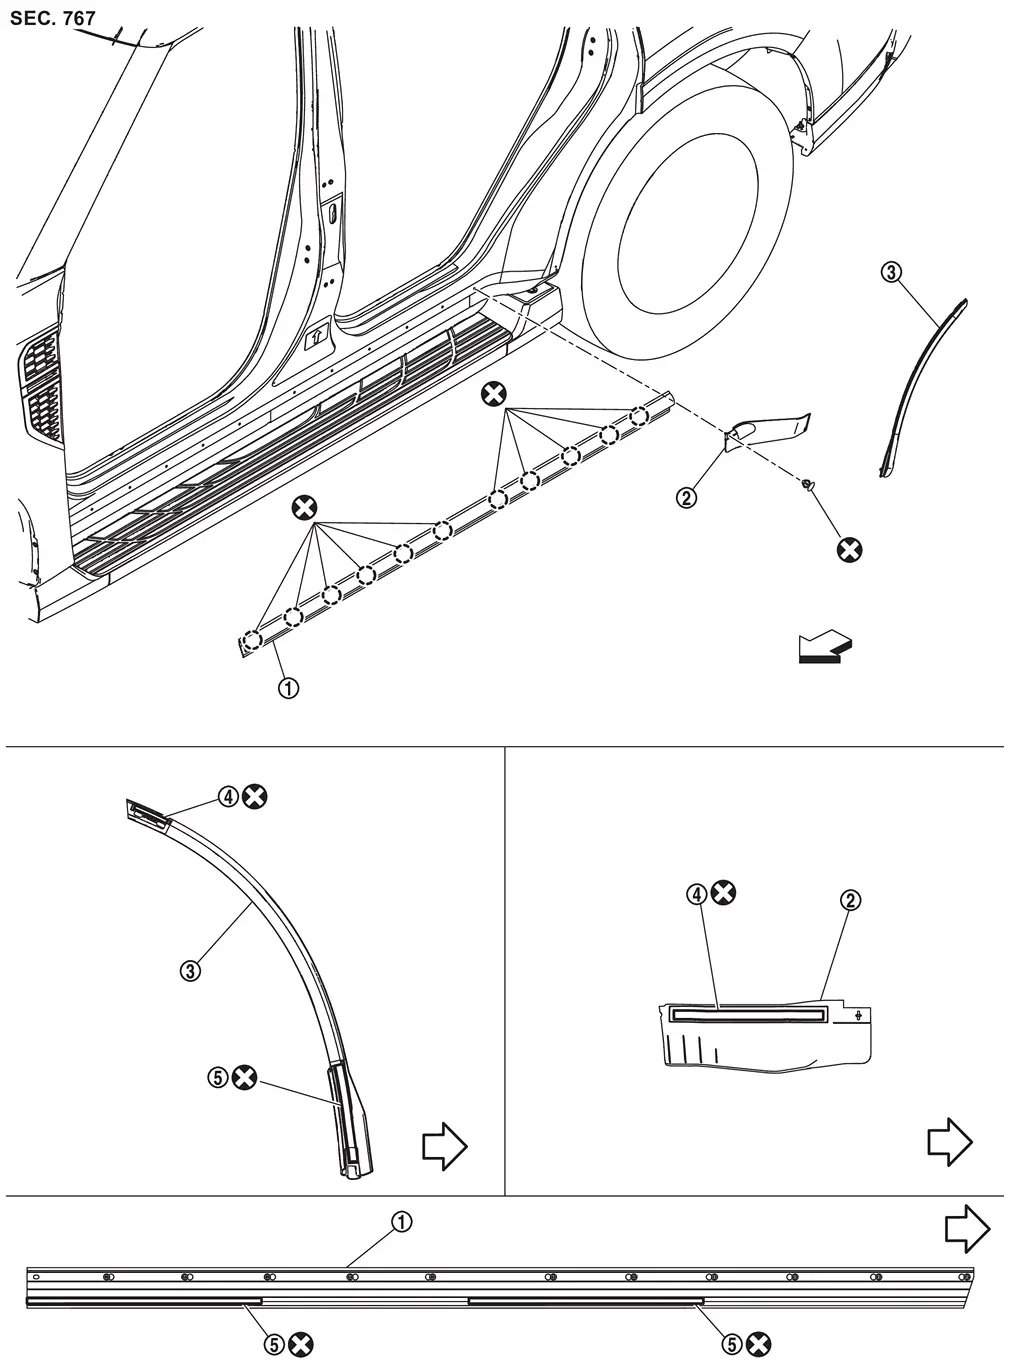
 |
Parting seal A |  |
Parting seal B |  |
Parting seal C |
 |
Double-sided tape [t: 0.8 mm (0.031 in)] |
 |
Double-sided tape [t: 2.5 mm (0.098 in)] |
||
 |
: Clip | ||||
| : vehicle front | |||||
 |
: Always replace after every disassembly. | ||||
Removal and Installation
REMOVAL
CAUTION:
Never use a material for remover tool which could damage body side panel.
Fully open front door and rear door.
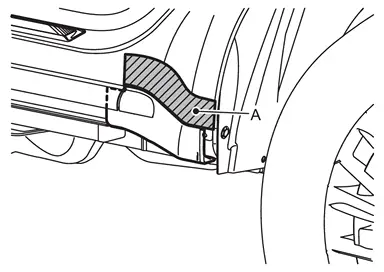
Apply a protective tape (A) on the parts to protect it from damage.
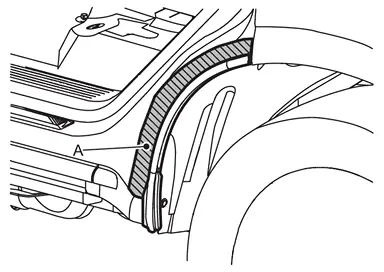
Cut double-sided tapes using a remover tool (A) and cutter (B), and then remove parting seal C.
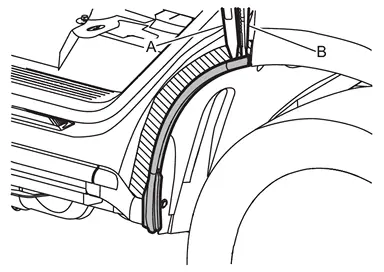
CAUTION:
Remove double-sided tape remaining on parting seal and body side panel with a double-sided tape remover after removing parting seal C.
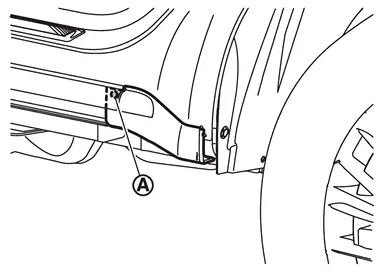
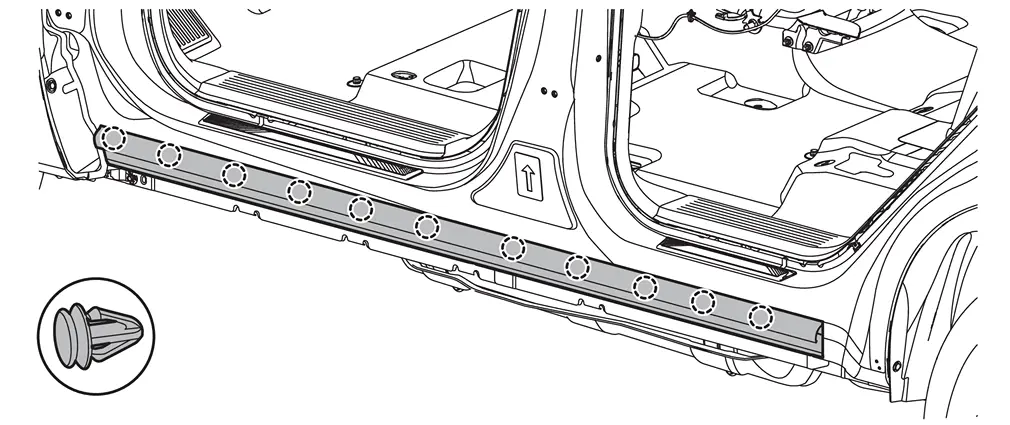
Remove parting seal B fixing clip  .
.
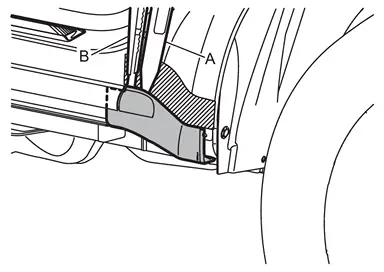
Apply a protective tape (A) on the parts to protect it from damage.
Cut double-sided tape using a remover tool (A) and cutter (B), and then remove parting seal B.
CAUTION:
Remove double-sided tape remaining on parting seal and body side panel with a double-sided tape remover after removing parting seal B.
Disengage fixing clips and peel off double-sided tapes from vehicle body, and then remove parting seal A.
CAUTION:
Remove double-sided tape remaining on parting seal and body side panel with a double-sided tape remover after removing parting seal A.
|
: Clip |
INSTALLATION
Note the following items, and then install in the reverse order of removal.
CAUTION:
-
Always replace double-sided tape with a new one, if parting seal is reused.
-
Degrease parting seal mounting surface of body side panel.
-
Paint grain or dust on mounting surface of parting seal may spoil exterior appearance if it remains. Clean the mounting surface and check that no paint grain or dust remains, before starting the operation.
-
Always replace clips with new ones, if parting seal is reused.
-
Never wash the vehicle within 24 hours after installing so as to keep adhesive.
 NOTE:
NOTE:
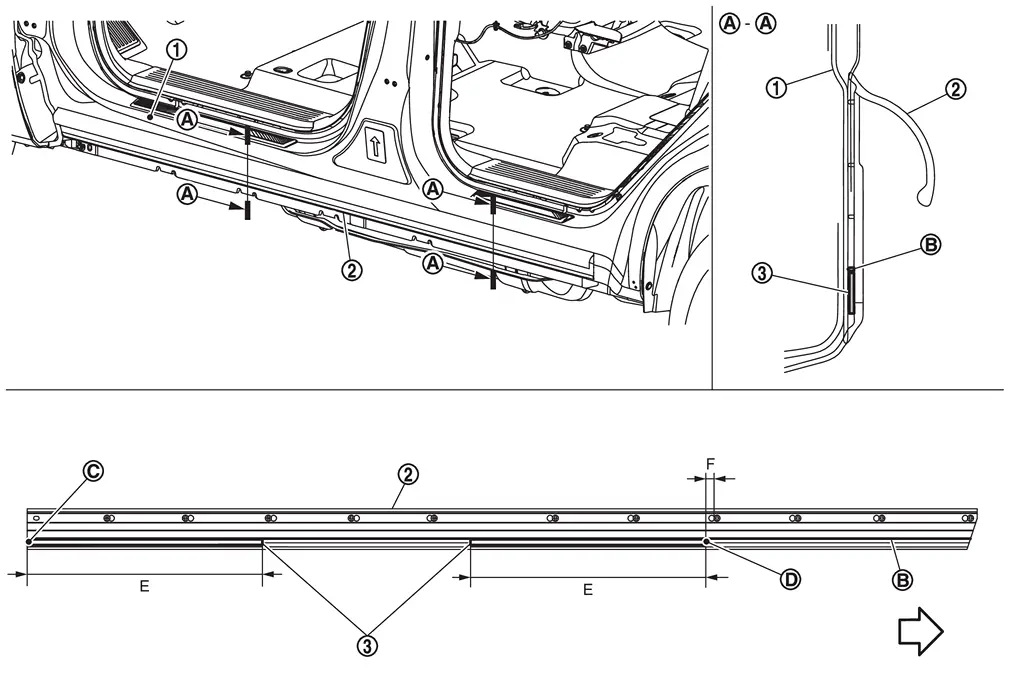
Refer to the figure below for the double-sided tapes mounting position of parting seal A.
|
Body side panel | |
Parting seal A | |
Double-sided tape [t: 2.5 mm (0.098 in)] |
 |
Rib |  |
Edge of parting seal A |  |
Edge of Double-sided tape |
| : vehicle front | |||||
| E | : 420.0 mm (16.535 in) |
| F | : 30.0 mm (1.181 in) |
Other materials
Hill descent control system
Basic information
WARNING
Do not rely solely on the Hill Descent Control system in the Nissan Armada
to regulate speed on steep downhill slopes. Always maintain full control of
the vehicle and use the brake pedal when necessary. Extra caution is required
on slippery, muddy, icy, or ext ...
Sunload Sensor
Exploded View
Sunload sensor
Front speaker grille
: Pawl
: vehicle front
Removal and Installation
REMOVALRemove front speaker grille. Refer to Removal and Installation.
Disengage fixing pawls, and then push down sunload sensor and remove it.
: Pawl
INSTALLATIONIn ...
Intelligent Rear View Mirror Camera
Exploded View
Back door panel
Intelligent rear view mirror camera
Intelligent rear view mirror camera harness connector
: vehicle front
: N·m (kg-m, in-lb)
Removal and Installation
REMOVALRemove back door inner finisher. Refer to Removal and Installation.
Disconnect intelligent r ...