Exploded View
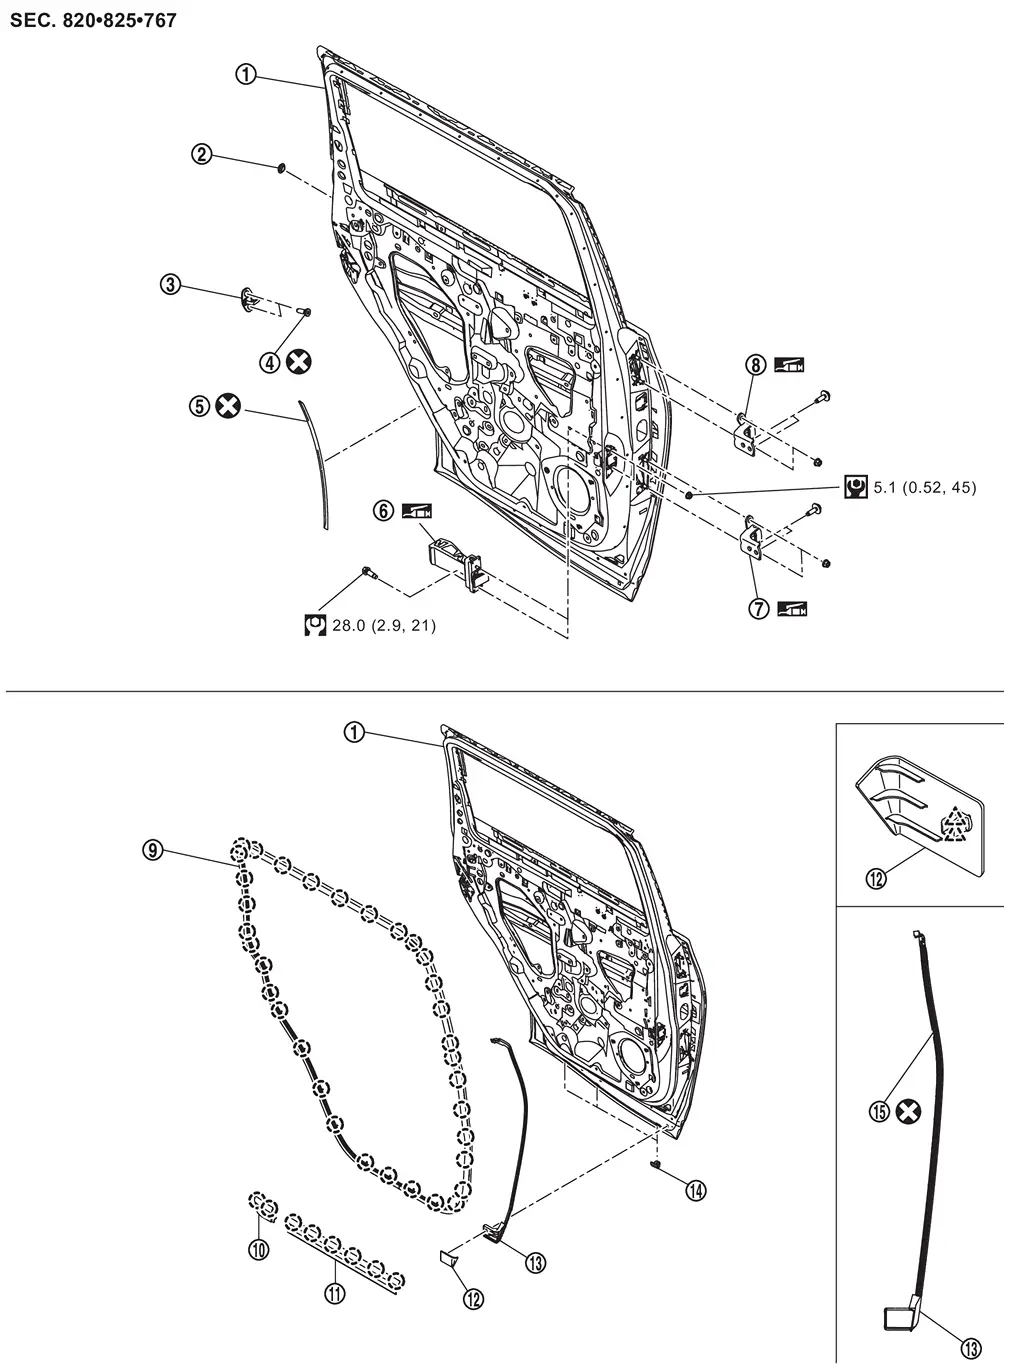
 |
Rear door panel |  |
Grommet |  |
Rear door striker |
 |
TORX bolt |  |
Rear door protector |  |
Rear door check link |
 |
Rear door hinge (lower) |  |
Rear door hinge (upper) |  |
Rear door weather-strip |
 |
Rear door parting seal lower 2 |  |
Rear door parting seal lower 1 |  |
Rear door parting seal front clip |
 |
Rear door parting seal front |  |
Drain hole cover |  |
Double-sided tape [t: 0.8 mm (0.031 in)] |
 |
: Clip | ||||
 |
: Pawl | ||||
 |
: Always replace after every disassembly. | ||||
 |
: N·m (kg-m, in-lb) | ||||
 |
: N·m (kg-m, ft-lb) | ||||
 |
: Body grease | ||||
- Rear Door Assembly
- Rear Door Striker
- Rear Door Hinge
- Rear Door Check Link
- Rear Door Weather-Strip
- Rear Door Parting Seal
Other materials
Drive Plate
Exploded View
Crankshaft position sensor
Dowel pin
Drive plate
: N·m (kg-m, ft-lb)
: N·m (kg-m, in-lb)
Removal and Installation
REMOVALRemove A/T assembly from the vehicle. Refer to following :
2WD models: Refer to Removal and Installation.
4WD models: Refer to Removal and ...
Folding Switch
Removal and Installation
REMOVALRemove luggage side lower finisher RH. Refer to Removal and Installation.
Disengage fixing pawls and then remove folding switch.
: Pawl
INSTALLATIONInstall in the reverse order of removal. ...
Hood Stay
Removal and Installation
CAUTION:
Perform work with 2 workers, because it is heavy weight.
Support hood with a proper material and use protective tape or shop cloth to protect hood and body from falling and damage when removing and installing hood stay.
REMOVALSupport hood assembly with a suita ...