Exploded View
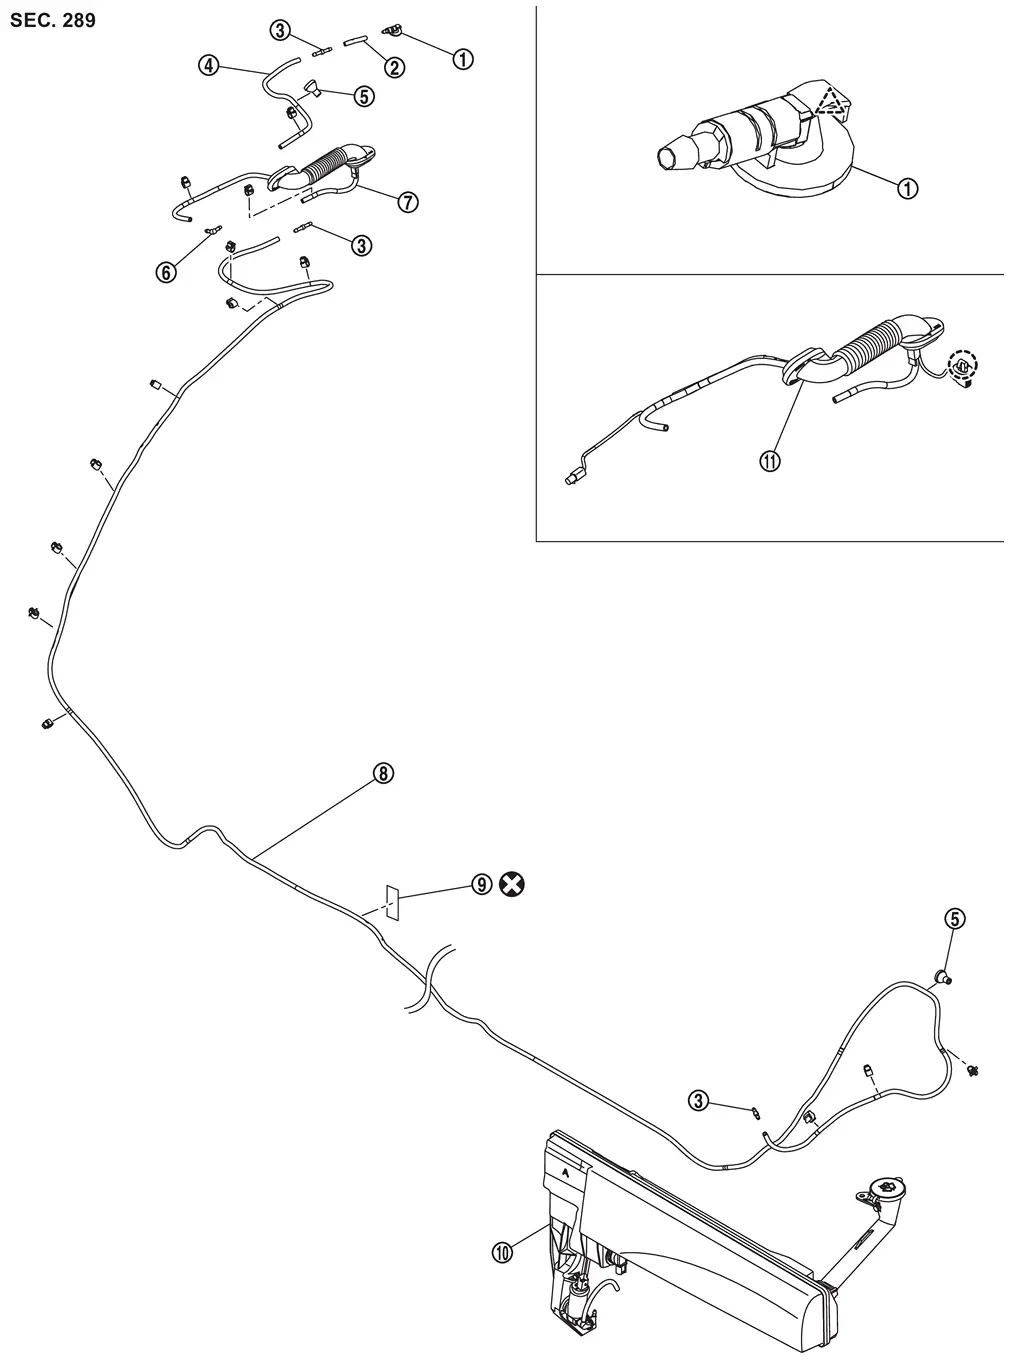
 |
Rear washer nozzle |  |
Rear washer nozzle tube |  |
Connector |
 |
Rear washer tube C |  |
Grommet |  |
Connector |
 |
Rear washer tube B assembly*1 |  |
Rear washer tube A |  |
Tube protector |
 |
Washer tank assembly |  |
Intelligent rear view mirror harness B assembly*2 | ||
 |
: Clip | ||||
 |
: Pawl | ||||
 |
: Always replace after every disassembly. | ||||
*1: Without intelligent rear view mirror models
*2: With intelligent rear view mirror models
 NOTE:
NOTE:
Intelligent rear view mirror harness B assembly is including rear washer tube B and grommet.
Hydraulic Layout
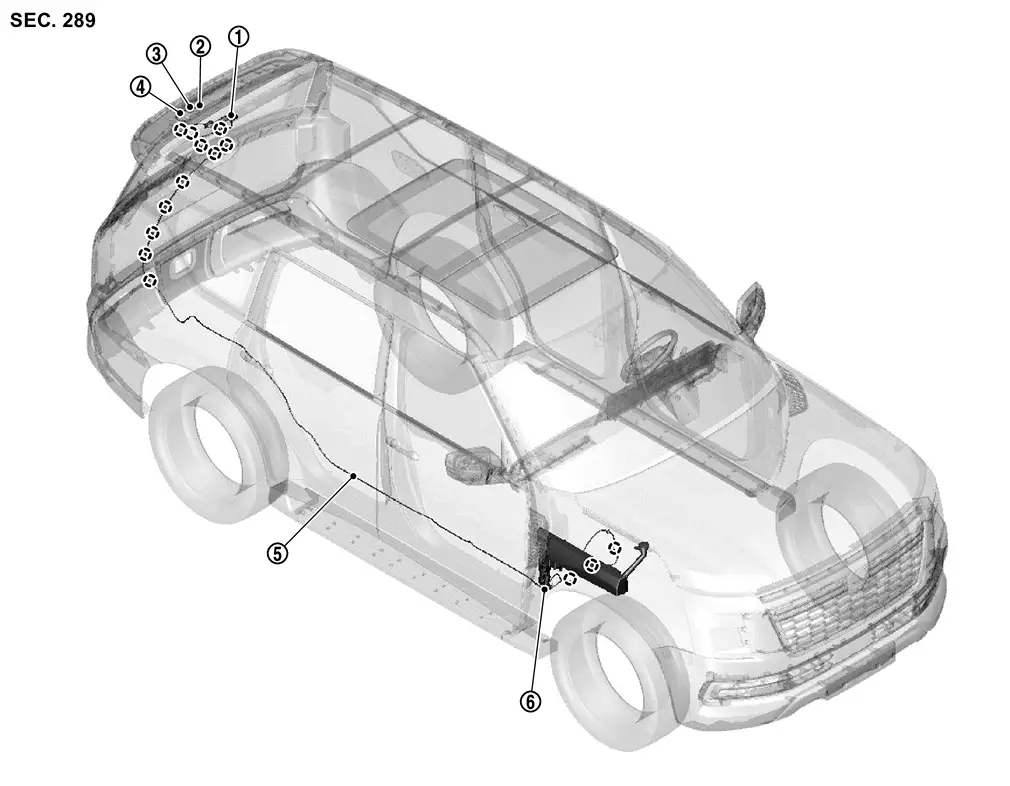
|
Rear washer tube B | |
Rear washer nozzle | |
Rear washer nozzle tube |
|
Rear washer tube C | |
Rear washer tube A | |
Washer tank assembly |
|
: Clip | ||||
Rear Washer Nozzle
Removal and Installation
REMOVAL
CAUTION:
When washer tube is disconnected/removed, washer fluid may come out so prepare a container to receive washer fluid and never allow washer fluid to be sprinkled.
Remove rear spoiler. Refer to Removal and Installation.
While pushing rear washer nozzle fixing pawl  , remove rear washer nozzle with rear washer nozzle tube in the direction of the arrow in the figure.
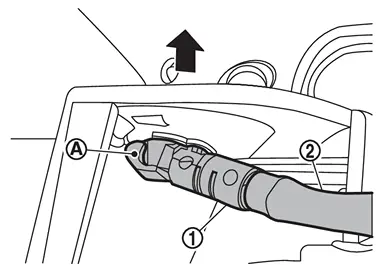
Remove rear washer nozzle tube from rear washer nozzle.
Remove connector from rear washer nozzle tube.
INSTALLATION
Note the following items, and then install in the reverse order of removal.
CAUTION:
-
Before installation, check rear washer nozzle (check valve). Refer to Inspection and Adjustment.
-
After installation, check rear washer nozzle spray position. Refer to Inspection and Adjustment.
Inspection and Adjustment
REAR WASHER NOZZLE (CHECK VALVE)
Inspection
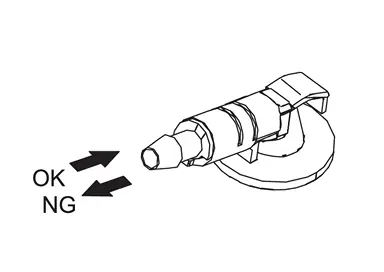
Check that air can pass through by blowing forward direction (toward nozzle side), and check that air cannot pass through by sucking reverse direction (toward washer tank side).
REAR WASHER NOZZLE SPRAY POSITION
Inspection
NOTE:
Refer to the figure below for the rear washer nozzle spray position.
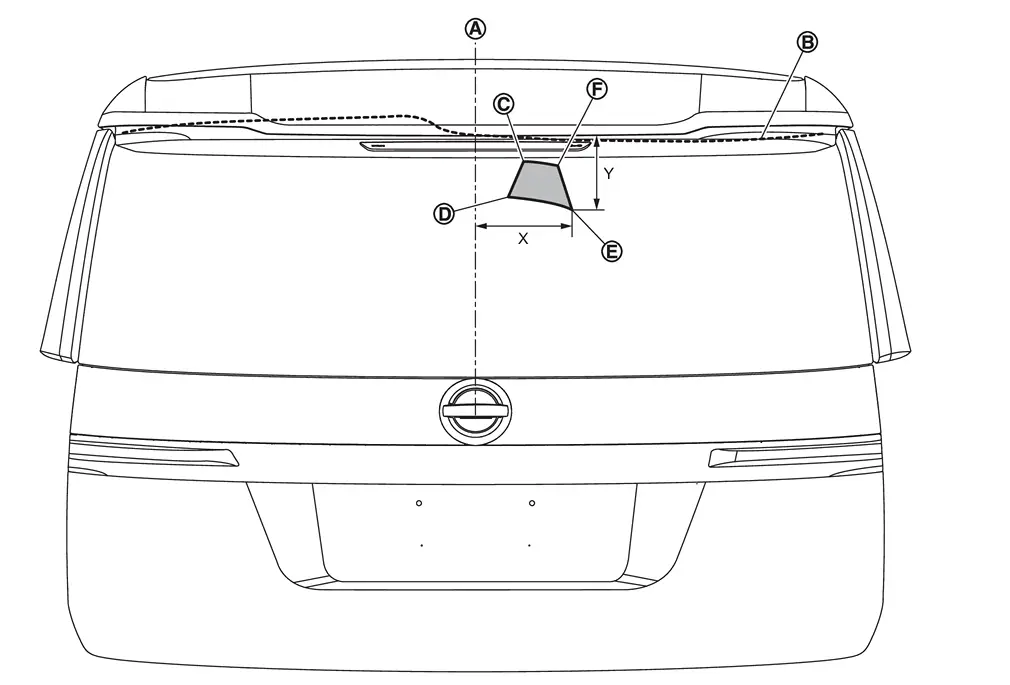
|
Center |  |
Edge of back door window glass | ||
 |
: Spray area |
Unit: mm (in)
 |
 |
 |
 |
|
|
X (from center) |
93.1 (3.67) |
64.2 (2.53) |
186.6 (7.35) |
158.4 (6.24) |
|
Y (from edge of back door window glass) |
37.7 (1.48) |
109.5 (4.31) |
134.6 (5.30) |
45.1 (1.78) |
Adjustment
Use washer nozzle adjuster (A) for rear washer nozzle adjustment.
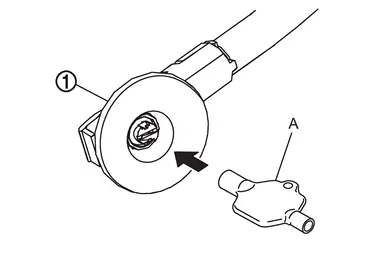
CAUTION:
Never use needle or small pin for adjustment.
Rear Washer Tube
Removal and Installation
WARNING:
REMOVAL
CAUTION:
When washer tube is disconnected/removed, washer fluid may come out so prepare a container to receive washer fluid and never allow washer fluid to be sprinkled.
Rear Washer Tube A
Remove fender protector RH. Refer to Removal and Installation.
Disconnect rear washer tube A from connector and remove rear washer tube A from fixing clip .
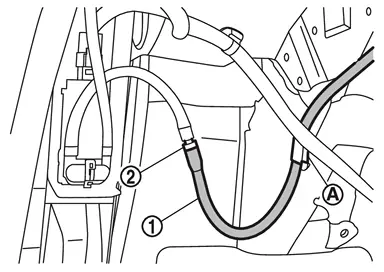
Remove rear washer tube fixing clips .
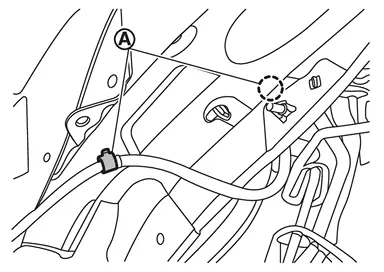
Remove dash side finisher RH. Refer to Removal and Installation.
Remove instrument panel assembly. Refer to Removal and Installation.
Peel off insulator.
Remove and pull in grommet and rear washer tube A to vehicle inside.
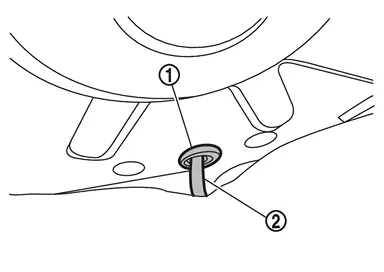
Remove center pillar lower garnish. Refer to Removal and Installation.
Remove rear foot duct. Refer to Removal and Installation.
Remove rear ventilator connecting duct. Refer to Removal and Installation.
Remove rear washer tube A from harness protectors and harness clips.
Remove tube protector.
Disconnect rear washer tube A from connector .
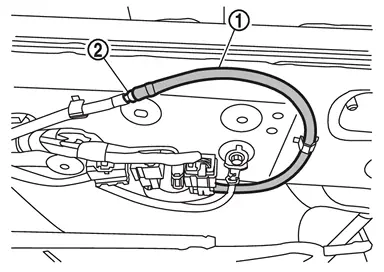
Remove rear washer tube A fixing clips .
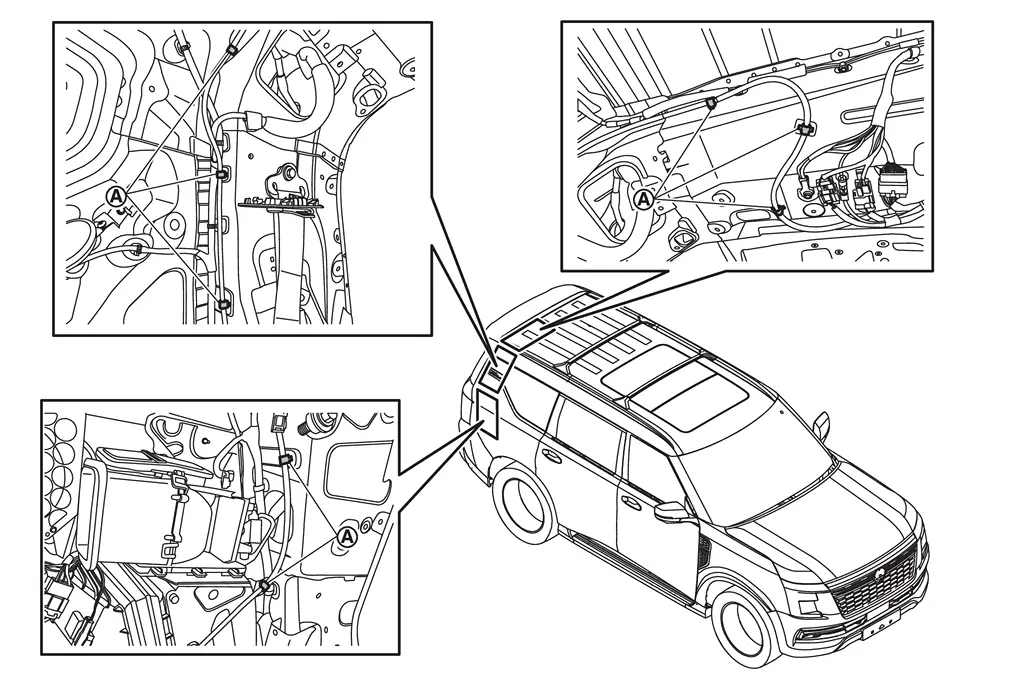
Remove rear washer tube A.
Remove grommet from rear washer tube A.
Rear Washer Tube B
Remove roof rear garnish. Refer to Removal and Installation.
Remove back door upper garnish. Refer to Removal and Installation.
Disconnect rear washer tube B from connectors.
Remove rear washer tube B fixing clips.
Disconnect intelligent rear view mirror harness B connectors and disengage intelligent rear view mirror harness B connector clip (with intelligent rear view mirror models).
Remove grommet from back door panel and roof panel, and then remove rear washer tube B assembly (without intelligent rear view mirror models) or intelligent rear view mirror harness B assembly (with intelligent rear view mirror models).
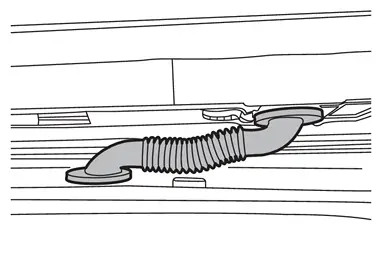
Rear Washer Tube C
Remove rear spoiler. Refer to Removal and Installation.
Disconnect rear washer tube C from connector.
Remove rear washer tube C fixing clip.
Remove grommet, and then remove rear washer tube C.
Remove connector from rear washer tube C.
INSTALLATION
Note the following items, and then install in the reverse order of removal.
CAUTION:
-
Never reuse tube protector. Always replace it with a new one when it is removed.
-
Align washer tube marking to the vehicle installation position.
-
Install grommets in the installation hole surely.
Other materials
Brake fluid
Basic information
For detailed specifications regarding brake fluid for your Nissan Armada, refer
to the section "Capacities and recommended fluids/lubricants" in the official documentation.
Maintaining the correct brake fluid condition in the Nissan Armada is essential
for ensuring ...
System Setting
Description
The settings of the automatic driving positioner system can be changed, using information display in the combination meter and the set switch. Always check the settings before and after replacing driver seat control unit. For details, refer to Work Procedure.×: Applicable Setting Change ...
Additional Service When Replacing Ecm
Description
Performing the following procedure can automatically activate recommunication of ECM and Intelligent Key unit, but only when the ECM is replaced with a new one*. For details, refer to Work Procedure.*: New one means a virgin ECM that has never been energized on-board.(In this step, initi ...