
Nissan Armada 2025-2026 Service and Repair Manual: Removal and Installation
WARNING:
REMOVAL
Remove oil pan. Refer to Removal and Installation.
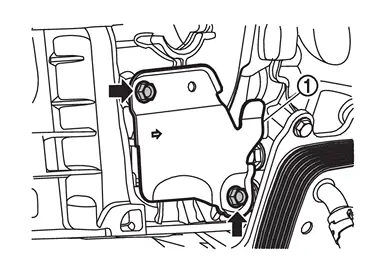
Remove heat shield mounting bolts ( ) and heat shield
  .
.
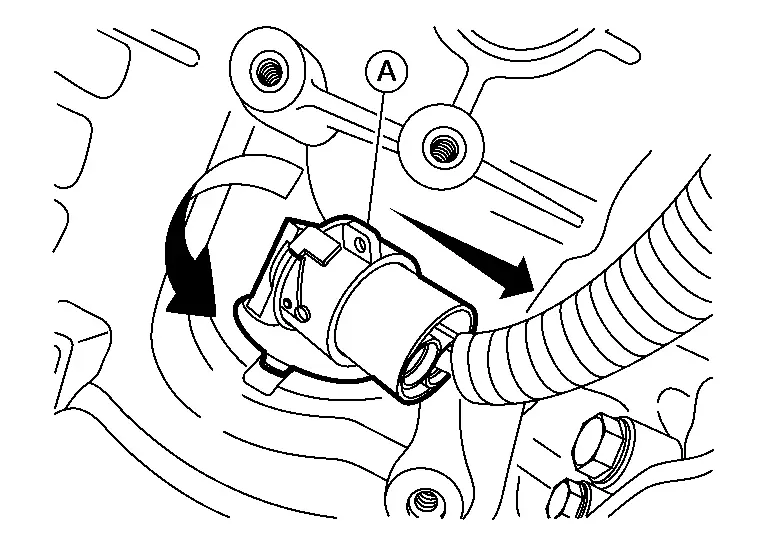
Disconnect harness connector  from control valve & TCM.
 NOTE:
NOTE:
Rotate connector counterclockwise then pull out to remove as shown.
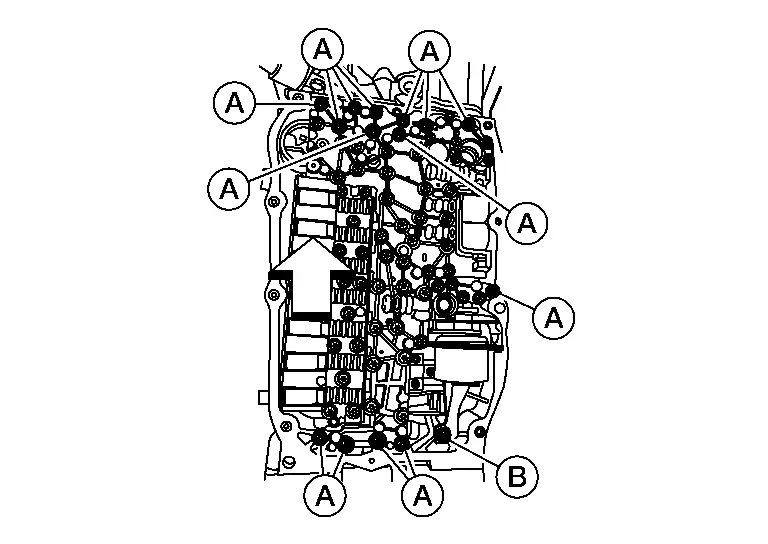
Remove control valve & TCM mounting bolts and  from the control valve & TCM.
CAUTION:
Never reuse bolts.
 | : Vehicle front |
| Bolt symbol | Length mm (in) | Number of bolts |
|---|---|---|
| A | 32 (1.26) | 14 |
| B | 18 (0.71) | 1 |
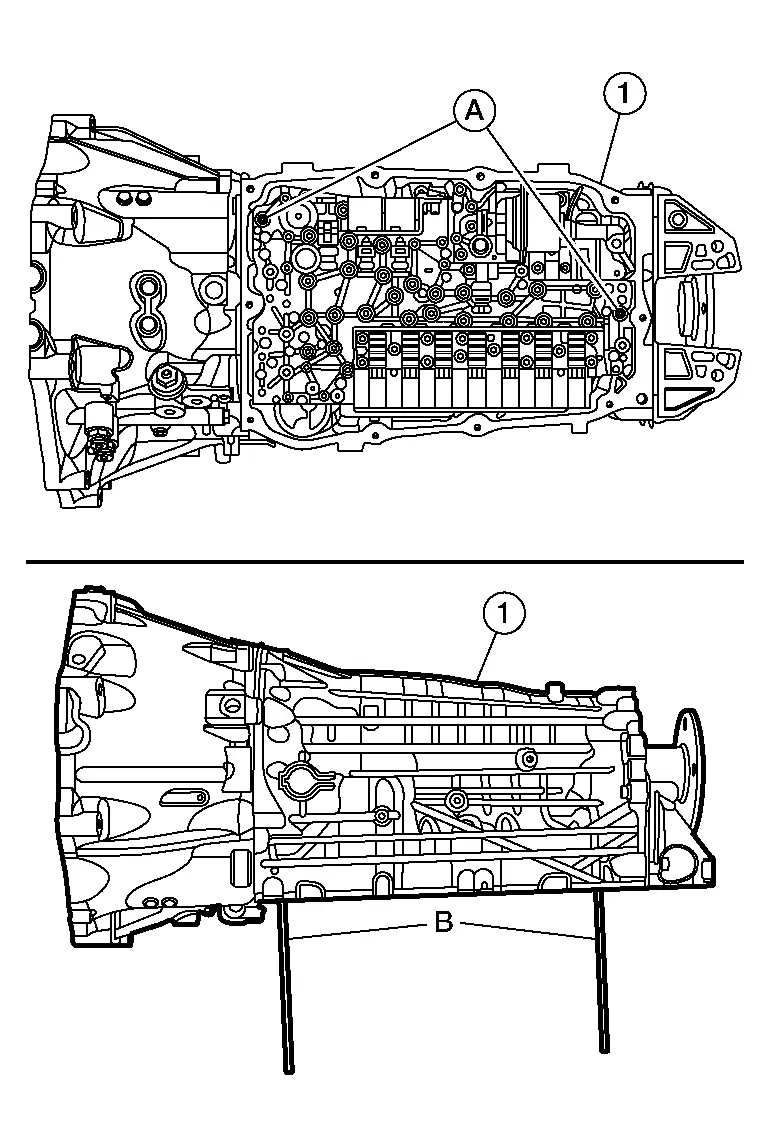
Insert RQ transmission guide pins (SST: NI–52983) (B) to A/T assembly using holes .
CAUTION:
Never reuse bolts.
Remove the control valve & TCM from the A/T assembly  using RQ transmission guide pins (SST: NI–52983) (A).
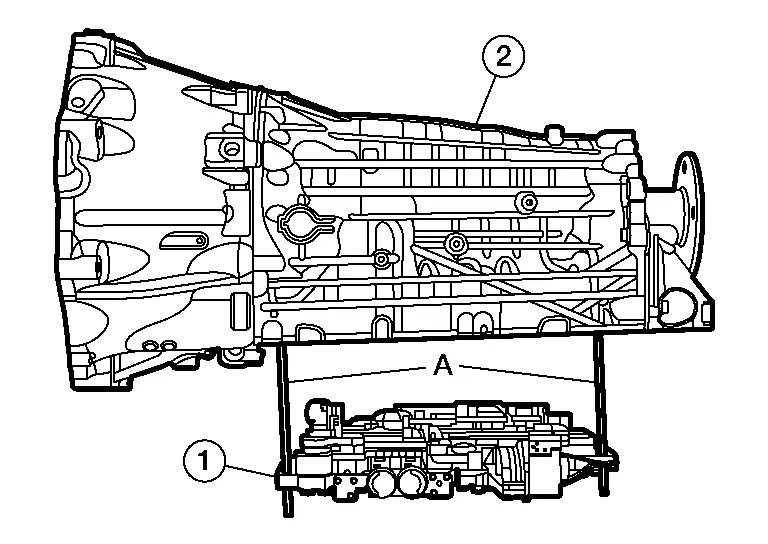
NOTE:
The weight of the valve body (control valve & TCM) is approximately 10 kg (22 lbs.).
Remove joint tubes and .
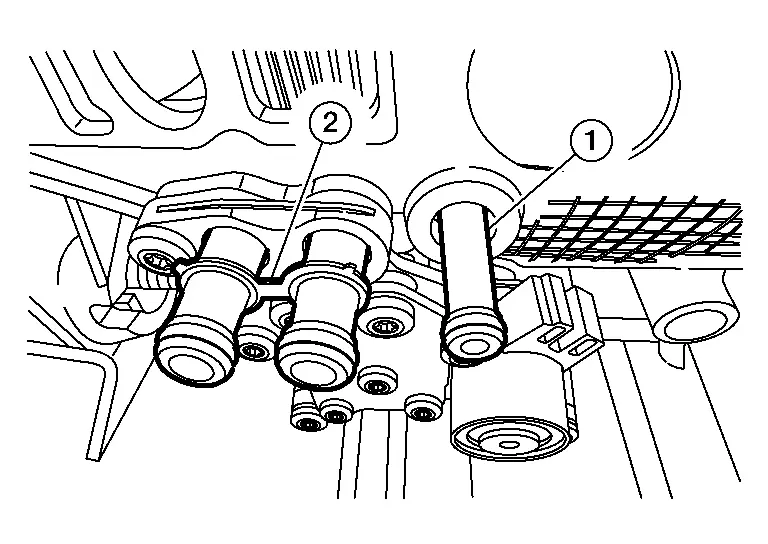
CAUTION:
Never reuse joint tubes.
NOTE:
Joint tubes may come out when removing control valve & TCM.
INSTALLATION
Note the following, and install in the reverse order of removal.
CAUTION:
Be careful not to damage connector when installing any connector.
Never reuse joint tubes.
Apply A/T fluid to O-ring of joint tubes.
Never reuse control valve & TCM bolts.
Never reuse drain plug O-ring. In addition, install new drain plug O-ring after adjustment of A/T fluid filling.
Refer to the following when installing the control valve & TCM to transmission case.
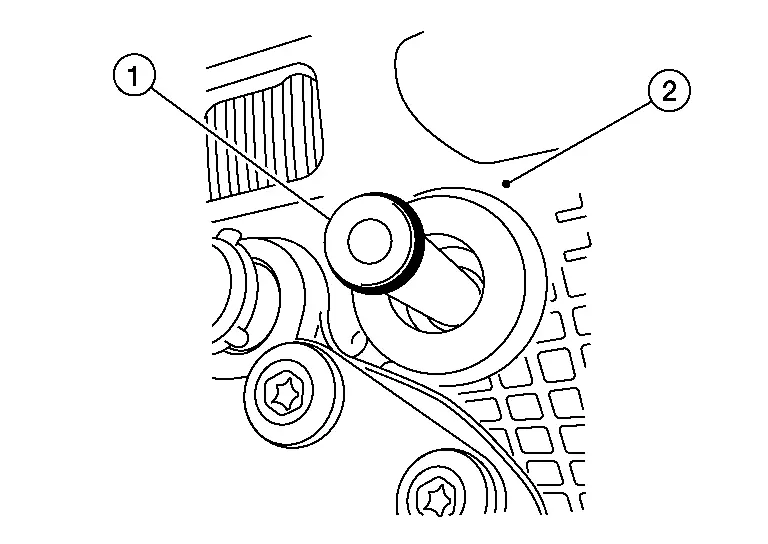
Install joint tubes and .
CAUTION:
Never reuse joint tubes.
Apply petroleum jelly to joint tubes
and to hold in place during installation.
NOTE:
Install joint tube with narrow opening facing toward control valve & TCM into A/T assembly .
Install RQ transmission guide pins (SST: NI–52983) (A) to the A/T assembly as shown.
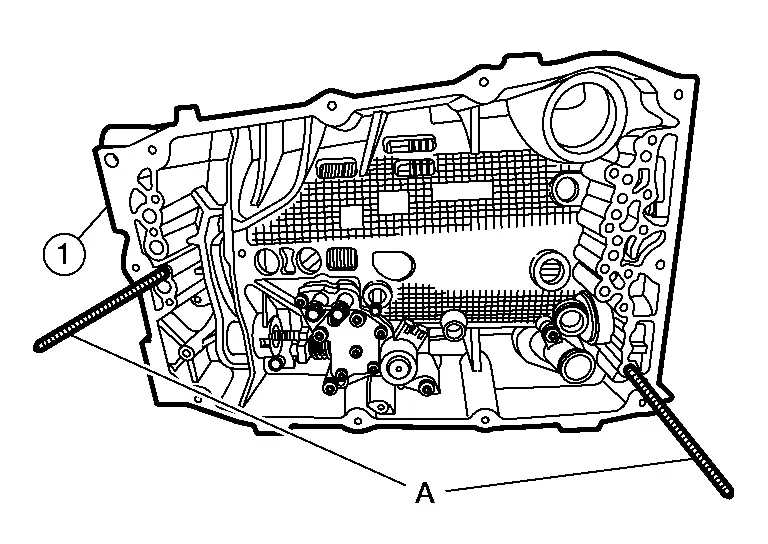
Install the control valve TCM to the A/T assembly using RQ transmission guide pins (SST: NI–52983) (A).
NOTE:
Control valve TCM will click into place when fully seated in A/T assembly.
Hand tighten control valve & TCM bolts before removing guide pins (commercial service tool).
CAUTION:
Never reuse control valve & TCM bolts.
| : Vehicle front |
| Bolt symbol | Length mm (in) | Number of bolts |
|---|---|---|
| A | 32 (1.26) | 14 |
| B | 18 (0.71) | 1 |
Replace RQ transmission guide pins (SST: NI–52983) (A) with control valve & TCM bolts.
Install the control valve & TCM bolts and , then tighten to the specification shown.
| Step 1 | : Tighten 4.0 N·m (0.41 kg-m, 35 in-lb) |
| Step 2 | : Tighten 95° |
 Exploded View
Heat shield A/T assembly Joint tube Control valve & TCM Oil pan Joint tube Joint tube Tube Refer to Removal and Installation. Refer to Removal and Installation. : N·m (kg-m, ft-lb) : ...
 Inspection and Adjustment
INSPECTION AFTER REMOVAL
Check foreign materials in oil pan to help determine causes of malfunction. If the A/T fluid is very dark, smells burned, or contains foreign particles, the frictional materia ...
Other materials:
Exploded View
CITY MODEL
Front bumper fascia U nut Front fog lamp bracket Front fog lamp : Vehicle front : N·m (kg-m, in-lb)
OFF ROAD MODEL
Front bumper fascia Front fog lamp : Vehicle front : N·m (kg-m, in-lb) ...
Diamond
This refers to deformation at the bases of crossmembers due to a parallelism difference between the left and right frames, which is caused by a longitudinal impact upon either frame during a collision. Generally, this results in a typical diamond deformation where the frames are kept almost straight ...
Work Flow
DETAILED FLOW
INTERVIEW FROM THE CUSTOMER
Clarify customer complaints before inspection. First of all, perform an interview utilizing reproduce symptoms as well as fully understand it. Ask customer about his/her complaints carefully. Check symptoms by driving vehicle with customer, if necessary. Ref ...

0.0061