
Nissan Armada 2025-2026 Service and Repair Manual: Removal and Installation
CAUTION:
REMOVAL
Remove back door finisher. Refer to Removal and Installation.
Remove rear emblem and rear emblem bracket. Refer to Removal and Installation.
Disconnect tail lamp harness connectors  .
.
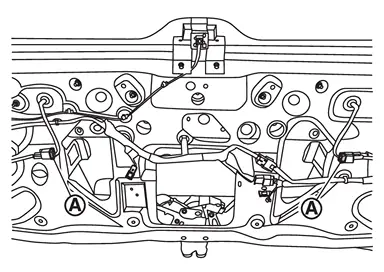
Remove tail lamp mounting nuts .
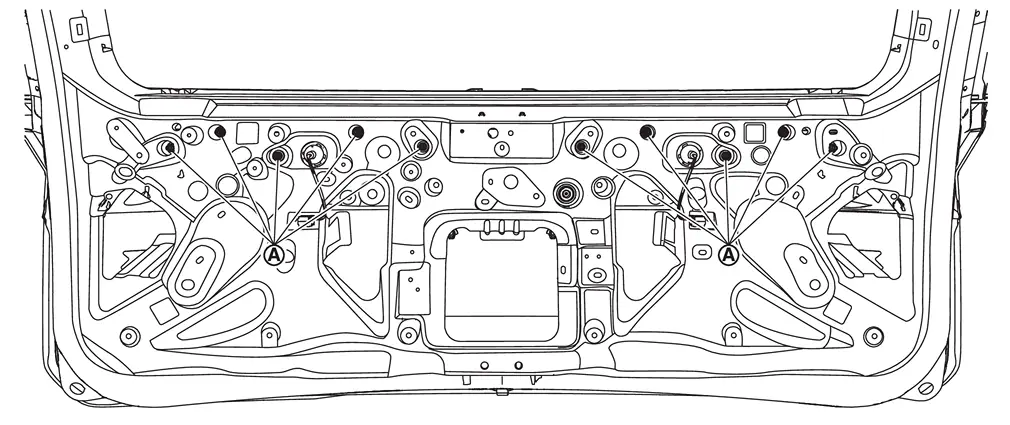
Apply protective tapes (A) on the part to protect it from damage.
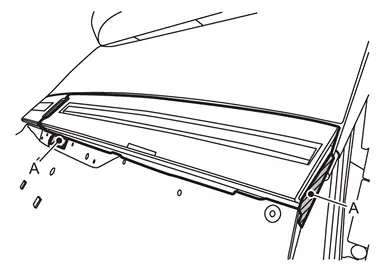
Disengage tail lamp RH fixing clip using a remover tool (A).
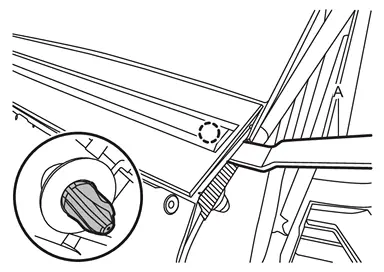
 | : Clip |
Disengage tail lamp RH fixing clip using a remover tool (A).
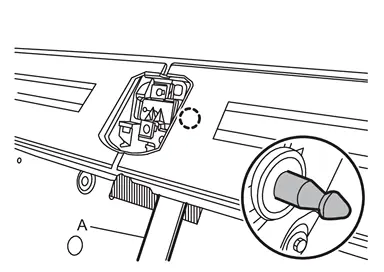
| : Clip |
Remove grommet , and then remove tail lamp RH.
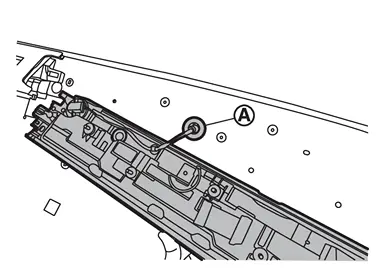
Apply protective tapes (A) on the part to protect it from damage.
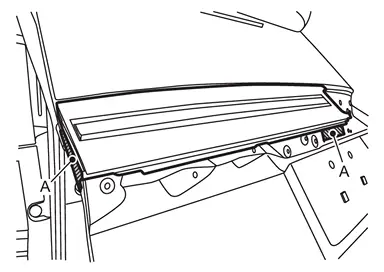
Disengage tail lamp LH fixing clip using a remover tool (A).
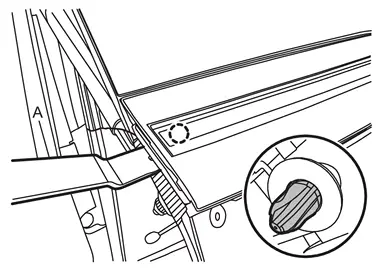
| : Clip |
Disengage tail lamp LH fixing clip using a remover tool (A).
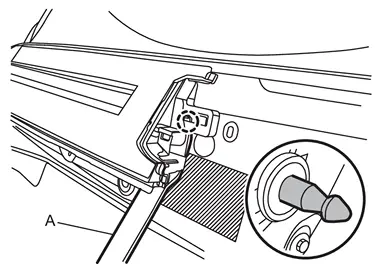
| : Clip |
Remove grommet , and then remove tail lamp LH.
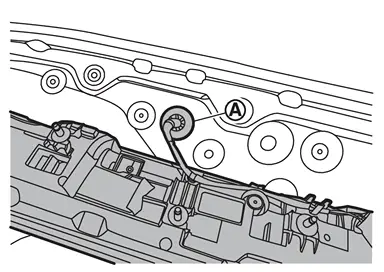
INSTALLATION
Note the following item, and then install in the reverse order of removal.
CAUTION:
 Exploded View
Back door panel Tail lamp LH Grommet Tail lamp RH : Clip : N·m (kg-m, in-lb) ...
 Replacement
CAUTION:
TAIL LAMP
CAUTION:
Replacement of a single part is not possible due to the adoption of LED. For replacement, replace tail lamp as a set. Refer to Removal and Installation. ...
Other materials:
Removal and Installation
REMOVAL
Remove luggage side lower finisher LH. Refer to Removal and Installation.
Disconnect inverter unit harness connector.
Remove inverter unit mounting nuts.
Remove the bracket from the inverter unit if necessary.
INSTALLATION
Note the following, and install in the reverse order of removal.
To ...
Removal and Installation
REMOVAL
Rear Door Parting Seal Front
Fully open rear door.
Remove rear door parting seal front clip.Apply protective tape (A) to rear door panel around rear door parting seal front clip for preventing damage.
Disengage fixing pawls using a remover tool (A), and then remove rear door parting seal f ...
EVAP CANISTER : Leak Check
CAUTION:
Never use compressed air or a high pressure pump.
Never exceed 4.12 kPa (0.042 kg/cm2, 0.6 psi) of pressure in EVAP system.
NOTE:
Never start engine.
Improper installation of EVAP service port adapter to the EVAP service port may cause a leak.
WITH CONSULT
To locate the EVAP leak, install ...

0.0062