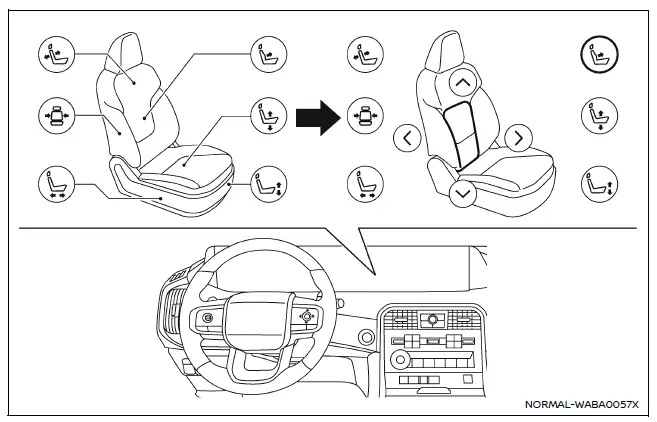
Example
The Nissan Armada offers an advanced and intuitive way to control seat adjustments through its integrated touch screen display. This system enhances convenience by allowing the driver to manage multiple seating functions quickly and efficiently without relying solely on physical controls.
Refer to the "Touch screen display" section or the separate NissanConnect Owner’s Manual for detailed instructions on operating the display system in the Nissan Armada.
The driver’s seat and 3rd row seats (if so equipped) in the Nissan Armada can be adjusted directly via the touch screen interface, providing a modern and user-friendly experience.
Touch
 on the display, then select the "Vehicle" menu.
Next, tap the "Seat" option and choose the desired function to control seat settings in the Nissan Armada.
The following features may be available depending on the vehicle configuration:
- Massage Settings
- Driver's Seat Pop-up
- Passenger's Seat Pop-up
- Front Power Seat Adjustment
- Power Folding Rear Seats
This touchscreen-based control system in the Nissan Armada allows for seamless customization of seat comfort and positioning, enhancing both driver and passenger experience.
NOTE:
- If the physical adjustment switch of a seat is being used, the same seat cannot be controlled via the touch screen display simultaneously.
- For safety reasons, seat adjustments for the driver via the touch screen display are disabled while the Nissan Armada is in motion.
Other materials
Additional Service When Replacing Control Valve & Tcm
Description
WARNING:
Jacking up or lift up the vehicle may the vehicle height to go down which cause a personal injury and/or damage to the air suspension component parts. Refer to Precaution for when Jacking and Lifting Up the vehicle with Electronic Air Suspension System.
When replacing the ...
Configration (intelligent Key Unit)
Description
Vehicle specification needs to be written with CONSULT because it is not written after replacing the Intelligent Key unit.The configuration requires network connection. CONSULT connects to network and then it downloads the configuration data from the server. Then CONSULT writes the vehic ...
Rear Door Parting Seal
Removal and Installation
REMOVALRear Door Parting Seal FrontFully open rear door.
Remove rear door parting seal front clip.Apply protective tape (A) to rear door panel around rear door parting seal front clip for preventing damage.
Disengage fixing pawls using a remover tool (A), and then remove re ...