Exploded View
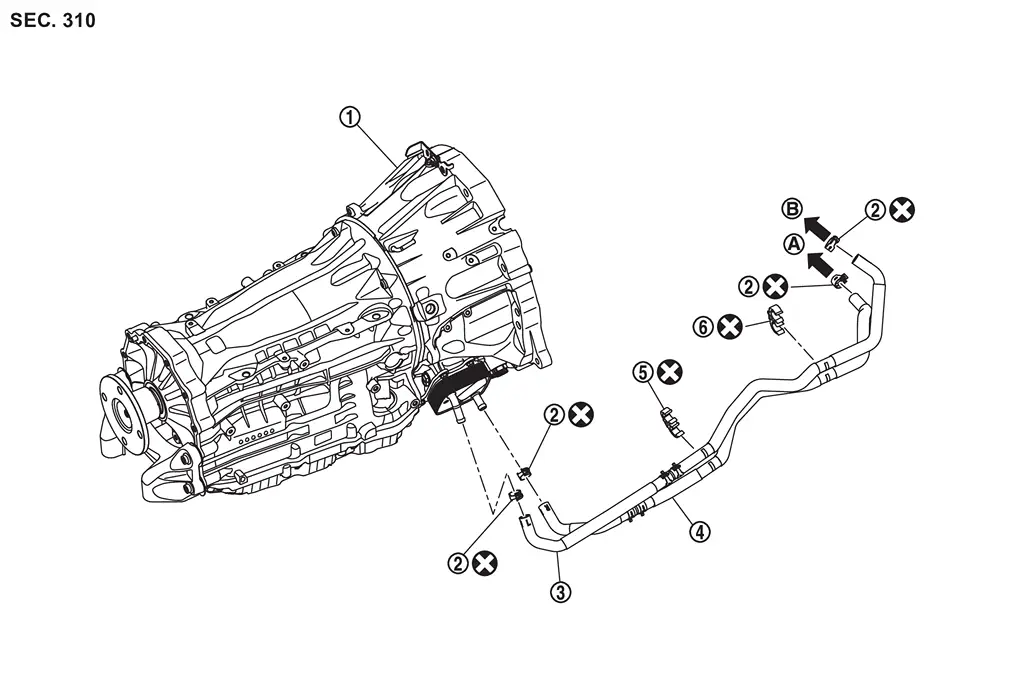
 |
A/T assembly |  |
Hose clamp |  |
A/T water hose A |
 |
A/T water hose B |  |
Clip A |  |
Clip B |
 |
To water pipe. Refer to Exploded View. |  |
To oil cooling exchanger. Refer to Exploded View. | ||
 |
: Always replace after every disassembly. | ||||
Removal and Installation
WARNING:
-
Jacking up or lift up the vehicle may the vehicle height to go down which cause a personal injury and/or damage to the air suspension component parts. Refer to Precaution for when Jacking and Lifting Up the vehicle with Electronic Air Suspension System.
REMOVAL
WARNING:
 NOTE:
NOTE:
When removing components such as hoses, tubes/lines, etc., cap or plug openings to prevent fluid from spilling.
CAUTION:
Perform this step when the engine is cold.
Remove front under cover. Refer to Removal and Installation.
Drain engine coolant. Refer to ENGINE COOLANT : Draining.
Remove hose clamps  , and remove A/T water hose A
  and A/T water hose B from A/T fluid warmer.
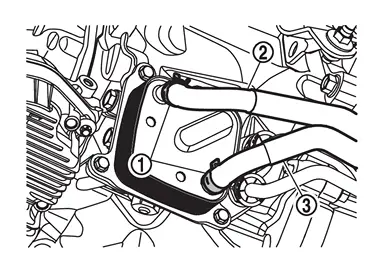
CAUTION:
Never reuse hose clamps.
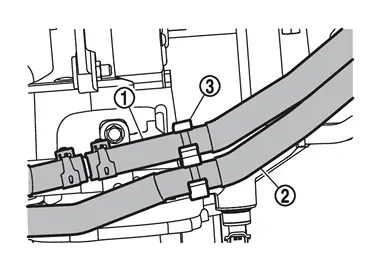
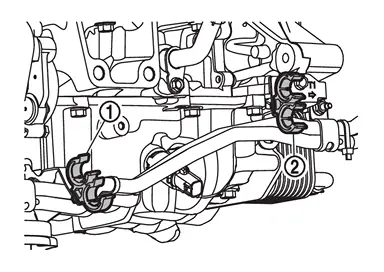
Remove A/T water hose A and A/T water hose B from clip A .
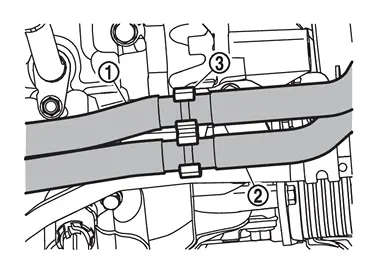
Remove A/T water hose A and A/T water hose B from clip B .
Remove hose clamp , and remove A/T water hose A from water pipe.
CAUTION:
Never reuse hose clamp.
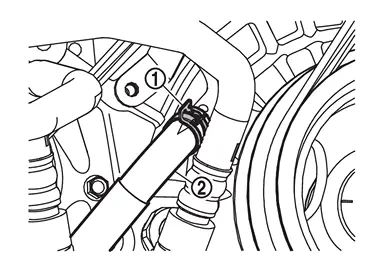
Remove hose clamp , and remove A/T water hose B from oil cooling exchanger.
CAUTION:
Never reuse hose clamp.
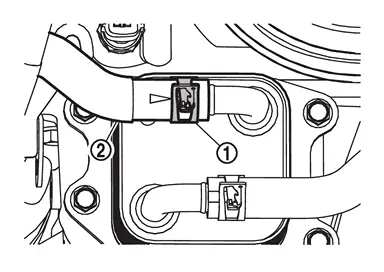
Remove clip A and clip B from bracket.
CAUTION:
Never reuse clips.
INSTALLATION
Note the following, and install in the reverse order of removal.
CAUTION:
-
Hose clamp should not interfere with the bulge of tube.
-
Securely install the water hose clip to the bracket hole.
-
Refer to the following when installing A/T water hose.
Water hose Installation side tube Direction of paint mark Hose insertion depth (L) A/T Water hose A Water pipe Align with the paint mark on water pipe End reaches the 2-stage bulge. A/T fluid warmer Align with the paint mark on the A/T fluid warmer A/T Water hose B A/T fluid warmer Align with the paint mark on the A/T fluid warmer oil cooling exchanger Frontward 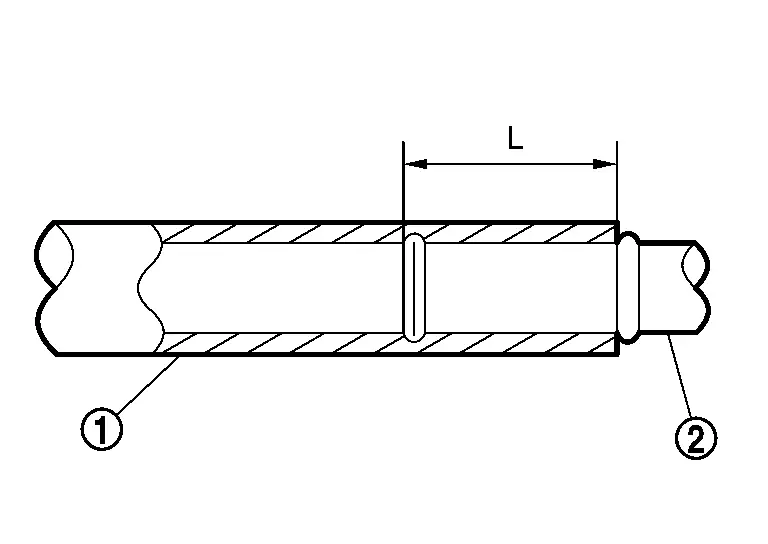
-
Refer to the following when installing hose clamps.
Water hose Installation side tube Hose clamp 
Direction of tab Clamping position Water hose A Water pipe Frontward 3 - 7 mm (0.12 - 0.28 in) (A) from hose end. A/T fluid warmer Upward Water hose B A/T fluid warmer Upward oil cooling exchanger Frontward 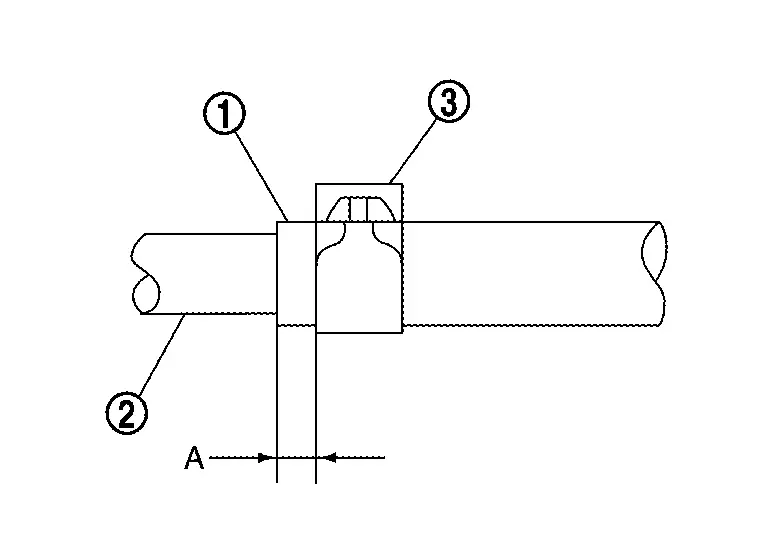
-
When installing the A/T water hose
to the clip , attach the paint mark on the A/T water hose to the rightward of the vehicle.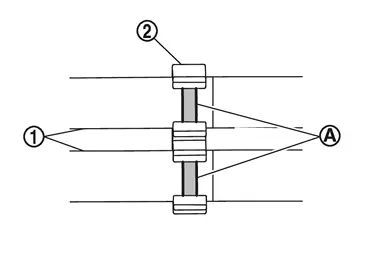
Inspection and Adjustment
INSPECTION AFTER INSTALLATION
Start the engine, and check the joints for coolant leakage. Refer to ENGINE COOLANT : Inspection.
Other materials
Additional Service When Replacing Electric Shift Selector
Description
When electric shift selector is replaced, always perform "Replace ECU" of CONSULT function to write vehicle specifications. For work procedure, refer to Work Procedure.
Work Procedure
WRITING VEHICLE SPECIFICATIONS
With CONSULT
Ignition switch ON.
Select "ELECTRIC SHIFTER".
Select ...
Precautions
Precaution for Supplemental Restraint System (SRS) "AIR BAG" and "SEAT BELT PRE-TENSIONER"
The Supplemental Restraint System such as “AIR BAG� and “SEAT BELT PRE-TENSIONER�, used along with a front seat belt, helps to reduce the risk or severity of injury to the driver and front passenger fo ...
Panic Alarm Function Does Not Operate
Description
Panic alarm does not operate when press the PANIC ALARM button of Intelligent Key.
Diagnosis Procedure
CHECK INTELLIGENT KEY SYSTEM (REMOTE KEYLESS ENTRY FUNCTION)
Press the LOCK button of Intelligent Key.
Are all doors LOCKED?
YES>>
GO TO 2.
NO>>
Check Intelligent Key syst ...