Exploded View
12V SUB BATTERY (LITHIUM ION BATTERY) HARNESS
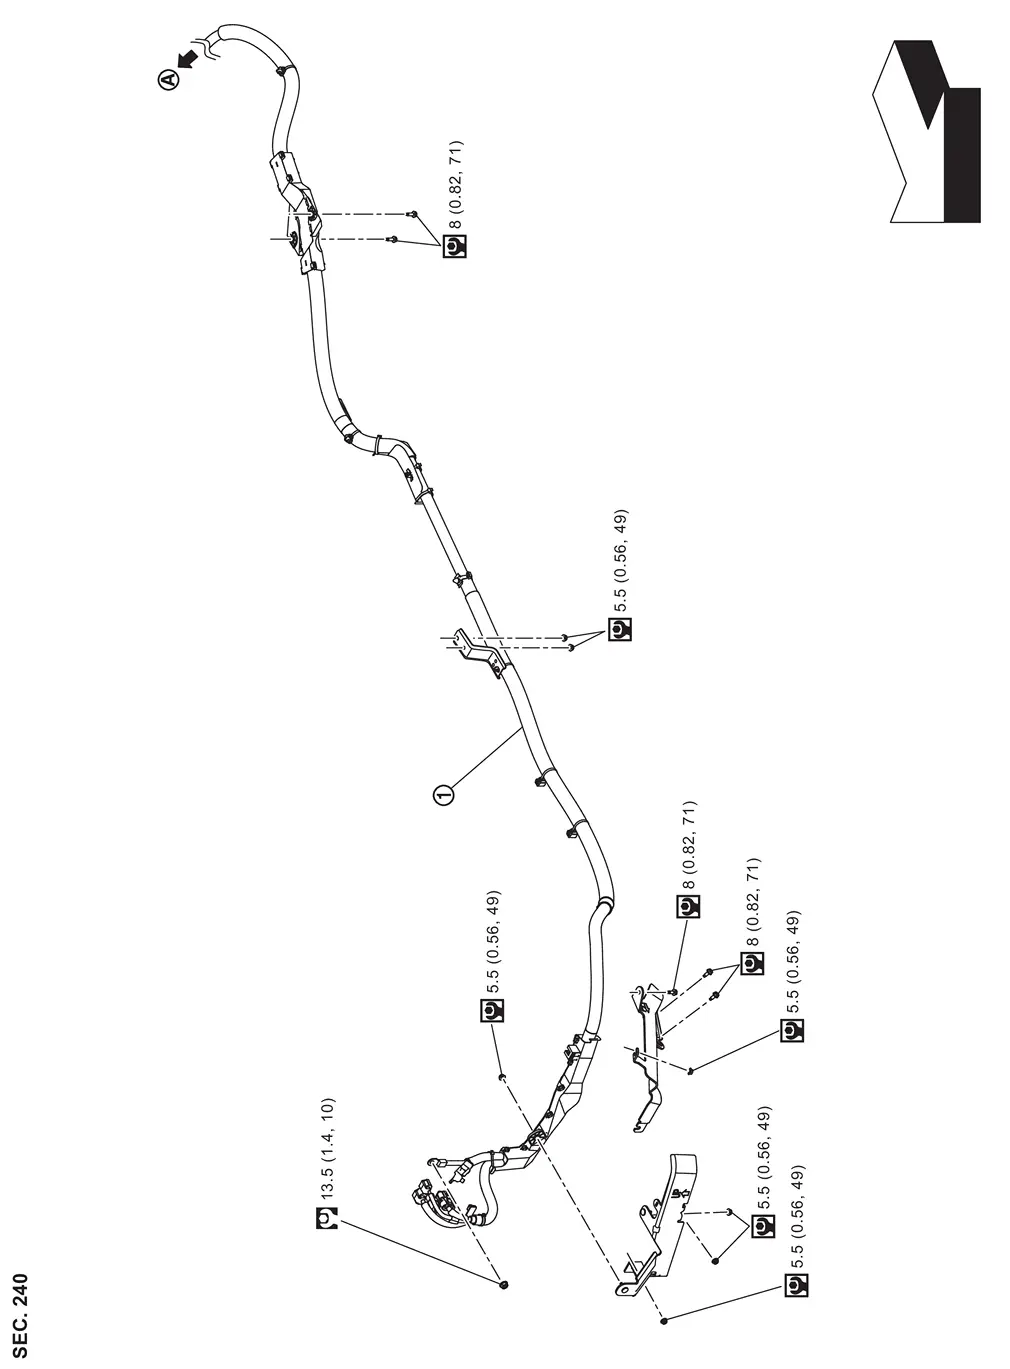
 |
12V sub battery (lithium ion battery) harness 1 | ||||
 |
: To 12V sub battery (lithium ion battery) | ||||
| : vehicle front | |||||
 |
: N·m (kg-m, in-lb) | ||||
 |
: N·m (kg-m, ft-lb) | ||||
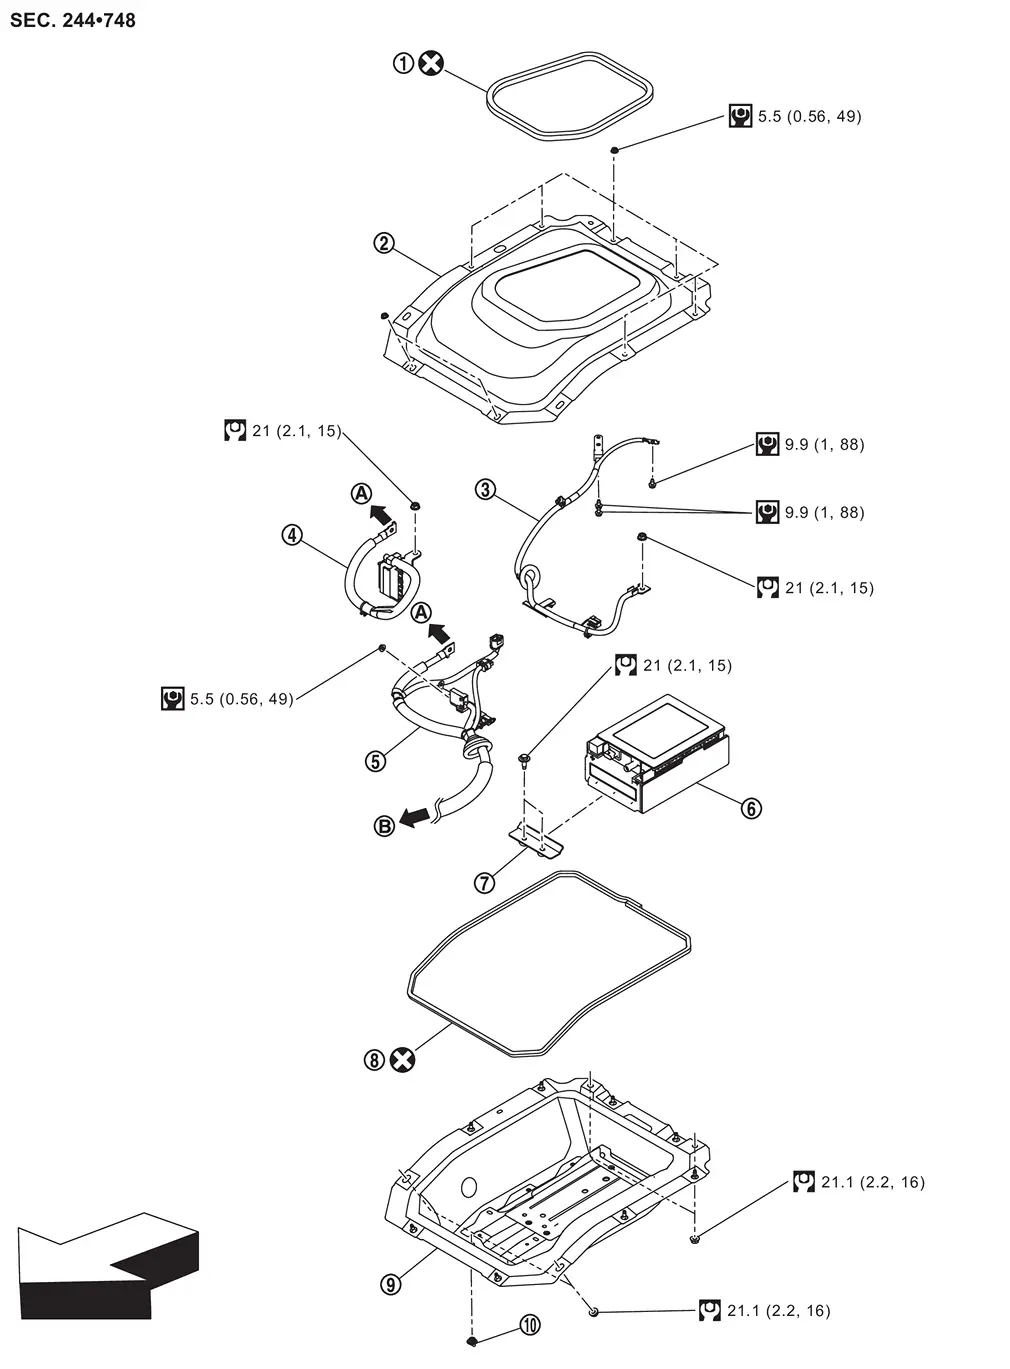
12V SUB BATTERY (LITHIUM ION BATTERY)
|
:12V sub battery (lithium ion battery) cover seal |  |
:12V sub battery (lithium ion battery) cover |  |
:12V sub battery (lithium ion battery) negative cable |
 |
:12V sub battery (lithium ion battery) positive cable 2 |  |
:12V sub battery (lithium ion battery) positive cable 1 |  |
:12V sub battery (lithium ion battery) |
 |
:12V sub battery (lithium ion battery) bracket |  |
:12V sub battery (lithium ion battery) case seal |  |
:12V sub battery (lithium ion battery) case |
 |
:Oneway valve | ||||
|
:To power network separate relay | ||||
 |
:To engine room | ||||
| : vehicle front | |||||
|
: N·m (kg-m, in-lb) | ||||
|
: N·m (kg-m, ft-lb) | ||||
 |
: Always replace after every disassembly. | ||||
Removal and Installation
WARNING:
Jacking up or lift up the vehicle may the vehicle height to go down which cause a personal injury and/or damage to the air suspension component parts. Refer to Precaution for when Jacking and Lifting Up the vehicle with Electronic Air Suspension System.
REMOVAL
Disconnect 12V battery cable from negative terminal. Refer to Precautions for Removing Battery Terminal.
CAUTION:
To prevent damage to the parts, disconnect 12V battery cable from negative terminal first.
Remove 3rd seat. Refer to Removal and Installation.
Flip the rear floor carpet to secure work space.
Remove floor cover mounting bolts , and then remove floor cover.
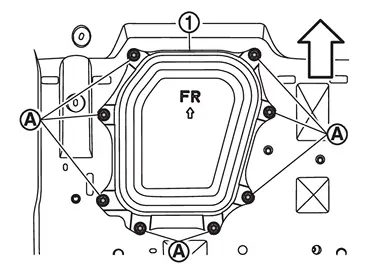
| : vehicle front |
Disconnect 12V sub battery (lithium ion battery) harness connector .
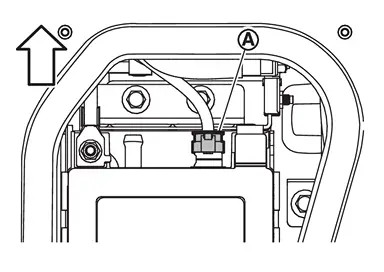
| : vehicle front |
Remove mounting nut , and then disconnect 12V sub battery (lithium ion battery) negative cable from negative terminal.
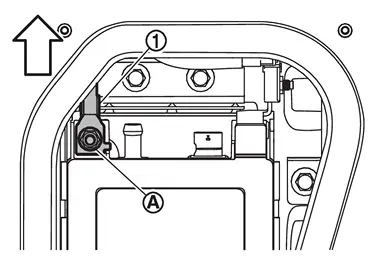
| : vehicle front |
Disengage fixing pawl, and then remove positive terminal cover part of 12V sub battery (lithium ion battery) in the direction of the arrow ( ).
).
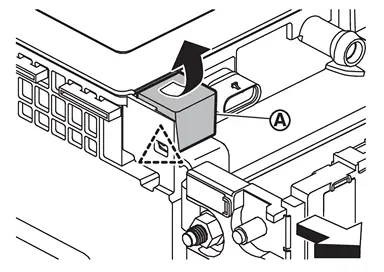
 |
: Pawl |
| : vehicle front |
Remove mounting nut , and then disconnect 12V sub battery (lithium ion battery) cable 2 from positive terminal.
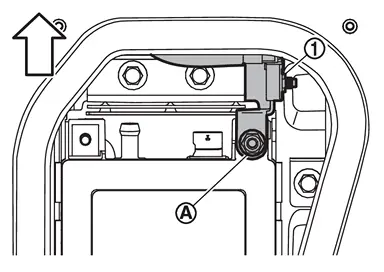
| : vehicle front |
Remove mounting nuts , and then remove 12V sub battery (lithium ion battery) bracket.
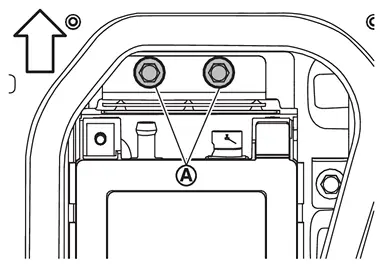
| : vehicle front |
Remove 12V sub battery (lithium ion battery).
If necessary, remove the 12V sub battery (lithium ion battery) case and cover by following the steps below.Remove power network separate relay. Refer to Exploded View . Remove 12V sub battery (lithium ion battery) positive cable 1 mounting nut , harness clip and disconnect harness connectors 
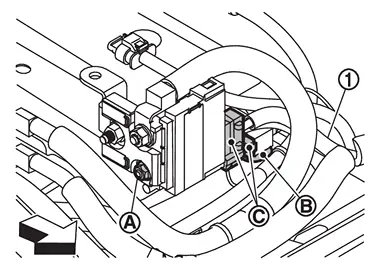
| : vehicle front |
, and then move 12V sub battery (lithium ion battery) positive cable 1 from 12V sub battery (lithium ion battery) case .
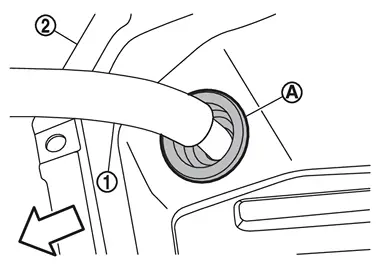
| : vehicle front |
harness clip and then remove 12V sub battery (lithium ion battery) positive cable 2 from 12V sub battery (lithium ion battery) case.
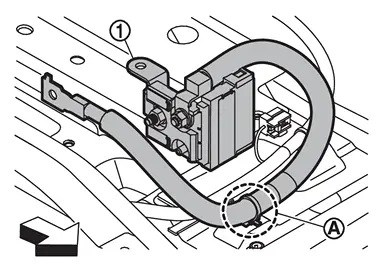
 |
: Clip |
| : vehicle front |
mounting bolts and clip .
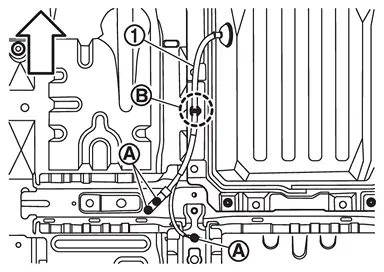
|
: Clip |
| : vehicle front |
clips from 12V sub battery (lithium ion battery) case.
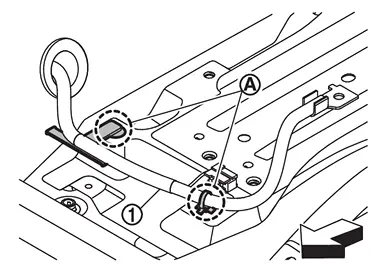
|
: Clip |
| : vehicle front |
, and then remove 12V sub battery (lithium ion battery) negative cable from 12V sub battery (lithium ion battery) case .
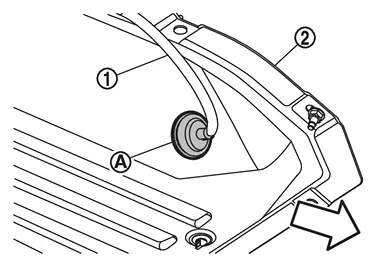
| : vehicle front |
mounting bolt to secure work space.
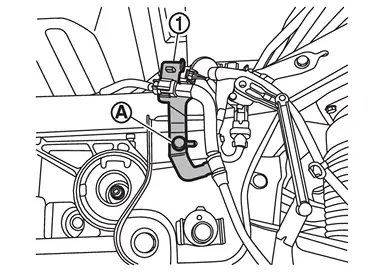
case and cover mounting nuts , and then remove 12V sub battery (lithium ion battery) case and cover from vehicle.
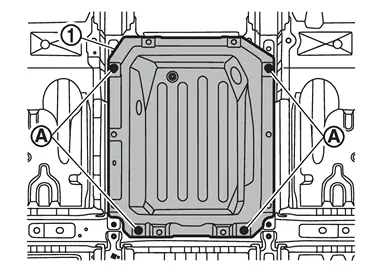
mounting nuts , and then remove 12V sub battery (lithium ion battery) cover from 12V sub battery (lithium ion battery) case.
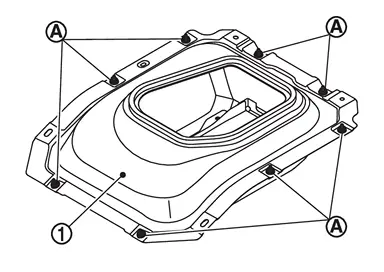
INSTALLATION
Note the following items, and then install in the reverse order of removal.
CAUTION:
-
When connecting, connect battery cable to positive terminal first.
-
Never reuse battery cover upper seal and battery case lower seal.
-
When install 12V sub battery (lithium ion battery) cover seal
, make sure that the dimensions of (A) are 20 – 40 mm (0.79 – 1.57 in).: vehicle front 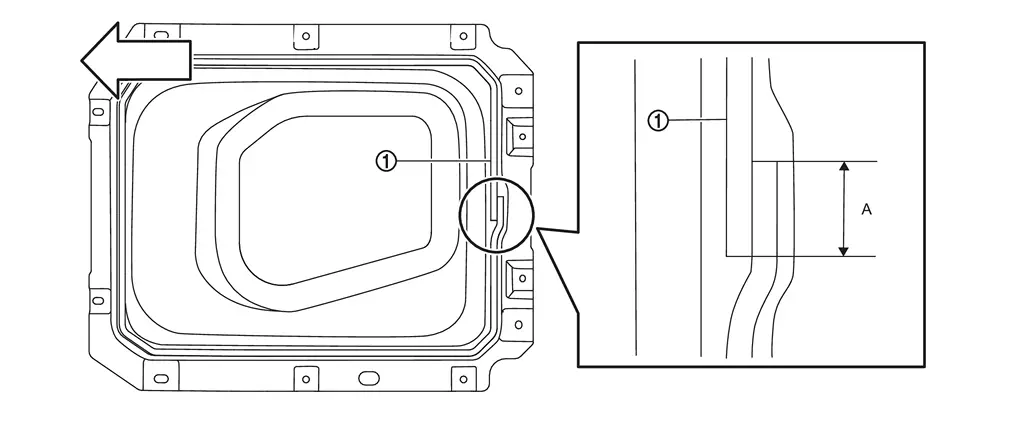
-
When install the 12V sub battery (lithium ion battery) cover
to the 12V sub battery (lithium ion battery) case, tighten the mounting nuts to the specified torque in the order of 1 ⇒ 2, then tighten the other mounting nuts to the specified torque.: vehicle front 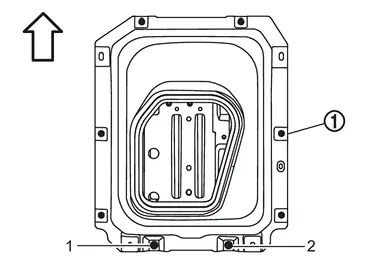
-
When install the 12V sub battery (lithium ion battery) cover and 12V sub battery (lithium ion battery) case
to the vehicle, tighten the mounting nuts to the specified torque in the order of 1 ⇒ 2, then tighten the other mounting nuts to the specified torque.: vehicle front 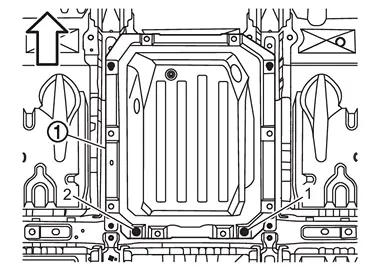
Other materials
Connection to Roadside Assistance
In the event of a roadside emergency involving your Nissan Armada, professional
Roadside Assistance services are available to provide support.
Refer to your Warranty Information Booklet (U.S.) or Warranty & Roadside Assistance
Information Booklet (Canada) for full details regarding coverage ...
Diagnosis and Repair Work Flow
Work Flow
OVERALL SEQUENCEDETAILED FLOWINTERVIEW FOR MALFUNCTION
It is also important to clarify the customer concerns before starting the inspection. Interview the customer about the concerns carefully and understand the symptoms fully.
NOTE:
The customers are not professionals. Never assume that ...
Front Seat Belt Buckle
Removal and Installation
REMOVALRemove front seat. Refer to Removal and Installation.
Disconnect seat belt buckle harness connector and disengage harness clip.
Remove seat belt buckle mounting anchor bolt, and then remove seat belt buckle.INSTALLATIONInstall in the reverse order of removal.
Inspecti ...