Exploded View
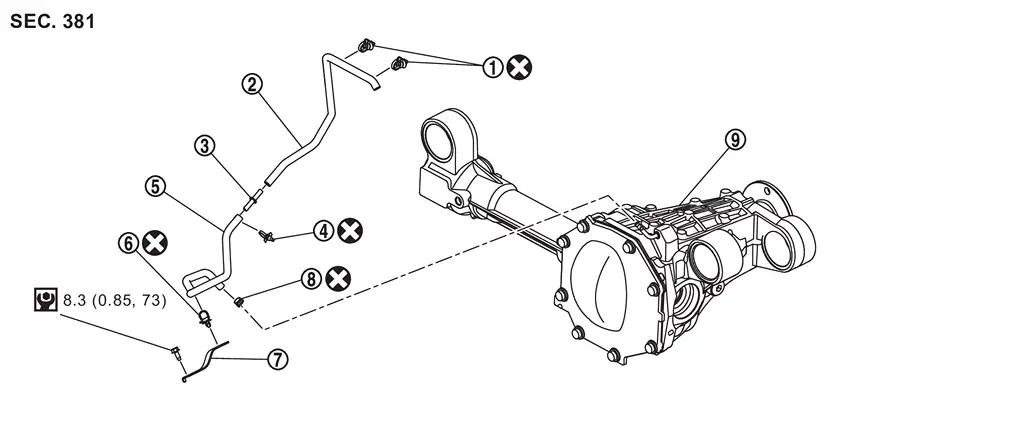
 |
Clip A |  |
Air breather hose A |  |
Hose connector |
 |
Clip B |  |
Air breather hose B |  |
Clip C |
 |
Bracket |  |
Hose clamp |  |
Front final drive assembly |
 : Always replace after every disassembly. : Always replace after every disassembly. |
|||||
 : Nï½¥m (kg-m, in-lb) : Nï½¥m (kg-m, in-lb) |
|||||
Removal and Installation
WARNING:
-
Jacking up or lift up the vehicle may the vehicle height to go down which cause a personal injury and/or damage to the air suspension component parts. Refer to Precaution for when Jacking and Lifting Up the vehicle with Electronic Air Suspension System.
REMOVAL
Remove engine under cover. Refer to Exploded View.
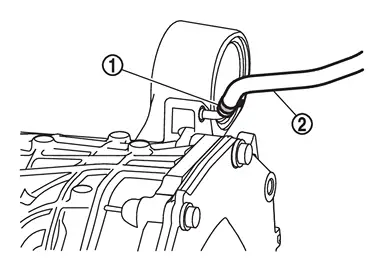
Release hose clamp , and remove air breather hose B from final drive assembly.
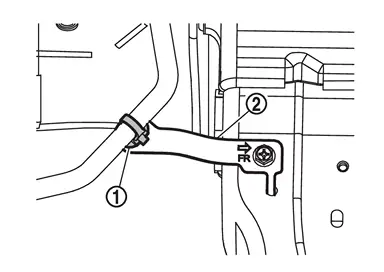
Remove clip C from bracket .
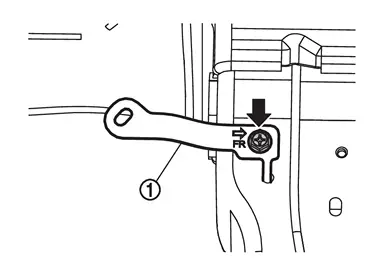
Remove bracket mounting bolt (  ) and remove bracket .
Remove clip B .
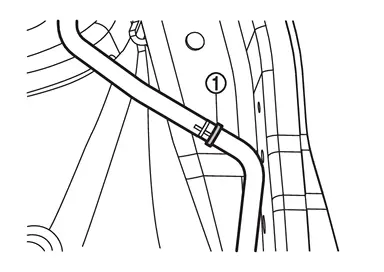
Remove clip A .
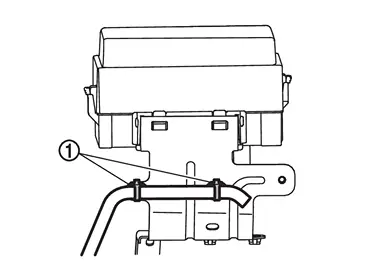
Remove air breather hose assembly.
Separate each component part.
INSTALLATION
Note the following, and install in the reverse order of removal.
-
For non-reusable parts, refer to Exploded View.
-
When inserting air breather hose to hose connector
, be sure to insert it fully until its end reaches the stop.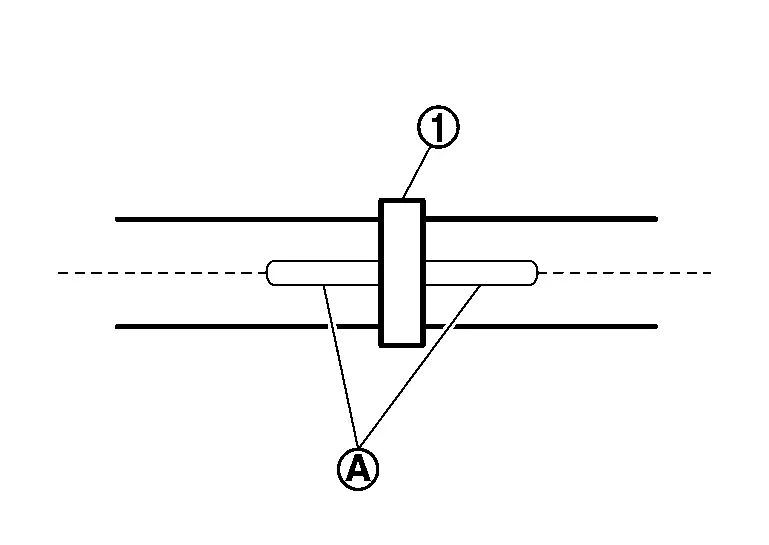
CAUTION:
Align paint marks
 on each air breather hose.
 -
When inserting air breather hose B to final drive assembly, be sure to insert it fully until its end reaches the stop.
CAUTION:
-
Install air breather hose B
so that the paint mark on it and tab of hose clamp faced leftward of the vehicle.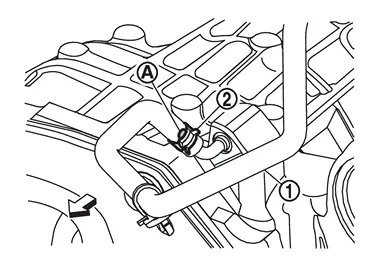
: vehicle front -
Set hose clamp
at the end of air breather hose with dimension (A) from the hose edge.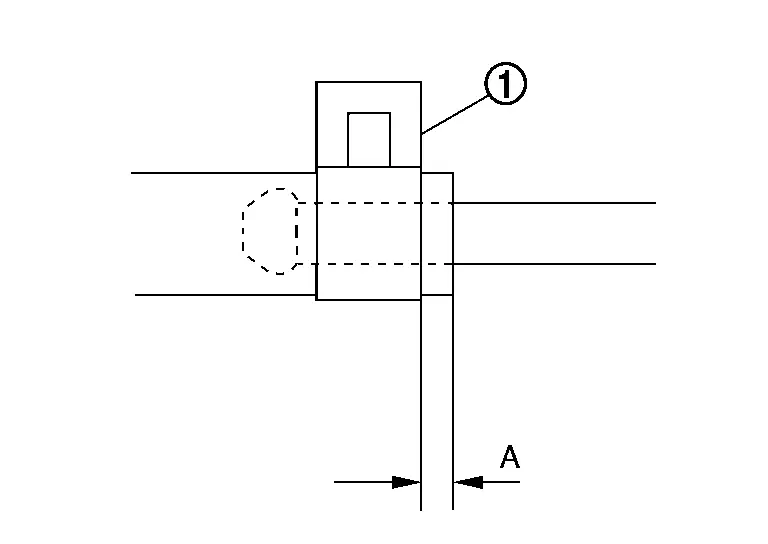
Dimension (A) : 5 – 7 mm (0.20 – 0.28 in)
-
-
When installing air breather hose, make sure there are no pinched or restricted areas on air breather hose caused by bending or winding.
Other materials
Basic information
WARNING
Riding in the cargo area of a Nissan Armada is extremely hazardous. In
the event of a collision, occupants in these areas face a significantly higher
risk of severe injury or fatal consequences.
Never allow passengers to occupy any part of the Nissan Armada that is
not specifi ...
Side Window Glass
Exploded View
Body side outer panel
Side window glass
Glass primer
Adhesive
Edge
Adhesive mark
: Clip
: Always replace after every disassembly.
Unit: mm (in) Portion Primer range Adhesive range
L N
Side window glass - Bod ...
Head up Display Symptoms
Symptom Table
Symptom Reference
Head Up Display screen is not displayed.
Refer to Diagnosis Procedure.
Head Up Display brightness is not changed.
Refer to Diagnosis Procedure.
Head Up Display screen is not displayed in the correct position.
Refer to Diagnosis Procedure.
...