Exploded View
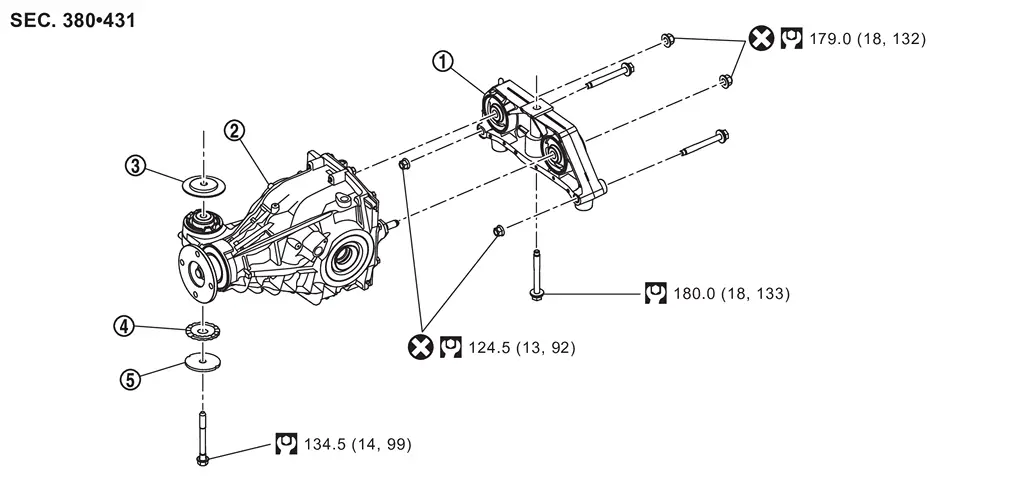
 |
Final drive mounting bracket |  |
Rear final drive assembly |  |
Upper stopper |
 |
Lower stopper |  |
Washer | ||
 : N·m (kg-m, ft-lb) : N·m (kg-m, ft-lb) |
|||||
 : Always replace after every disassembly. : Always replace after every disassembly. |
|||||
Removal and Installation
WARNING:
-
Jacking up or lift up the vehicle may the vehicle height to go down which cause a personal injury and/or damage to the air suspension component parts. Refer to Precaution for when Jacking and Lifting Up the vehicle with Electronic Air Suspension System.
REMOVAL
-
Drain gear oil. Refer to Draining.
-
Remove rear propeller shaft from final drive. Refer to Removal and Installation (2WD) or Refer to Removal and Installation (4WD).
-
Remove drive shafts. Refer to Removal and Installation.
-
Remove rear supension member stay. Refer to Removal and Installation.
-
Remove breather hose from rear final drive assembly. Refer to Removal and Installation.
-
Set a suitable jack to rear final drive assembly.
CAUTION:
Never place a jack under the rear cover.
-
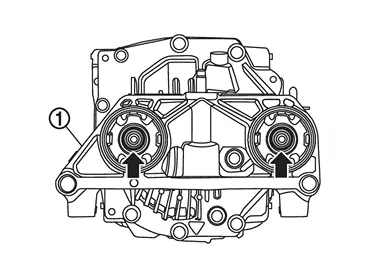
Remove rear final drive assembly mounting nuts (
 ) from final drive mounting bracket
  .
.
-
Remove rear final drive assembly mounting bolt (
) and remove rear final drive assembly .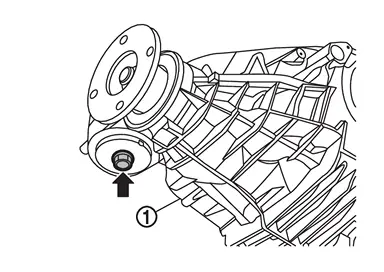
CAUTION:
Secure rear final drive assembly to a suitable jack while removing it.
-
Remove upper stopper, lower stopper, and washer.
-
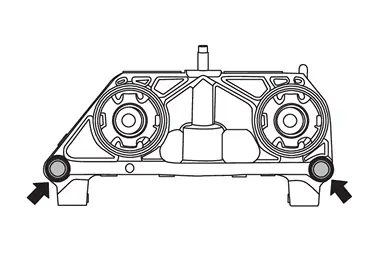
Remove final drive mounting bracket mounting bolts and nuts (
).
-
Remove final drive mounting bracket mounting bolt (
) and remove final drive mounting bracket .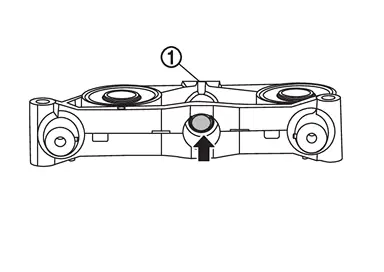
INSTALLATION
Note the following, and install in the reverse order of removal.
-
For non-reusable parts, refer to Exploded View.
-
For each tightening torque, refer to Exploded View.
-
Perform inspection after installation. Refer to Inspection.
Inspection
INSPECTION AFTER INSTALLATION
Check the oil level and the oil leakage after installation. Refer to Inspection.
Other materials
Owner's manual/service manual order information
Authentic NISSAN Service Manuals for your Nissan Armada, including this model
year and earlier versions, are available for purchase and provide the most accurate
and comprehensive source of service and repair information.
These official manuals are identical to those used by factory-trained tec ...
Anti-Pinch Inspection
Description
If any of the following operations are performed, the initialization is necessary for normal operation of anti-pinch function. Refer to Work Procedure.
When each power window motor replaced.
Power supply to the each power window motor is not cut off properly.
Removal and install ...
Meter, Warning Lamp & Indicator
Diagnosis and Repair Workflow
Work flow
OVERALL SEQUENCE
Reference 1···On Board Diagnosis Function.
Reference 2···DTC Index.
Reference 3···Component Function Check.
Reference 4···Diagnosis Procedure.
DETAILED FLOWOBTAIN INFORMATION ABOUT SYMPTOM
Interview the customer to obtain ...