Cleaning
Whenever an A/T is replaced, the A/T fluid cooler mounted in the radiator must be inspected and cleaned.
Metal debris and friction material, if present, can become trapped in the A/T fluid cooler. This debris can contaminate the newly serviced A/T or, in severe cases, can block or restrict the flow of ATF. In either case, malfunction of the newly serviced A/T may result.
Debris, if present, may build up as ATF enters the cooler inlet. It will be necessary to back flush the cooler through the cooler outlet in order to flush out any built up debris.
CLEANING PROCEDURE
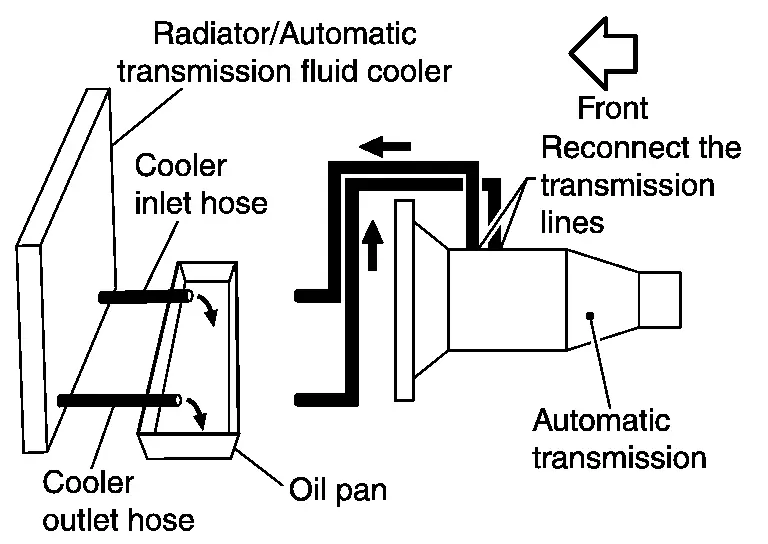
Position an oil pan under the A/T inlet and outlet cooler hoses.
Identify the inlet and outlet fluid cooler hoses.
Disconnect the A/T fluid cooler inlet and outlet rubber hoses from the steel cooler tubes or by-pass valve.
 NOTE:
NOTE:
Replace the cooler hoses if rubber material from the hose remains on the tube fitting.
Allow any ATF that remains in the cooler hoses to drain into the oil pan.
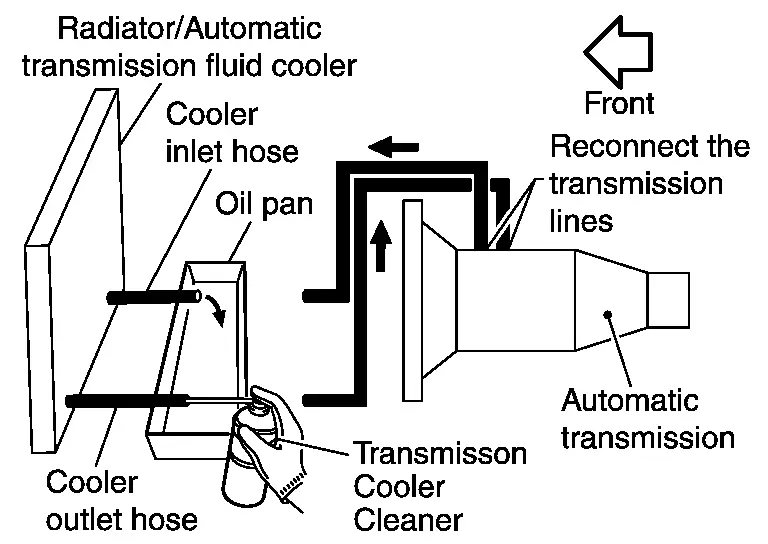
Insert the extension adapter hose of a can of Transmission Cooler Cleaner into the cooler outlet hose.
CAUTION:
-
Wear safety glasses and rubber gloves when spraying the Transmission Cooler Cleaner.
-
Spray Transmission Cooler Cleaner only with adequate ventilation.
-
Avoid contact with eyes and skin.
-
Never breath vapors or spray mist.
Hold the hose and can as high as possible and spray Transmission Cooler Cleaner in a continuous stream into the cooler outlet hose until ATF flows out of the cooler inlet hose for 5 seconds.
Insert the tip of an air gun into the end of the cooler outlet hose.
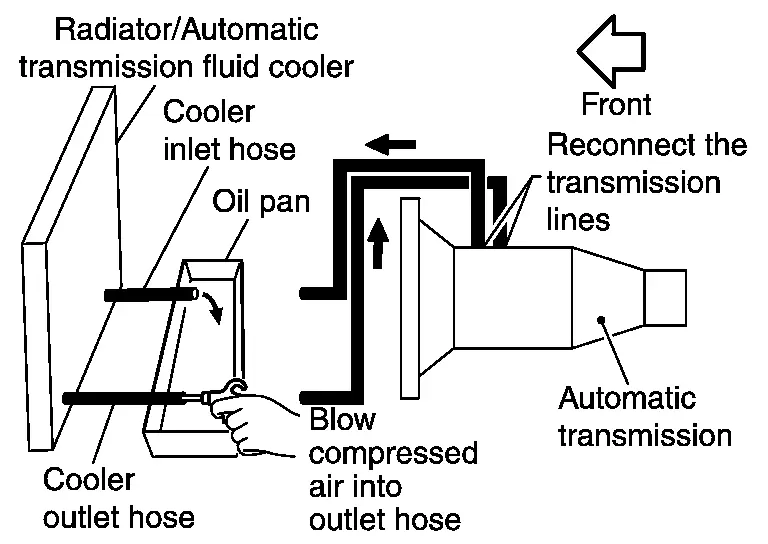
Wrap a shop rag around the air gun tip and of the cooler outlet hose.
Blow compressed air regulated to 5 to 9 kg/cm2 (71 to 128 psi) through the cooler outlet hose for 10 seconds to force out any remaining ATF.
Repeat steps 5 through 9 three additional times.
Position an oil pan under the banjo bolts that connect the A/T fluid cooler steel lines to the A/T.
Remove the banjo bolts.
Flush each steel line from the cooler side back toward the A/T by spraying Transmission Cooler Cleaner in a continuous stream for 5 seconds.
Blow compressed air regulated to 5 to 9 kg/cm2 (71 to 128 psi) through each steel line from the cooler side back toward the A/T for 10 seconds to force out any remaining ATF.
Ensure all debris is removed from the steel cooler lines.
Ensure all debris is removed from the banjo bolts and fittings.
Perform “DIAGNOSIS PROCEDURE�.
DIAGNOSIS PROCEDURE
NOTE:
Insufficient cleaning of the cooler inlet hose exterior may lead to inaccurate debris identification.
Position an oil pan under the A/T inlet and outlet cooler hoses.
Clean the exterior and tip of the cooler inlet hose.
Insert the extension adapter hose of a can of Transmission Cooler Cleaner into the cooler outlet hose.
CAUTION:
-
Wear safety glasses and rubber gloves when spraying the Transmission Cooler Cleaner.
-
Spray Transmission Cooler Cleaner only with adequate ventilation.
-
Avoid contact with eyes and skin.
-
Never breath vapors or spray mist.
Hold the hose and can as high as possible and spray Transmission Cooler Cleaner in a continuous stream into the cooler outlet hose until ATF flows out of the cooler inlet hose for 5 seconds.
Tie a common white, basket-type coffee filter to the end of the cooler inlet hose.
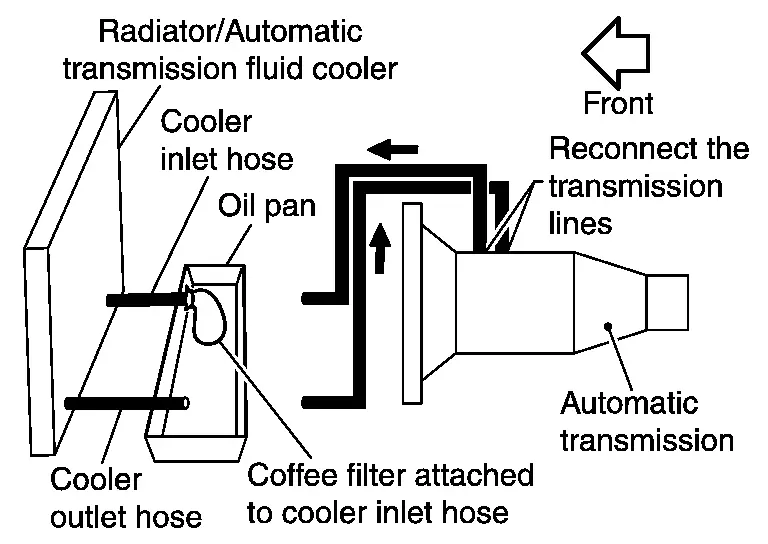
Insert the tip of an air gun into the end of the cooler outlet hose.
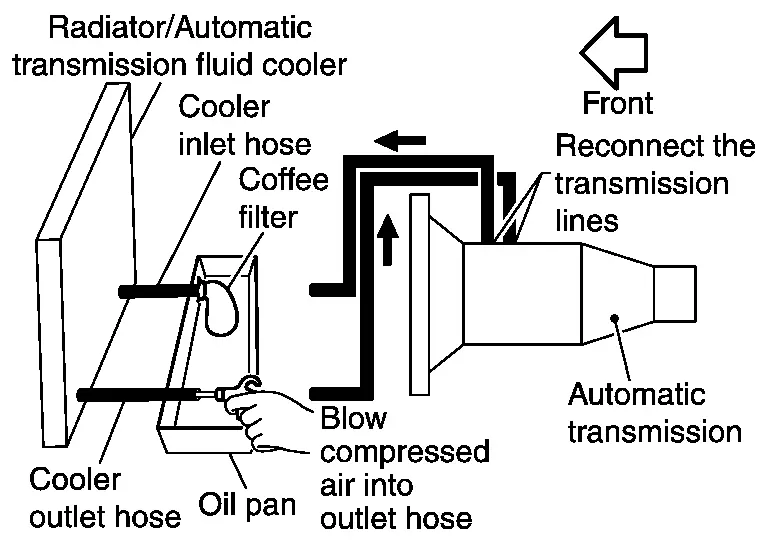
Wrap a shop rag around the air gun tip and end of cooler outlet hose.
Blow compressed air regulated to 5 to 9 kg/cm2 (71 to 128 psi) through the cooler outlet hose to force any remaining ATF into the coffee filter.
Remove the coffee filter from the end of the cooler inlet hose.
Perform “INSPECTION PROCEDURE�.
INSPECTION PROCEDURE
Inspect the coffee filter for debris.
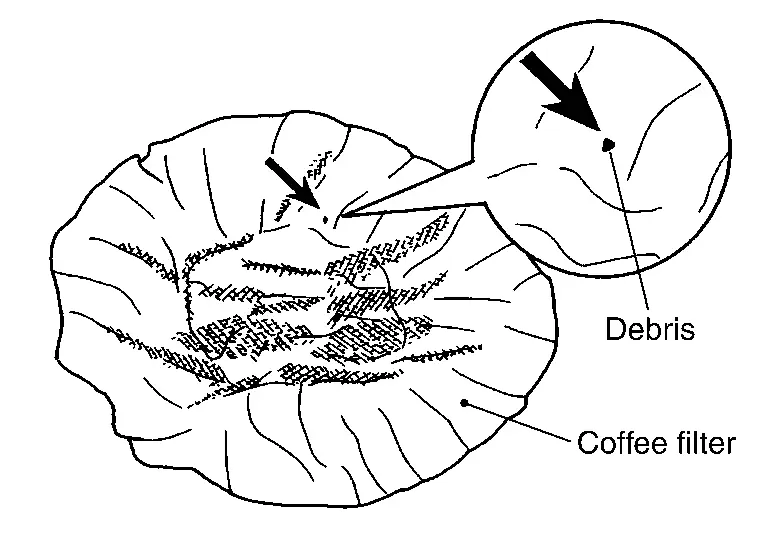
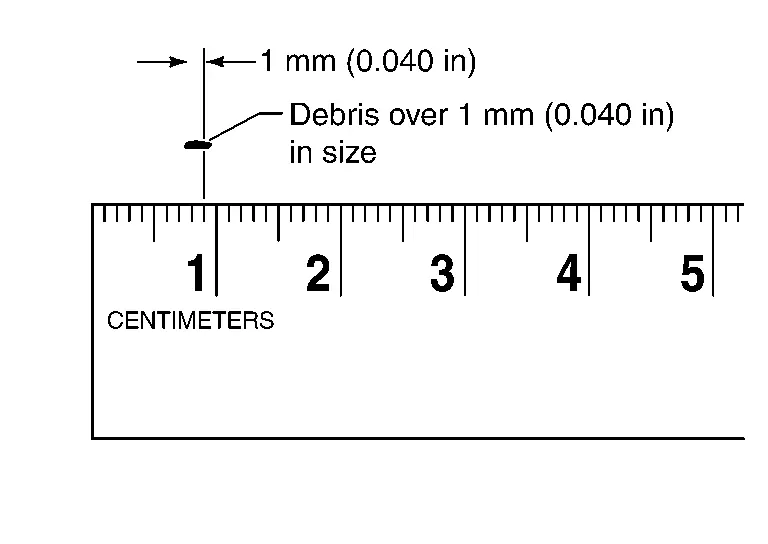
Inspection
After performing all procedures, ensure that all remaining oil is cleaned from all components.
Other materials
Manual operation
Basic information
In the Nissan Armada, the electronic parking brake can also be controlled manually
using the dedicated switch, allowing precise control in various driving and parking
situations.
To apply: When the Nissan Armada is completely stopped and the
ignition switch is in the ON or ...
Radiator
Exploded View
Radiator drain cock
O-ring
Mounting rubber (upper)
Collar
Mounting rubber (lower)
Engine coolant temperature sensor 2
Radiator
Clamp
Radiator hose (lower)
Clamp
Reservoir tank tube
Reservoir tank bracket
Reservoir tank
Reservoir tank support ...
Outside Key Antenna
Rear Door
Removal and Installation
REMOVALRemove rear door finisher. Refer to Removal & Installation.
Disconnect outside key antenna (rear door) harness connector.
Disengage outside key antenna (rear door) fixing clips, and then remove outside key antenna (rear door) .
: Clip
Disengage ...