WARNING
- If non-standard tire sizes are installed on the Nissan Armada, the predictive course lines may not display accurately.
- On slippery or snow-covered roads, the Nissan Armada predicted path may differ from the actual vehicle movement.
- If the Nissan Armada battery is disconnected or discharged, the system
may require recalibration.
- Turn the steering wheel fully from lock to lock with the engine running.
- Drive the Nissan Armada straight for at least 5 minutes.
- Turning the steering wheel while stationary may temporarily distort the Nissan Armada predictive lines.
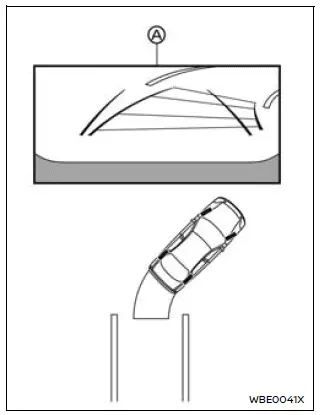
1. Carefully check that the parking area is safe before maneuvering the Nissan Armada.
2. Shift into R (Reverse) to display the rear view on screen A.
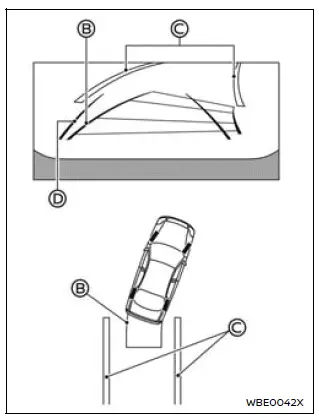
3. Slowly reverse the Nissan Armada while steering so that the predictive course lines B align with the parking space C.
4. Adjust the steering wheel until the vehicle width guide lines D become parallel with the parking space.
5. Once the Nissan Armada is properly positioned, shift into P (Park) and apply the parking brake.
RearView Monitor settings
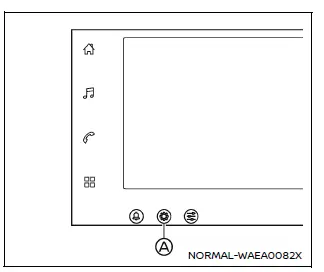
1. Select the "
 "
icon on the Nissan Armada display.
"
icon on the Nissan Armada display.
2. Tap the "
 "
button A.
"
button A.
3. Choose "Vehicle".
4. Select "Camera".
Available setting items:
- Predictive course line
Enable or disable the Nissan Armada predictive guidelines as desired. - Display setting
Adjust brightness, contrast, tint, color, and black level to optimize the Nissan Armada display according to lighting conditions.
The Nissan Armada RearView Monitor system combines advanced visual guidance with intuitive controls, providing drivers with enhanced confidence and precision when reversing or parking.
Other materials
Rear Disc Brake
Brake Pad
Inspection and Adjustment
WARNING:
Jacking up or lift up the vehicle may the vehicle height to go down which cause a personal injury and/or damage to the air suspension component parts. Refer to Precaution for when Jacking and Lifting Up the vehicle with Electronic Air Suspension System ...
Rear Door Finisher
Exploded View
Rear door panel
Inside seal
Rear door sash inner cover
Pull handle cap
Inside handle cap
Rear door finisher
Pull handle bracket
Grommet
: Clip
: Pawl
: N·m (kg-m, in-lb)
Rear Door Finisher
Removal and Installation
CAUTION:
Never da ...
Automatic Back Door Control Unit
Removal and Installation
REMOVALRemove luggage side lower finisher LH. Refer to Removal and Installation.
Disconnect automatic back door control unit harness connector.
Remove automatic back door control unit mounting nuts , and then remove automatic back door control unit .
INSTALLATIONInstall in ...