Exploded View
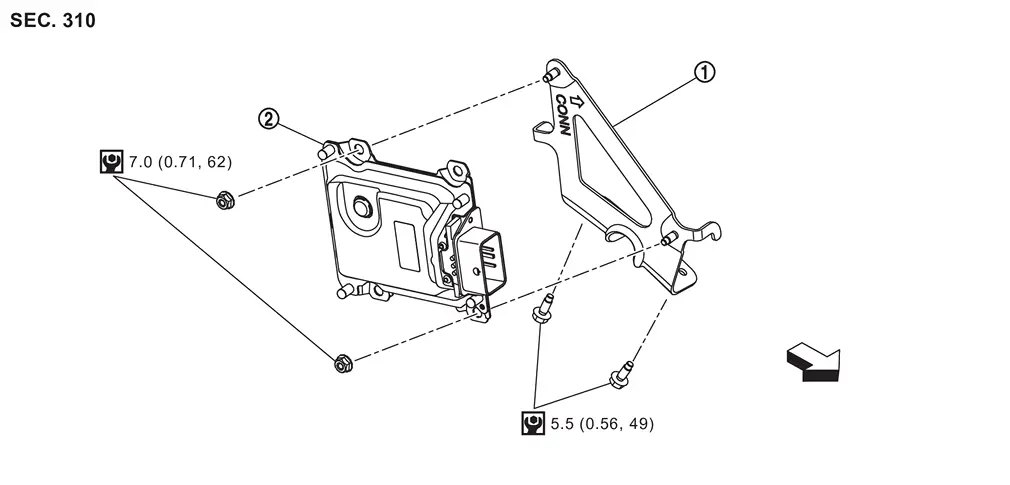
 |
Bracket |  |
Sub-TCM |
 |
: N·m (kg-m, in-lb) | ||
 |
: vehicle front |
Removal and Installation
WARNING:
-
Jacking up or lift up the vehicle may the vehicle height to go down which cause a personal injury and/or damage to the air suspension component parts. Refer to Precaution for when Jacking and Lifting Up the vehicle with Electronic Air Suspension System.
REMOVAL
Disconnect the battery cable from negative terminal. Refer to Removal and Installation .
Remove fender protector LH. Refer to Removal and Installation.
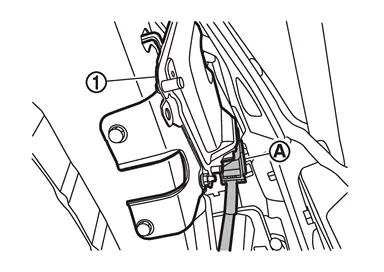
Disconnect the harness connector  from sub-TCM .
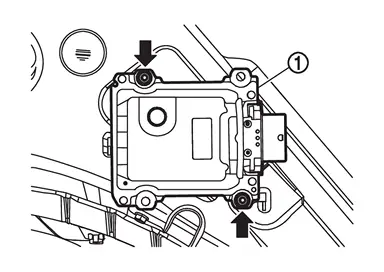
Remove sub-TCM mounting nuts ( ) and remove sub-TCM .
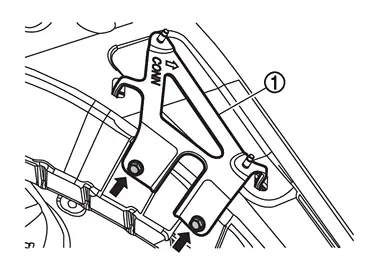
Remove bracket mounting bolts () and remove bracket .
INSTALLATION
Installation is in the reverse order of removal.
CAUTION:
Never damage sub-TCM.
Inspection & Adjustment
INSPECTION AFTER INSTALLATION
Check the electric shift position. Refer to Inspection.
ADJUSTMENT AFTER INSTALLATION
When replaced sub-TCM, perform “ADDITIONAL SERVICE WHEN REPLACING sub-TCM�. Refer to Description.
Other materials
Inside mirror
Basic information
In the Nissan Armada, adjust the inside mirror by carefully setting both its
height and angle to achieve optimal rearward visibility and driving comfort.
Manual anti-glare type (if so equipped)
The Nissan Armada manual anti-glare inside mirror can be adjusted to reduce ...
Shift Position
Inspection
CHECK SHIFT BUTTON OPERATION
When pressing each shift button of electric shift selector, check that each button is not twisted, stuck, or does not make noise and can be operated smoothly.
After pressing each shift button, check that all buttons return to original positions without sti ...
Rear Final Drive: R240 Tools and Preparation
Preparation
Special Service Tools
The actual shapes of the TechMate tools may differ from those of the special service tools illustrated here.
Tool number
(TechMate No.)
Tool name Description
KV10122000
(NI-53383)
Side oil seal puller
Removing side oil seal
KV10123000
(NI-53384)
Side oil ...