Front Wheel Sensor
Exploded View
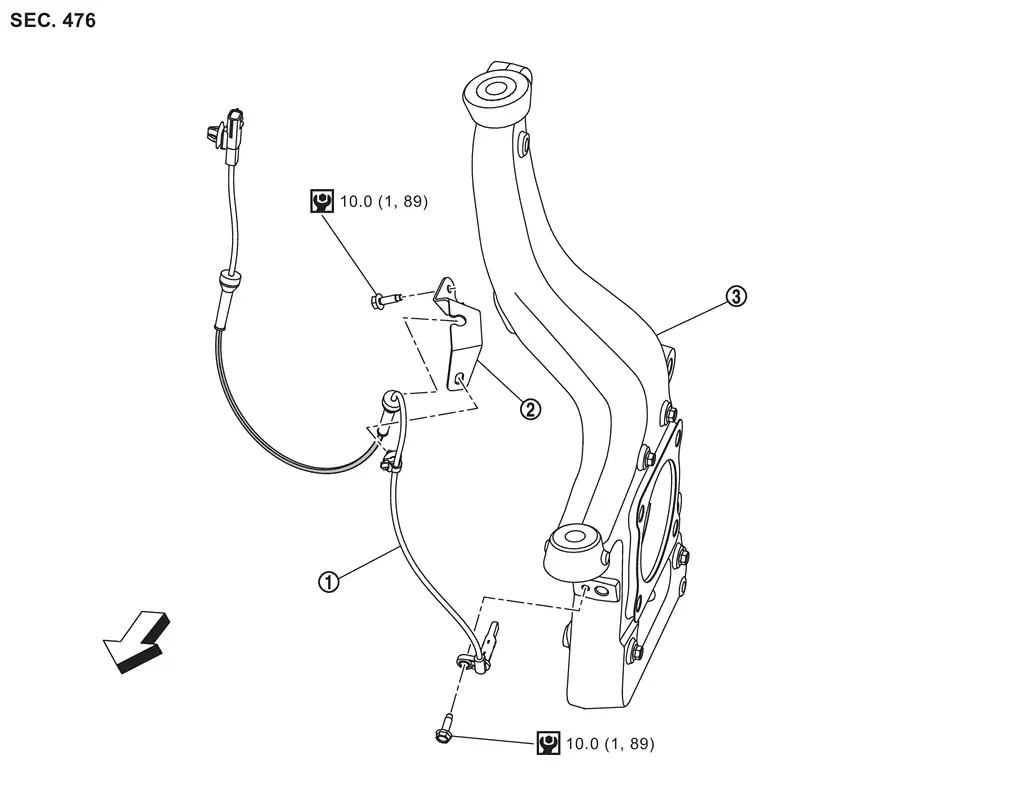
 |
Front LH wheel sensor |  |
Bracket |  |
Steering knuckle |
| : vehicle front | |||||
 |
: N·m (kg-m, in-lb) | ||||
 NOTE:
NOTE:
Front RH wheel sensor is symmetrically opposite of LH.
Removal and Installation
WARNING:
-
Jacking up or lift up the vehicle may the vehicle height to go down which cause a personal injury and/or damage to the air suspension component parts. Refer to Precaution for when Jacking and Lifting Up the vehicle with Electronic Air Suspension System.
REMOVAL
Remove tires. Refer to ROAD WHEEL TIRE : Removal & Installation.
Disconnect front wheel sensor harness connectors and remove harness clip.
Remove grommet from bracket.
Remove front wheel sensor mounting bolt.
Remove front wheel sensor from steering knuckle.
CAUTION:
Never rotate and never pull front wheel sensor as much as possible, when pulling out.
Remove front wheel sensor harness from the vehicle.
CAUTION:
Never twist or pull front wheel sensor harness, when removing.
INSTALLATION
Note the following, and install in the reverse order of the removal.
-
Check that there is no foreign material like iron powder or damage on inner surface of front wheel sensor mounting hole of steering knuckle and sensor rotor. Install after cleaning when there are foreign material like iron powder, or replace when there is a malfunction.
-
Never twist front wheel sensor harness when installing front wheel sensor. Check that grommet
is fully inserted to bracket . Check that front wheel sensor harness is not twisted after installation.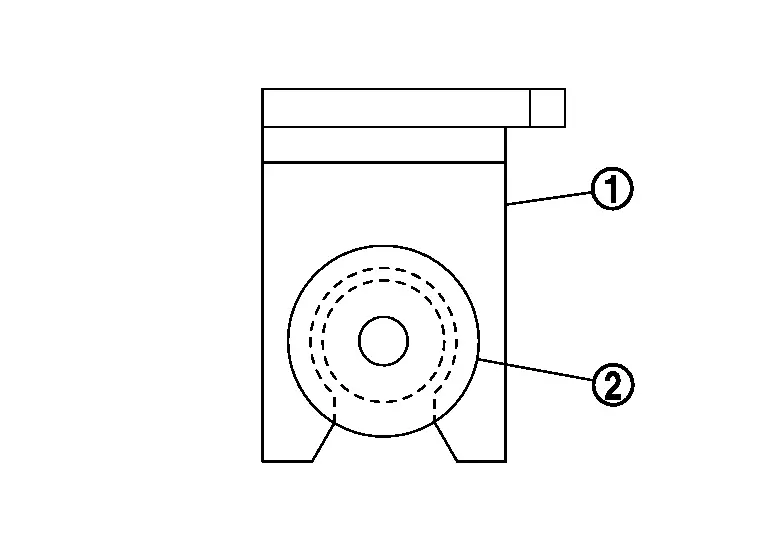
CAUTION:
Check that front wheel sensor identification line
 faces toward the vehicle front.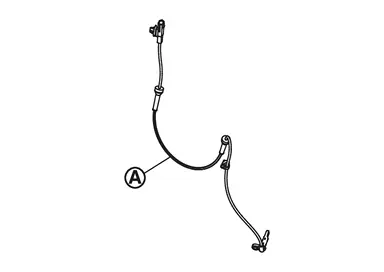
Rear Wheel Sensor
Exploded View
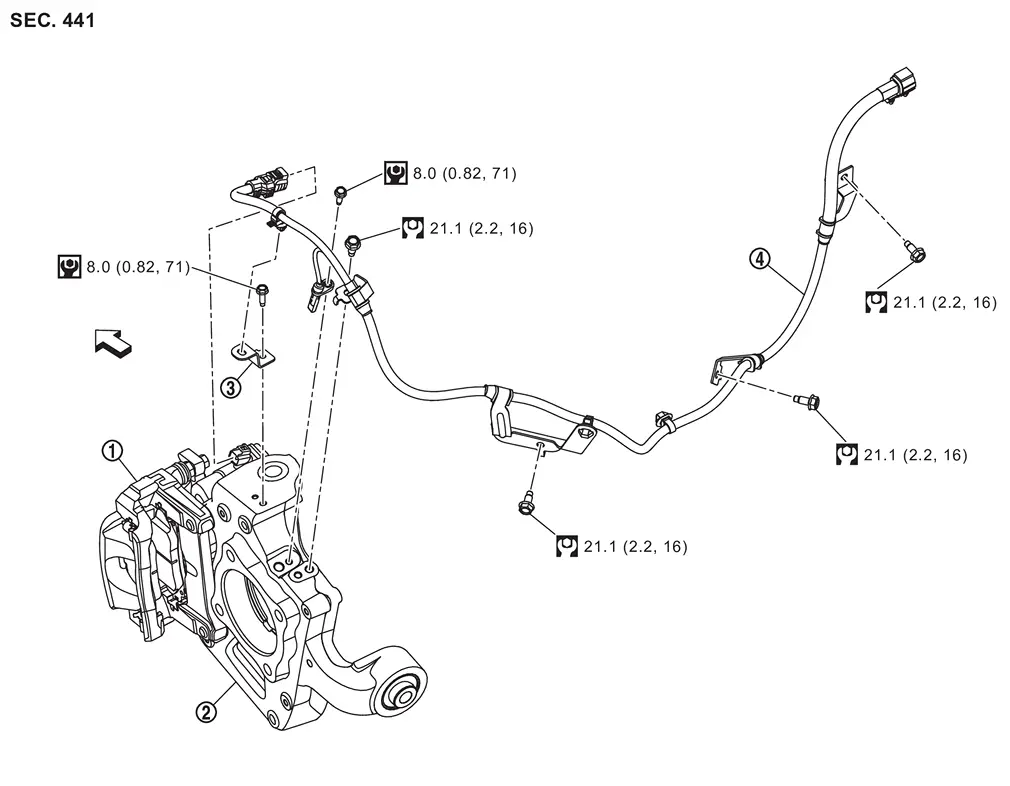
|
Rear brake caliper | |
Axle housing | |
Bracket |
 |
Parking brake actuator harness and rear wheel sensor | ||||
| : vehicle front | |||||
 |
: N·m (kg-m, ft-lb) | ||||
|
: N·m (kg-m, in-lb) | ||||
NOTE:
Rear RH wheel sensor is symmetrically opposite of LH.
Removal and Installation
WARNING:
-
Jacking up or lift up the vehicle may the vehicle height to go down which cause a personal injury and/or damage to the air suspension component parts. Refer to Precaution for when Jacking and Lifting Up the vehicle with Electronic Air Suspension System.
REMOVAL
Remove tire. Refer to ROAD WHEEL TIRE : Removal & Installation.
When removing parking brake actuator harness and rear wheel sensor on the left side, remove the spare tire. Refer to Removal & Installation.
Disconnect parking brake actuator harness and rear wheel sensor harness connectors.
CAUTION:
Never twist and never pull rear wheel sensor harness, when removing.
Remove parking brake actuator harness and rear wheel sensor mounting bolts.
Remove parking brake actuator harness and rear wheel sensor.
CAUTION:
Never rotate or pull rear wheel sensor as much as possible, when pulling out.
INSTALLATION
Note the following, and install in the reverse order of removal.
-
Check that there is no foreign material like iron powder or damage on inner surface of rear wheel sensor mounting hole. Install after cleaning when there are foreign material like iron powder, or replace when there is a malfunction.
-
Never twist rear wheel sensor harness when installing rear wheel sensor. Check that grommet
is fully inserted to bracket . Check that rear wheel sensor harness is not twisted after installation.
Other materials
Basic information
The Idling Stop System in the Nissan Armada is designed to enhance fuel efficiency,
reduce exhaust emissions, and minimize unnecessary engine noise during short stops
such as traffic lights or congestion.
When the Nissan Armada comes to a complete stop, the system automatically
shuts off ...
Back Door Trim
Exploded View
Back door panel
Back door upper garnish
Back door side garnish RH
Back door lower finisher
Back door pull handle
Back door finisher cap*1
Automatic back door switch finisher*2
Back door inner finisher
Back door side garnish LH
: Clip
: Pawl
: Metal ...
Lithium Ion Battery 12v Inspection. Diagnosis and Repair Work Flow
Diagnosis and Repair Work Flow
Work Flow
OVERALL SEQUENCEDETAILED FLOWINTERVIEW AND SYMPTOM CONFIRMATION
Interview the customer to obtain the malfunction information (conditions and environment when the malfunction occurred).
>>
GO TO 2.
CHECK DTC (LITHIUM ION BATTERY 12V)
Check DTC.
Pe ...